


How to Create Mediterranean-Style DIY Arch Walls

Creating DIY arch walls can add a stylish and unique touch to any room. Whether you're renovating your home or embarking on a new project, this step-by-step tutorial will guide you through the process of making your very own arch walls. From cutting the materials to finishing touches, follow along to transform your space with beautiful arches.
Disclaimer: I may receive a small affiliate commission from purchases made via links in this article but at no cost to you.
Tools and materials
- 3/4” plywood
- 1/2” drywall
- Drywall screws
- Flexible corner bead
- Drywall mud
- Joint tape
- Jigsaw
- Circular saw
- Sanding block
- Drill
- Snips
- Putty knife
- Trowel (if skim coating)
Steps
Step 1: Cutting the Plywood Strips
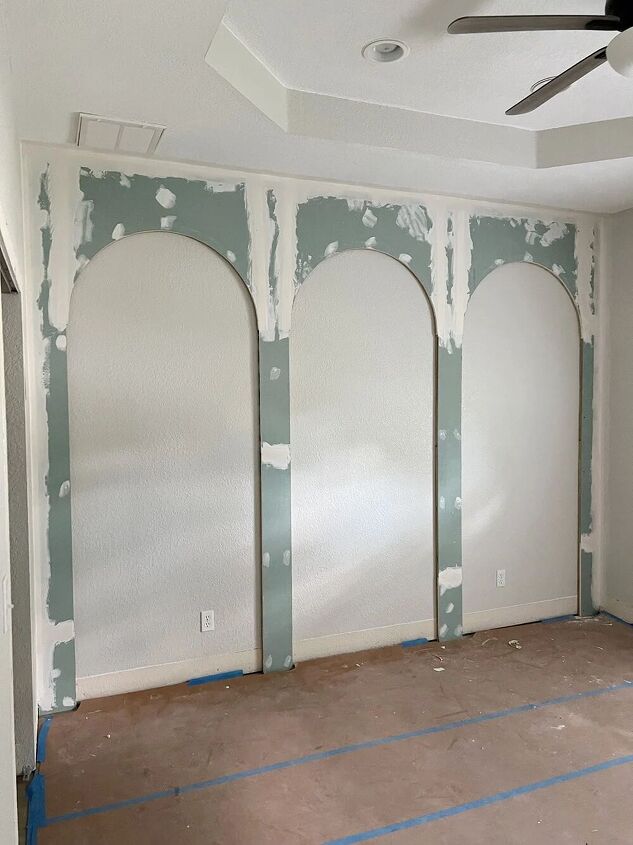
Determine the size and layout of your arch walls. Cut vertical strips of plywood according to your measurements. Each strip should be 7 inches wide. If your ceilings are more than 8 feet tall, split the strips into 2 sections each.

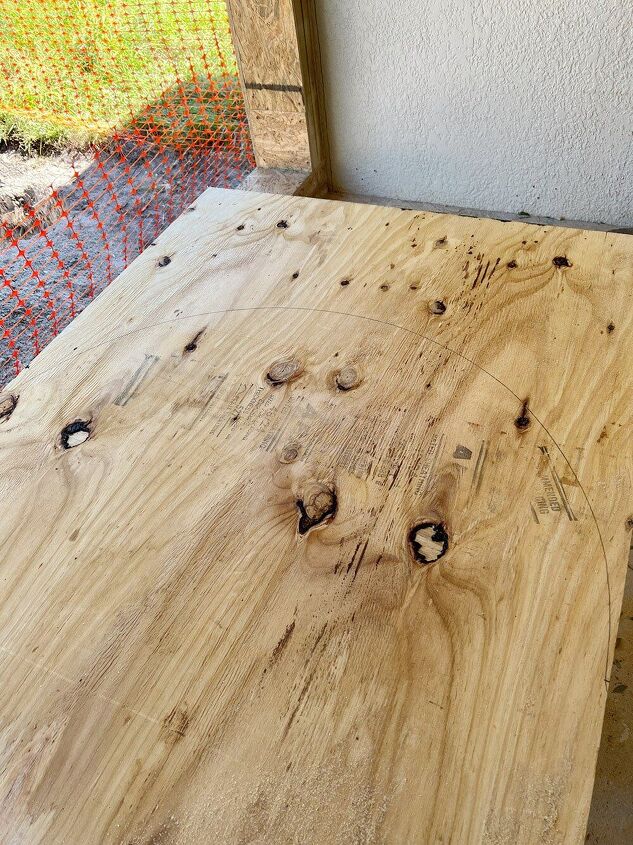
Step 2: Cutting the Arch
Cut the plywood down to the size of the arch diameter. Use a string tied around a screw in the center to draw a perfect circle on the plywood. Cut out the circle using a jigsaw. Sand down any imperfections along the edges of the arch.
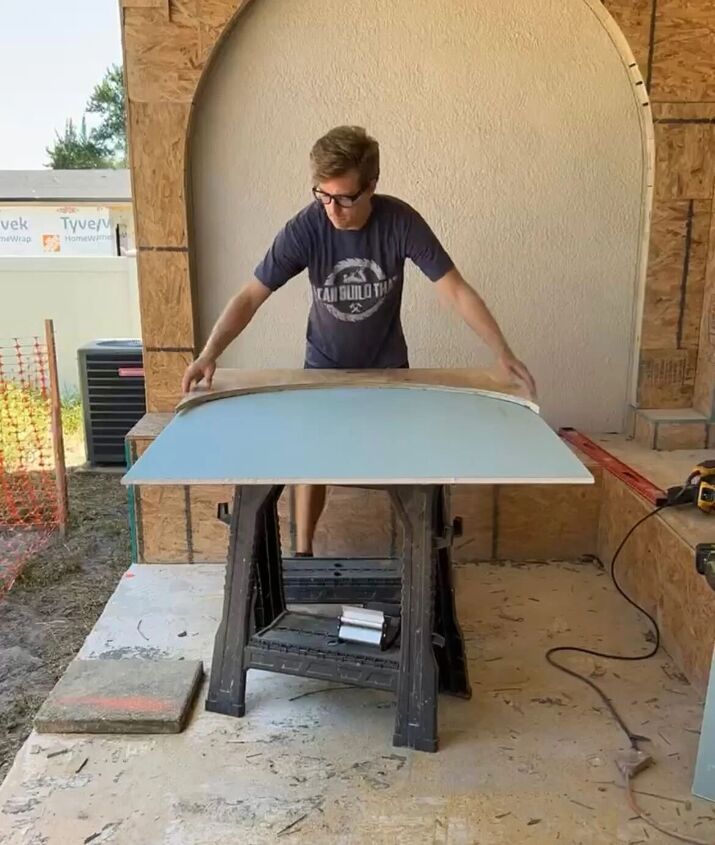
Repeat the process for the drywall to get matching pieces. Use the plywood arch cutout as a template to trace onto the drywall. Cut along the traced line with a jigsaw.
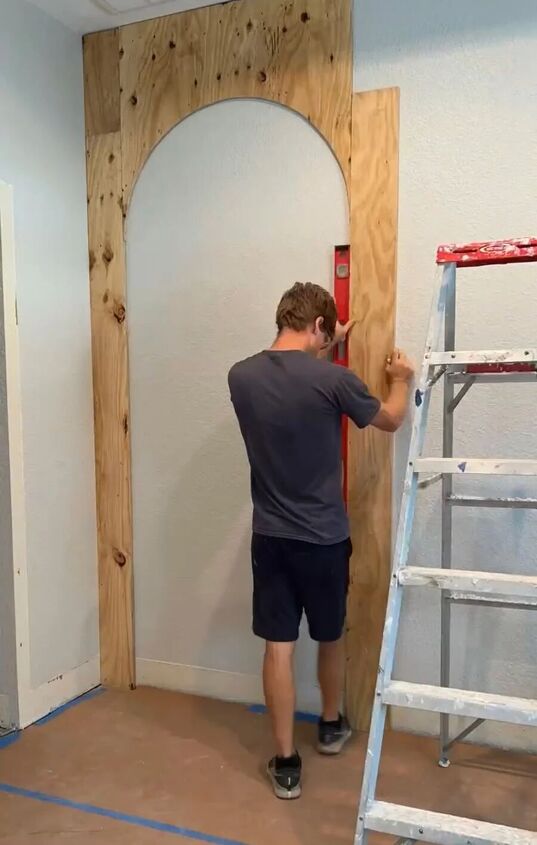
Step 3: Attaching the Plywood to the Wall
Starting at one end, screw the first vertical strip into the wall. For exterior block walls, regular drywall screws can be used to secure the strips. For interior walls, try to hit the studs whenever possible.
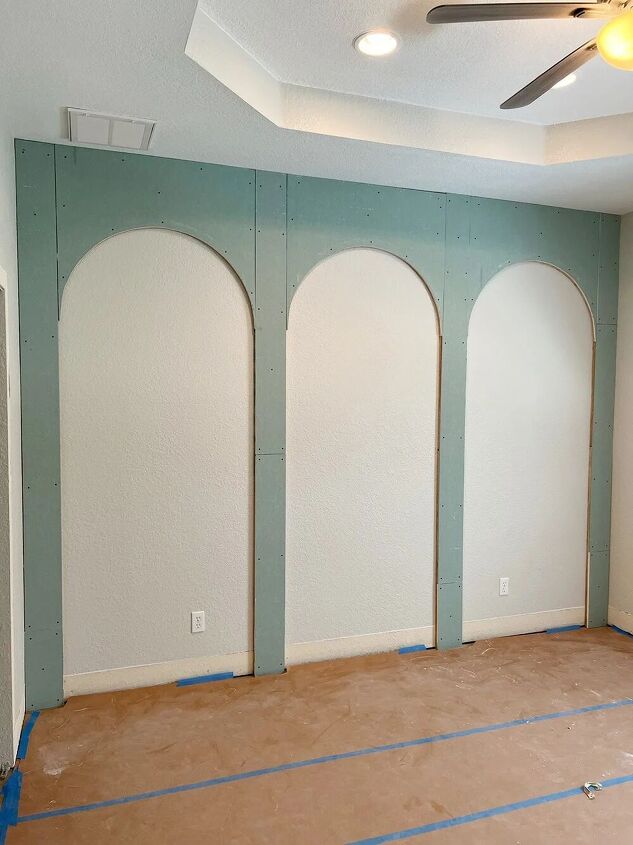
Step 4: Attaching Drywall onto the Plywood
Line up the drywall and screw it into the plywood. Ensure screws are added near the edge of the drywall to avoid gaps between the two pieces.
Step 5: Mudding and Taping Drywall Seams
Use drywall mud and tape to join the seams where two pieces of drywall meet. Patch the screw holes with drywall mud.
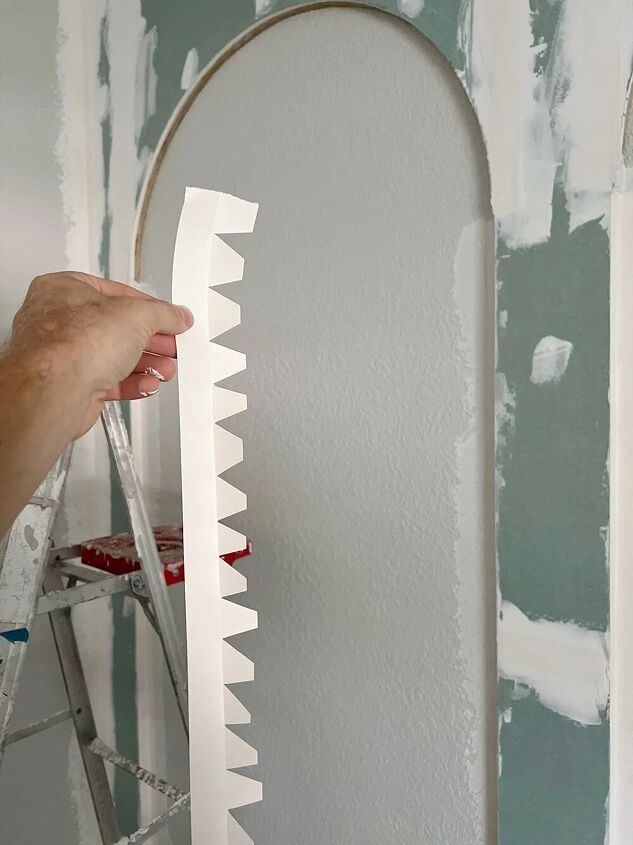
For the drywall seam along the inside of the arch, cut notches along a strip of tape to bend it around the curve.
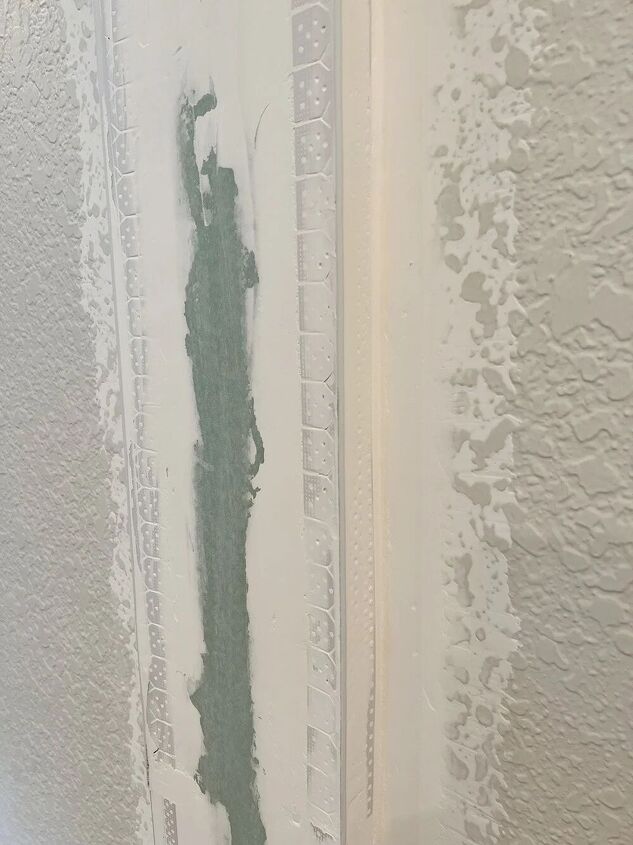
Step 6: Adding Corner Bead
Use flexible corner bead to curve around the outside edge of the arches. Attach the corner bead with nails, screws, staples, or adhesive. Feather out the small lip of the corner bead by adding multiple layers of drywall mud.
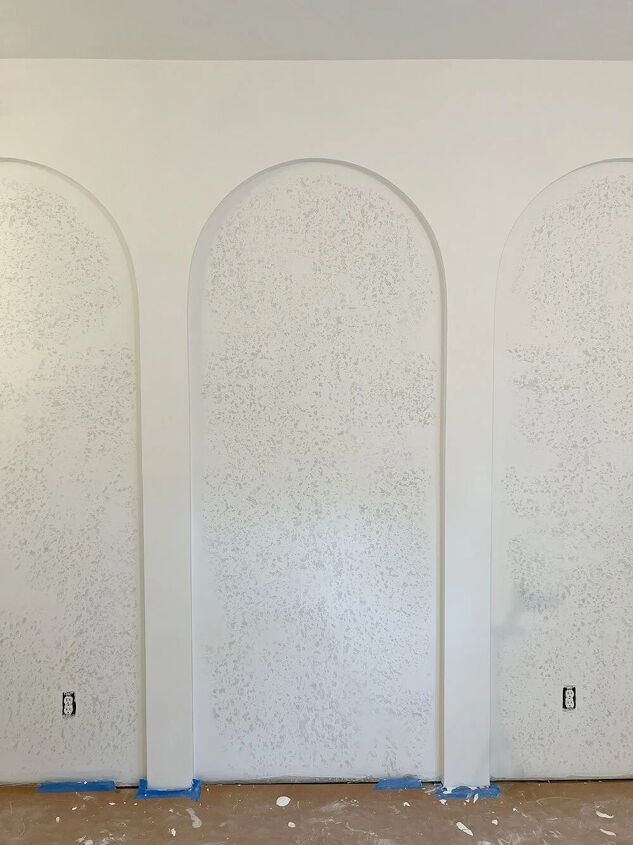
Step 7: Sanding and Skim Coating (Optional)
Sand the arches with a sanding block until smooth and even. If your wall texture underneath is textured, consider skim coating for a uniform finish.
Prep the walls by sanding with an orbital sander to knock down raised areas. Apply pre-mixed drywall mud with a large pool trowel in 2-3 coats to cover textured walls. Smooth out the texture with each coat until the surface is even. Allow each coat to dry completely before applying the next.
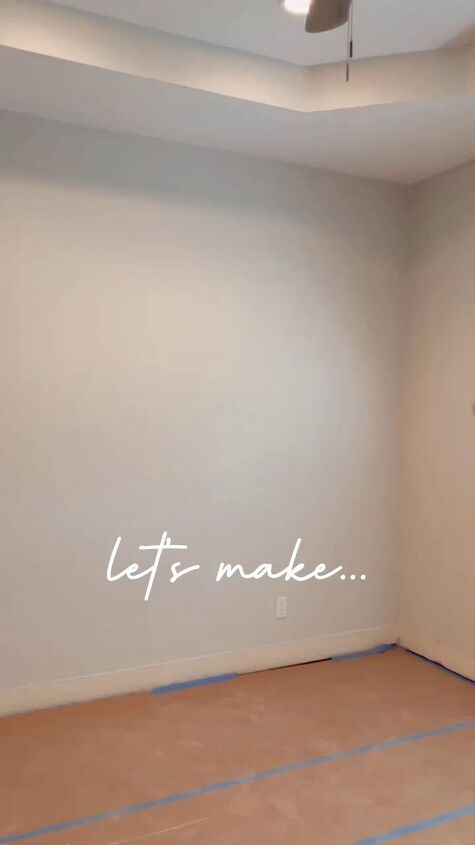
Before:
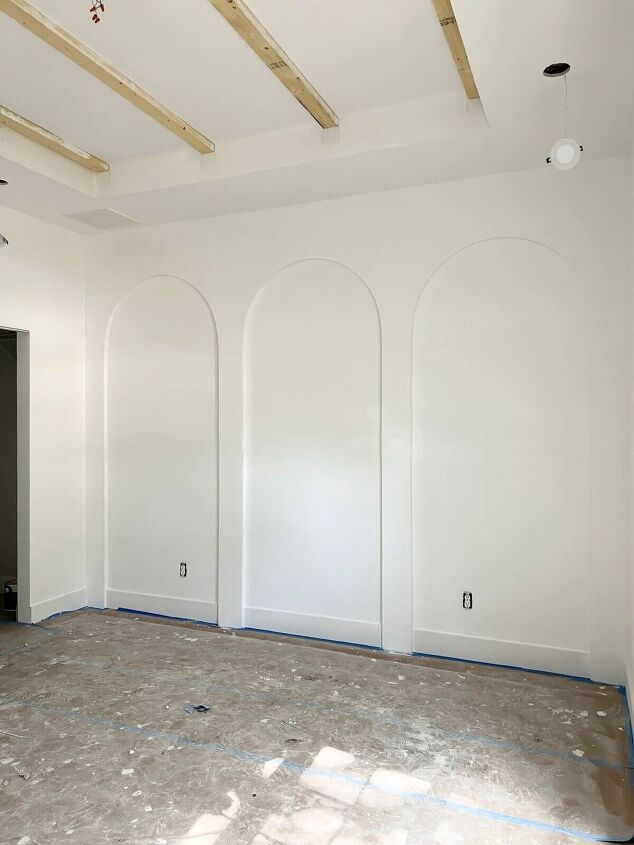
After:
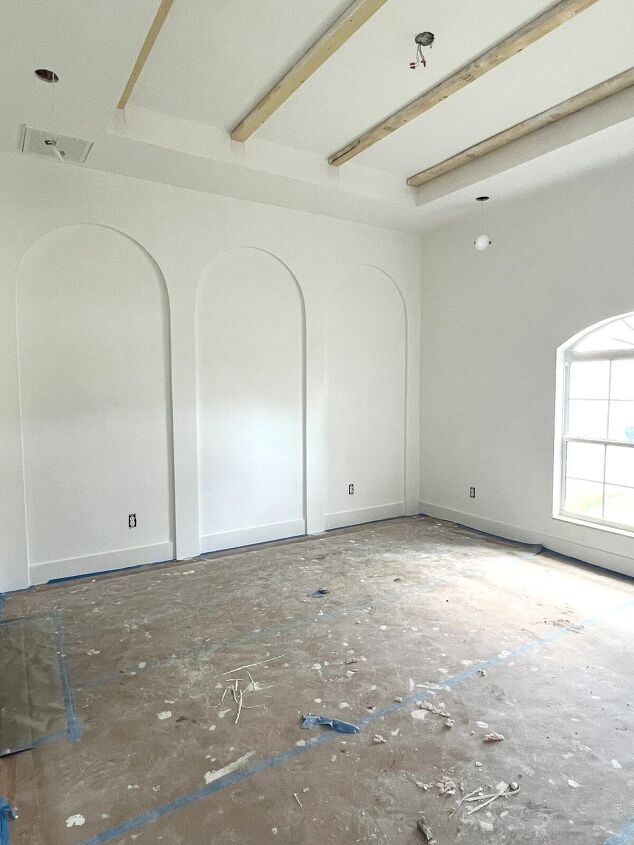
DIY arch wall
Congratulations! You have successfully created DIY arch walls to enhance the aesthetic appeal of your space. Whether you're aiming for a modern or traditional look, DIY arched walls can add character and charm to any room.
Experiment with different finishes and decorations to personalize your arch walls and make them uniquely yours. Leave a comment and ask me questions or let me know how your arches came out.
Follow @jennasuedesign on Instagram for more DIY ideas.


Frequently asked questions
Have a question about this project?