« View Post
Photos

Oops! Leave without saving?

If you leave this page, the information you have entered will not be saved!
Are you sure you want to leave this page?

Leave this page Stay on this page

Hometalk.com

  • Sign Up
  • or
  • Log In
  • Professionals
  • Community
    • All Members
    • Professionals
    • Bloggers
  • About
    • About Hometalk
    • Blog
    • FAQ
    • Guidelines
    • Resources
    • Support
    • Press
    • Contact
    • Terms of Use
    • Privacy Policy
  • Following
  • All Topics
    • Cleaning & Organization
    • Crafts
    • Design & Décor
    • DIY Projects
    • Gardening
    • Home Maintenance & Repairs
    • Outdoor Living
    • Painting
    • Remodeling
    • Repurposing & Upcycling
    See More Topics »
  • Questions
    • All Questions
    • Open Questions
    • Unanswered Questions
  • Clips
Post & Ask
Join Now Log In

Hometalk is where people share and help with everything home & garden

Sharron W

Memphis, TN
196 Followers 2.3KLikes 536 Shares
  • Overview
  • Posts13
  • Q&A455
  • Comments2K
  • Boards3
  • Clips272
  • Likes275
  • Following65
  • Send a Message

My Recent Boards

  • Sharron W's Clipboard
  • Around the House
  • Backyard Escapes

Featured Photos

About Me:

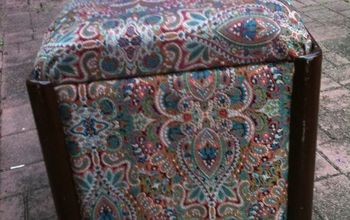
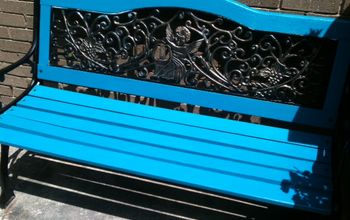
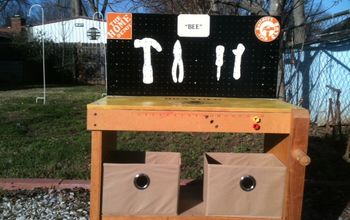
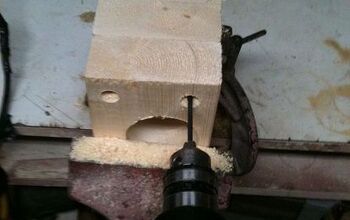
I Love to repurpose! I love picking up stuff off the curb and giving it new life...if I don't have a project already, then I'll scout the goodwill store to find one...I like all areas of home improvement and can handle the powertools to do almost anything...except I don't have a table saw so that long precision cuts are sometimes difficult...and I've never had the opportunity to use a router so even though we own one...I don't know how to use it...LOL Still I've done some big projects and some small ones, usually I find that if I were going to do the project a second time, I'd make some changes...LOL

Favorite area of home improvement:

I've had some really great success, found an old Lane cedar chest Gouged up and scarred, both back legs broken off in a jagged mess. Sanded stained, varnished and of course carefully rebuilt the legs matching the original pattern and reinforced with metal all thread up into the remainder of the original leg. Checked with Lane and the SN identified it as a 1942 model so I was thrilled. Now I'm working on a Tiger Striped Maple chest I found on the side of the road...again, the back leg is broken and the drawer slides need repair...but Everydrawer has a lock and I beleive it is from the federal period based on the hardware although I am far from an expert in identification! I just like to give them new life...


Recent Activity


  • Materials needed, soil, potatoes, and reusable bags.
  • Cut up potatoes and let sit out for 2 days (this prevents disease once planted).
  • Place potatoes eye side up.
  • Cover with soil
  • Roll down sides to allow sun and rain to reach potatoes.
  • 1
  • See 3 more photos

Use Reusable Grocery Bags to Grow Potatoes

When I discovered that the potato grow bags cost $20 each I decided to try using my old reusable grocery bags to grow my potatoes in this year. Add 3" of soil to bottom, add potatoes eye ...»
side up, cover with additional 4" of soil. Once plant is 8" high add more soil. Keep adding soil until bag is full. Once plant starts to die and wilt, stop watering. Wait a couple of weeks and dump bag out. Harvest your home grown potatoes. #MayProjects

2 Little Superheroes
2 Little Superheroes Raleigh, NC
44 Comments | Post Comment | 15770 Views
  • Sharron W
    Clipped on May 01, 2013 to Backyard Escapes
  • Share 5.5K
  • Like 104
  • Clip 141
Clipped to:
  • Garden Ideas
  • Repurposed
  • 10
  • 3
  • 18

Mosaic Kitchen backsplash

I did this backsplash several years ago in our cabin in the mountains of Arizona. I wanted a western motif and brocke dishes in many colors and added african tiger eye stones and bottle ...»
bottoms. Put the pieces on with tile adhesive and grouted it with gray tile grout. I then finish it with sealer.

Patty S
Patty S Sturgeon Bay, WI
79 Comments | Post Comment | 12098 Views
  • Sharron W
    Commented on May 01, 2013
    Patty S Hoping you've got some more posts for us of your beautiful work!!!!
  • Share 285
  • Like 67
  • Clip 20
Clipped to:
  • Becky Reep's board charmi...
  • Backsplash Ideas
  • A simple crate planter made from pallets and using a straw bale for a growing medium 1
  • Start by assembling 2 rectangle frames from scrap wood or 2 x 4′s.
  • Next – attach the two rectangles with four of your slat boards in each corner
  • Next – screw in additional slat boards to create the crate "look".
  • Next -use a sharp knife, reciprocating saw or shovel to dig out a 6 to 8″ planting hole
  • Simply place your plant in the hole and cover with more soil.
  • To build on the cheap, you can create the straw bale frame using the slats from a single pallet
  • See 4 more photos

The Straw Bale Pallet Crate Garden - Simple, Attractive - And Cheap!

So you have little space, little time, little money and you still want to garden. Or maybe you would like to add a great looking focal point to your existing garden or landscape to grow ...»
something unique. Even better, maybe you know of someone who still likes to garden but can't get out or handle as much of the physical activity anymore.

Here is a great solution to all three! Create your own Pallet Straw Bale Crate Garden. It's attractive, simple to build, and best of all, low or no cost to make.

With a single pallet, (3) 2x4x8's, a bale of straw, and a bag or two of soil and compost – you can create an instant garden space that can provide fresh vegetables or flowers all summer long.

You can purchase all the materials you need for under $15.00 – or build for virtually free using pallets and scrap lumber. We made a few single bale boxes last week for our garden – and will use them along our fence row to grow our cucumbers in. You can also double the measurements to make a double bale box and plant to your heart's content.

The straw bale crates have a lot of built-in advantages! They are easy to maintain – with little weeding ever needed. The 2' high design lends itself to less stooping and bending while tending, and the combination straw, compost and soil make for a great instant growing medium – without the hassle of digging up the earth.

The best part of all – at the end of the season – you can add all of the contents to the compost pile –or start a compost pile right in the pallet box to have fresh compost next year when you're ready to grow again!

Here is how we made ours:

Materials List:

(1) Straw Bale

(4) 2 x 4 x 20"

(4) 2 x 4 x 44"

(1) Pallet - for vertical boards - be sure to use untreated pallets to be "food safe"

(1) bag of compost – substitute your own for free material

(1) bag of topsoil – substitute your own for free material

***The straw bales we use measure 20" wide, 18" high and a little less than 46" long. Bales can vary in length - so be sure to measure your bale to adjust the length and width of frame boards. You can also reference our previous post's on How To Disassemble A Pallet Quickly, and How To Make Your Own Compost for more info.

Building The Garden:

Assemble 2 rectangles from your 2x4's – screwing or nailing together 2 of the 20" pieces and 2 of the 44" pieces. Once you have both rectangles together – use your pallet boards to attach vertically to connect the two rectangles to create your straw bale box.

We cut our pallet slat boards into 18" lengths, (we got about 2 boards for each slat) and then screwed them into the inside of the two frames to form the crate. The spacing is up to you – we put about 4" between each board for ours - we wanted the look of an "old-time" crate.

Planting The "Garden"

Now it's easy – place the bale down inside the frame – you may need to wiggle a little and cut a little off here and there to get it to fit depending on the size of the bale.

Simply use a sharp knife or blade to cut out your planting holes - we went about 8" deep and 5" around– filling them with a good mixture of garden soil and compost. Plant, cover up, water – and the garden is in! Depending on what you plant – you can fit in 5 to 6 tomato plants, or a combination of pepper and tomato plants per bale, etc. You can plant a little closer than traditional garden rows because of the raised beds. Only your imagination is the limit to what you want to grow!

You will get some compression of the bale as the season progresses – the bale will slowly decompose, giving even more nutrients to the plants. Your plant and roots will thrive in the soil, compost and straw because the garden is off the ground - there will be very little weeds that develop, and should be easy with the added height to pick and maintain.

End of the Season :

If you have a compost bin already set up – you can certainly take the contents and throw them into the pile. The decomposed straw and soil mixture are great for a pile – adding a lot of carbon material. If not – use the crate box as a compost bin! Mix up the bale and contents right in the pallet box structure – and start adding some shredded fall leaves, coffee grounds, vegetable scraps , lawn clippings and more. By next spring – you will have enough compost made to use in the next bale for planting, with extra if you need it.

So how about trying a straw bale pallet crate garden this year! And if you have a neighbor or relative that loves garden but finds it difficult now – it's a great gift to let them have their very own garden

Happy Gardening - Jim and Mary

If you would like to receive our DIY & Gardening Tips every Tuesday – be sure to sign up to follow the blog via email in the right hand column, "like" us on Facebook, or follow us on Twitter.

Old World Garden Farms
Old World Garden Farms Newark, OH
13 Comments | Post Comment | 10026 Views
  • Sharron W
    Clipped on May 01, 2013 to Backyard Escapes
  • Share 1.1K
  • Like 109
  • Clip 121
Clipped to:
  • Gardens
  • garden & yard
  • rusty and colorful door knobs and locks from my junk stash
  • vintage and not so vintage rusty keys 1
  • architectural wood 1
  • lots of brass 2
  • See 1 more photo

Salvage Saturday, Sometimes It's The Little Things

Now that I have the workshop all organized, I'm in heaven. I can find all my cool junky stuff. Take a peek.
Petticoat Junktion
Petticoat Junktion Clarksville, TN
6 Comments | Post Comment | 1253 Views
  • Sharron W
    Clipped on Apr 28, 2013 to Sharron W's Clipboard
  • Share 8
  • Like 23
  • Clip 15
Clipped to:
  • Cool Projects
  • cool ideas
  • Here is my tea pot fountain in full bloom. 7
  • We drilled a a hole in the tea pot and then threaded it. We attached flanges to a solid concrete block to support both the tea pot and the gold pan. The block is heavy enough to support the weight of the unit underwater. 5
  • We then built a support for the gold pan and dropped the unit into the whiskey barrel. We added a fountain pump and inserted tubing up through the tee on the bottom of the pipe that supports the tea pot and into the tea pot. 1
  • Add water and your done! The unit is free standing so it can be leveled and no holes are drilled in the whiskey barrel. I put it all away every winter and take it out and set it up in the spring. 1
  • Last year we poured a concrete base that the whiskey barrel sits on so it doesn't sink into the dirt. 1
  • See 2 more photos

Tea pot fountain instructions.

Here are the instructions of how we made my tea pot fountain. Hope it helps with all of you who are interested!
Julee S
Julee S Bangor, MI
57 Comments | Post Comment | 65715 Views
  • Sharron W
    Commented on Apr 28, 2013
    Linda Dianne ...»
    Belinda Stafford Julee says under the pictures that she used a "Fountain" pump, and I'm confident that a solar powered pump would work well in the desert. Both regular and solar powered pumps can be found in almost any large Hardware store, or through an internet search. The Barrel Doesn't leak, and it's not lined, I believe it might be the type that are made as planters to look like a whisky barrel.

  • Share 25K
  • Like 549
  • Clip 790
Clipped to:
  • Garden inspiration
  • Garden Ideas
  • This is a simple, easy craft for kids and adults.
  • Any used food jars will work. Keep the lids! 1
  • Cover the jar with flat-bottom marbles using silicone sealant as an adhesive.
  • Attach the jar lid to a post or dowel using a wood screw. 1
  • But first hide a wish and tiny toys inside for a surprise later.
  • Check the jars every now and then. You never know when you might find a treasure!
  • See 3 more photos

How To Make Garden Treasure Jars

I started making these treasure jars when my kids were little and they wanted to make some garden art of their own. Because the jars remain functional, you can hide little notes and toys ...»
inside. Use them like little time capsules or part of a treasure hunt. And, of course, the covered jars look like pretty jewels in the garden.

1. Cover any used jar (keep the lid) with flat-bottom marbles (also sold as 'florist stones' or 'glass gems'). I use GE Silicone II sealant (clear, waterproof) as an adhesive.

2. Mount the lid on a post or dowel.

3. Attach the jar.

Notes and tiny treasures can be added at any time.

Full instructions, material list, and sources are listed on my blog here: http://www.empressofdirt.net/gardentreasurej...

Empress of Dirt - Melissa
Empress of Dirt - Melissa Canada
92 Comments | Post Comment | 83299 Views
  • Sharron W
    Clipped on Apr 25, 2013 to Backyard Escapes
  • Share 18K
  • Like 497
  • Clip 564
Clipped to:
  • outside
  • GARDEN IDEAS
  • The Dawn of the ages Redwood, before we cut the grass...LOL But the garden is planted and we're already seeing blooms on the tomatoes! 2
Commented on a photo from:

My Flower Garden this year

Sharron W
Sharron W Memphis, TN
2 Comments | Comment on this photo
  • Sharron W
    Commented on Apr 21, 2013
    Yes, nothing but twigs in the winter...and it's not even fully leafed out here...YET, it's ...»
    still early with the crazy back and forth temps we've had...

  • Share 0
  • Like 1
  • Clip 0
Clipped to:
  • Garden Stuff I Wanna Do
  • Double drinking
  • Baby's close-up
  • Dueling Hummingbirds 1
  • Hovering
  • Take-off
  • Landing
  • acrobats
  • See 4 more photos

Hummingbird Visitors

We watched Hummingbird Wars last night as eight hummingbirds chashed each other around and around the dead tree that hold my feeders. It was hysterical and the hubby got some photo's and ...»
a video....but I'm going to try and get a better video because by the time he started filming it was getting dark and several of them had left.

Sharron W
Sharron W Memphis, TN
28 Comments | Post Comment | 3091 Views
  • Sharron W
    Commented on Apr 21, 2013
    Debbie N I put the Vicks on the ...»
    Hanging cord that is attached to the top of the feeder... That is the only place I use the Vicks now that I have them hanging from a hook on a tree limb. But Before when I had them on the shepherds hook, I also put some on the pole and although it stopped most of them, it never stopped ALL of them...

  • Share 379
  • Like 16
  • Clip 4
Liked by:
Vicki Susan S Patty B Debbie N Patricia H Honor M Angela L Wendy Ann Short
  • Hydrangeas in May 2012 3
  • Caldiums in Bloom-May 28, 2012
  • Purple Shamrock in Bloom
  • Clemantis June24-2012
  • Yellow Amarillus from My Father in Laws Yard... 5
  • Foliage on my Dawn Redwood! I Love that tree!
  • Gerber Daisy, 3 years old 2
  • Close Up of the caladium Bloom
  • A Cross Between my red lillies and an orange Tiger Lilly
  • Hawaiian White Ginger, Now on it's fouth Bloom since late June...Oh I wish you could smell the lovely Fragrance!
  • The Sunrise Tulips they were so glorious, I just wish they lasted longer!
  • The one of snapdragons!
  • The Azalea in Bloom
  • The Dawn of the ages Redwood, before we cut the grass...LOL But the garden is planted and we're already seeing blooms on the tomatoes! 2
  • See 11 more photos

My Flower Garden this year

Some of the Beautiful plants from 2012's growing success
Sharron W
Sharron W Memphis, TN
21 Comments | Post Comment | 1088 Views
  • Sharron W
    Commented on Apr 20, 2013
    Teresa D I posted a picture of ...»
    the redwood, it's difficult to tell with the grass in the background, but the tree has a very primitive looking form and it's very distinctive. I get a lot of comments on it and it's really my favorite.

  • Share 5
  • Like 10
  • Clip 2
Clipped to:
  • Garden Stuff I Wanna Do
  • BEFORE - these labels were not coming off easily 1
  • I mixed up some homemade Goo Gone with vegetable oil and baking soda
  • AFTER - I was able to get my recycled bottles nice and clean! 1
  • 2 easy ingredients 1
  • See 1 more photo

How To Make Homemade Goo Gone

Recycled glass jars and bottles can be put to lots of good use around the house for storage or decorating. The most challenging part of recycling glass jars, however, can be getting the ...»
label completely off with no traces of the sticky gunk left behind. In the past I've used a product called Goo Gone for this job and it's always worked well. But guess what? You can make your own Goo Gone by simply combining vegetable oil and baking soda. I tested it out on a couple little glass jars and it really does work! You can click on the link below to read the complete instructions.

5 Minutes Easy
The Make Your Own Zone
The Make Your Own Zone Wyoming, MI
70 Comments | Post Comment | 39595 Views
  • Sharron W
    Commented on Apr 18, 2013
    Alcohol of any sort will react with plastic, including Plexiglas and ultimately make them ...»
    "foggy" looking in the area that it has been used. Cooking oil/baking soda combo will not. You might be safe using alcohol on glass containers, but I wouldn't use it on plastic. Also, I have had a lot of difficulty getting labels off after they've gone through the dishwasher, it seems that water absorbs into the adhesive or something and makes it repel this combo. Lastly I'd say that peeling the top layer of paper off the label or even just making a few scratches through it with a fork or knife will let the oil soak through and work it's magic a lot more easily...kind of like removing wallpaper..

  • Share 4K
  • Like 309
  • Clip 545
Clipped to:
  • DYI
  • "Faux " real
Loading
Back
to top
Feedback