


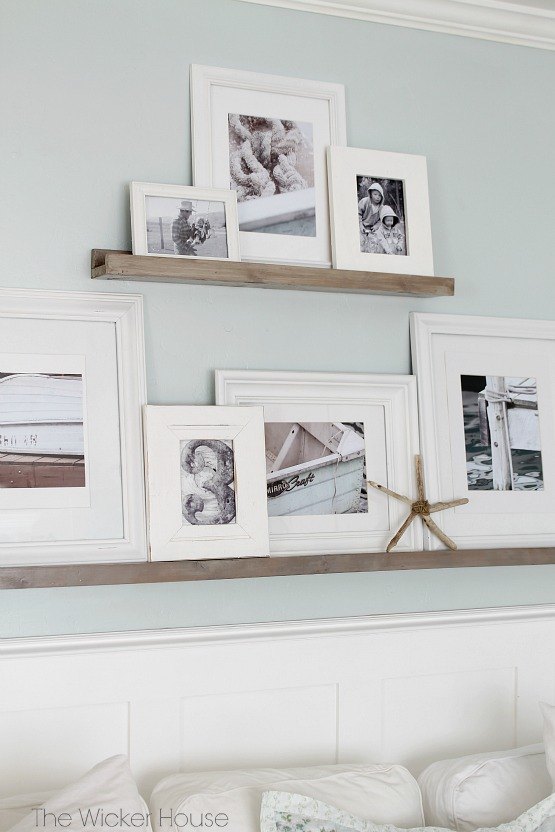
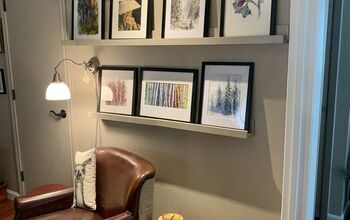
Easy Gallery Wall Picture Ledges
$11.00
Easy
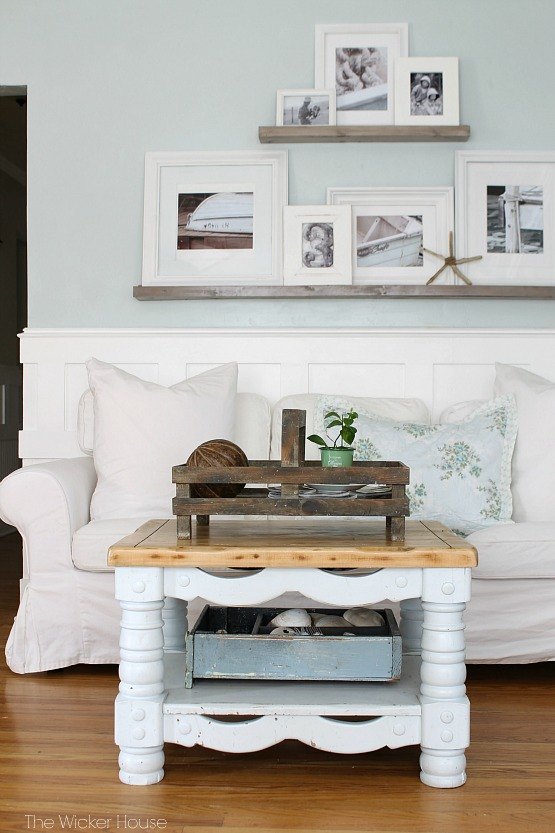
These Picture ledges were super easy to build, and they made such a huge statement in our living room. I like how these picture ledges allow me to freely switch around my pictures without creating any extra nail holes, or worry about messing up a whole wall arrangement.
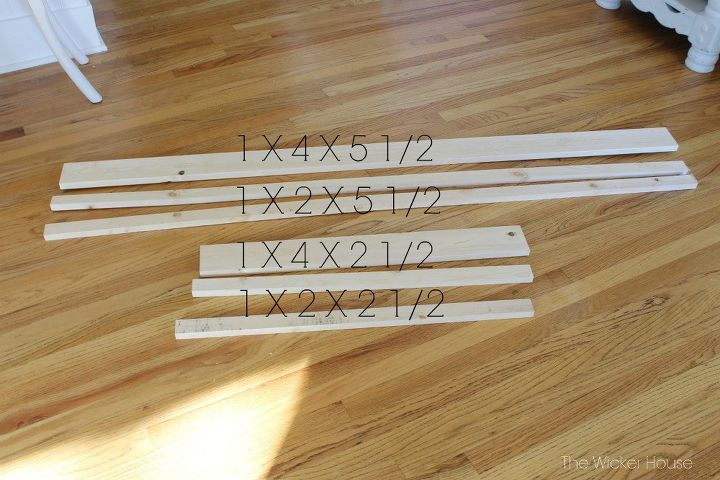
For this project I went to Lowes and picked up three 8 foot long boards; one 1 X 4 and two 1 X 2's. I then had Lowes cut the wood at 5 1/2 feet with the remainder being
To assemble my ledge, I used wood glue and glued 1 of the 1 X 2's onto the 1 X 4 and the second 1 X 2 was glued to the front of the 1 X 4 (see picture below). After it was glued together I secured it with screws.
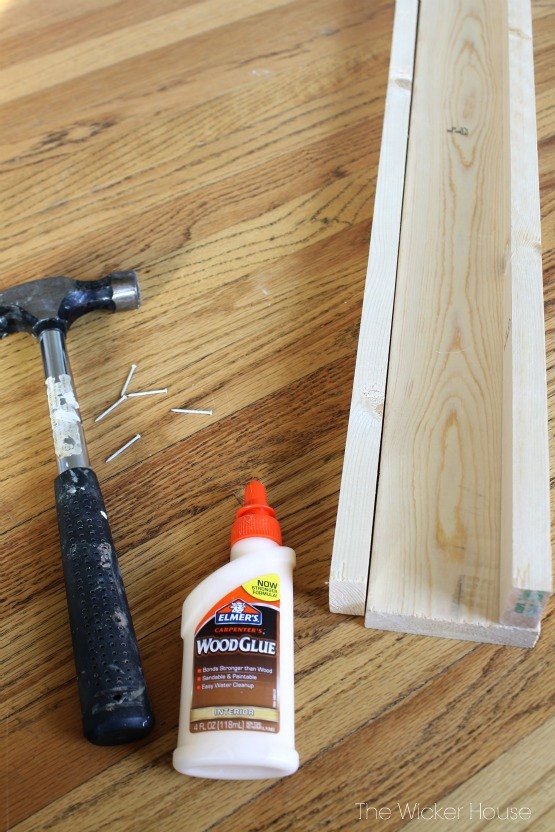
Next, I stained the wood giving it a weathered look.
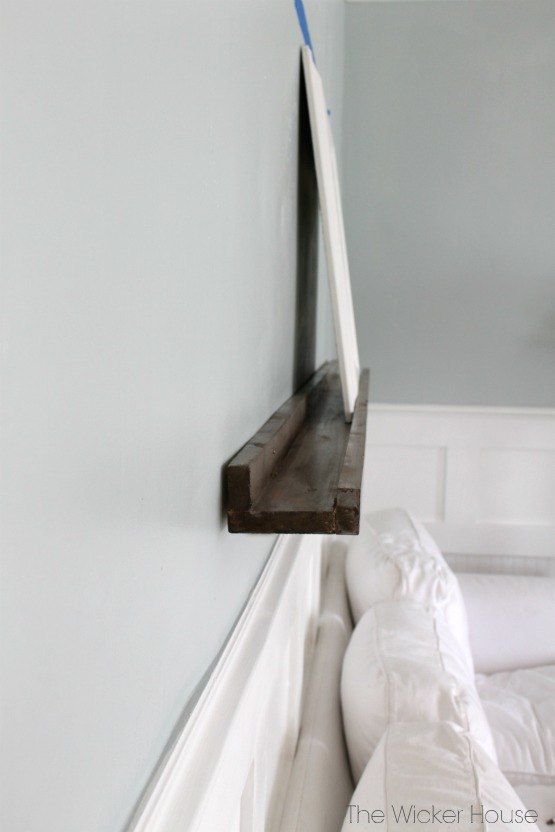
I used really long screws to attach the ledges to the wall.
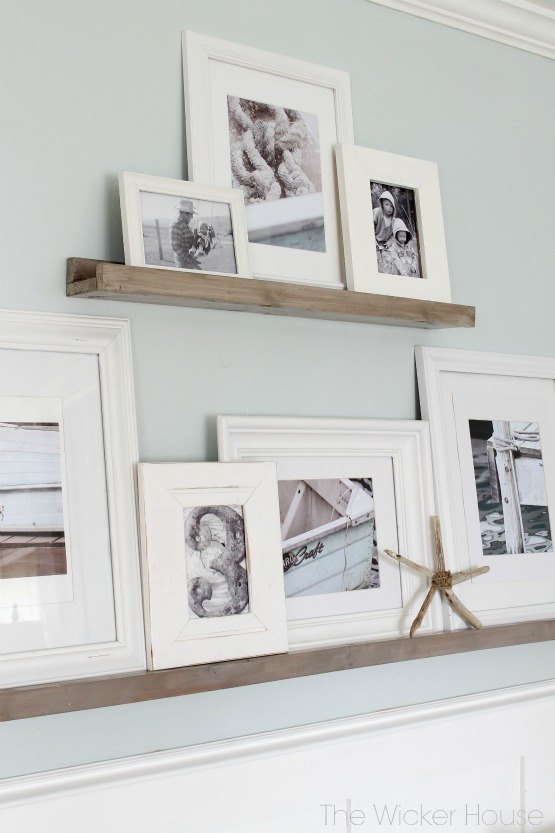
Once the ledges were hung, I filled them up with some of my favorite pictures.
To see more of my Gallery wall picture ledges, please visit my blog at the address below.

Want more details about this and other DIY projects? Check out my blog post!
Comments
Join the conversation
2 of 11 comments
-
I like your style and your house looks immaculate and organized. I need to emulate you. But, I’ll start with the five dollar curtains!
-
LOVE This I’ve been wanting to make one for all the pictures we have and to add some attitude to our newly remodeled bedroom and family room without being stuck with holes in the wall and also the versatility to change them as a take new photos and add some Beachythemed items Thanks so much for Sharing yours look AWESOME


Frequently asked questions
Have a question about this project?
What color of wood stain was used in this project?
I noticed your coffee table in this photo, is that a DIY project or did you find that Gorgeous piece somewhere??
Did you have to screw these into the wall at an angle because of the front ledge.