My Garden Bench From 2 Drywall Buckets, 2 Broken Drawers, Insulation

Vickie Johnson
by Vickie Johnson
I decided I wanted a garden bench for under my front yard tree area. I'm all about using what I've got laying around and my creativity. Here is where I went with it. Light weight but sturdy enough to sit on and all weatherproof.
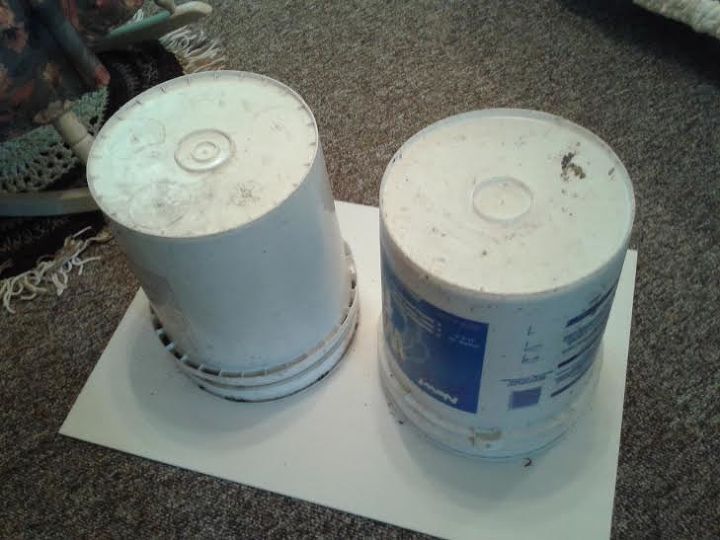
Two empty drywall buckets
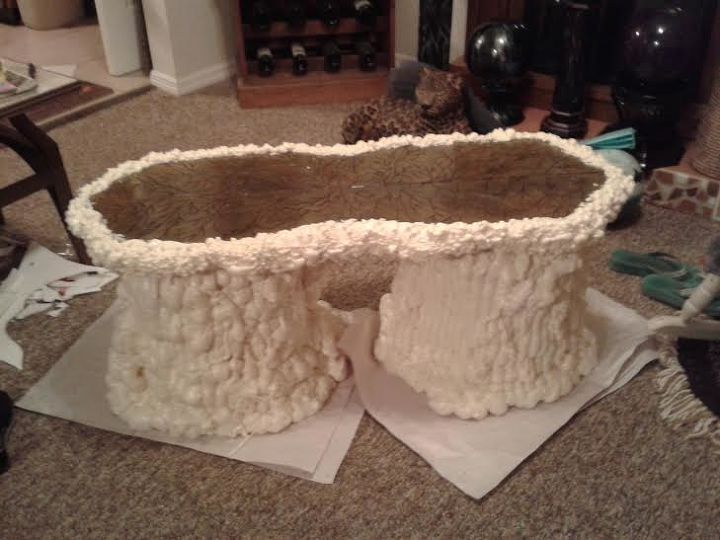
Bench top was previously made from two broken drawer fronts. I used 7 cans of insulation spray foam to cover the buckets and sides of seat area.
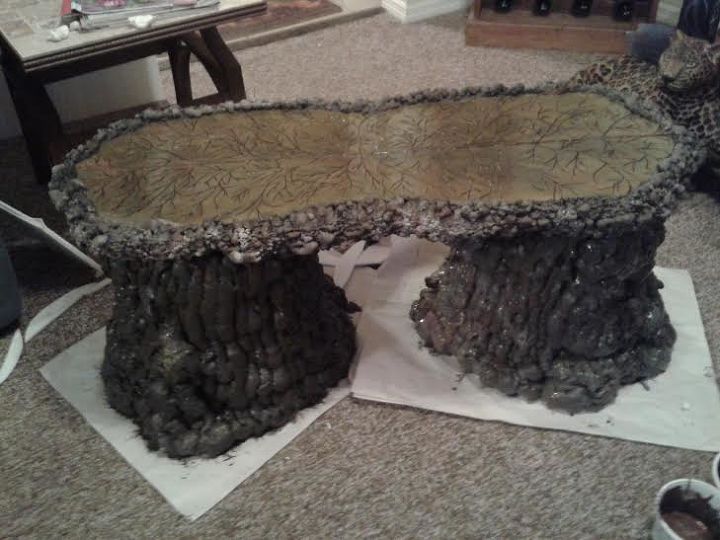
A little craft paint and done. Already had half dozen requests for me to make more.


Edited for step by step instructions: Sept. 16, 2015: Two 5 gallon empty buckets I used a piece of core board from Dollar tree to cut a base Glue the bucket on top of the cut coreboard piece.


Purchase spray insulation foam from Lowes or Home Depot and using a light touch, spray from bottom up to top of bucket in stripping motion to create the bark effect.


(BE CAREFUL NOT TO GET FOAM ON SKIN-believe me – it does NOT COME OFF)


Wear gloves please. It takes over a month for it to wear off your skin. I learned the hard way LOL. Let it sit until foam has expanded to its fullest Maybe an hour or so. You can trim off any excess you may not want. Spray paint or use craft paint. I used craft paint as it was on hand. I used several different colors to give it the shading effect of a tree. Seal with an acrylic spray for exterior use. Yes, the foam is durable and I live in Louisville, KY. Where the summers get 100 and the winters get below zero.


I have made rocks out of this foam for my back yard and they have withstood the weather now for a year. Time will tell here. THE TOP OF THE BENCH: I removed two broken dresser drawer fronts and glued them together in the middle longwise. Once glue was dry, I used 1 x 3 on the underneath side to brace it for support and holdings the two pieces together. I just screwed the 1 x 3’s to the wood. I then used a jigsaw and cut the sides and ends at random to give it some shape. Then on this particular one, I used a Dremel tool to groove out the design on the top.


Then I painted it with exterior craft paint, again using several shades blended together. I think I used black, brown, gray, green, and pumpkin orange, yellow, and white. Once I achieved the result of paint that I liked, let it dry overnight.


Coat the top of the bench with Hellsman exterior waterproofing of 2-3 coats. I used three due to our weather conditions. Then again using a lighteasy touch edge the bench top with insulation foam. Here, I actually used a wooden skewer togroove it out a little (be careful on this part as the foam gets very stickyvery fast). Work just a little at a time. Then, paint with the craft paint used on the bottom pieces so they match and have the same wood bark look. Mine is just for décor. So the top is just sitting on top of the buckets. You could easily attach a bolt if you filled the buckets with hypertufa or concrete and just attach the foam directly to concrete form if it was going to be used a lot. I just wanted something lightweight that a 90 lbs 65 year old single woman could move around easily.
Frequently asked questions
Have a question about this project?
3 of 6 questions
  • Nena Hodges Nena Hodges on Apr 14, 2017

    This is so cute! I'm seriously thinking of doing something similar. My only question would be: With people actually sitting on it would the foam eventually loosen and fall from the edge?

  • Glenna Russell Glenna Russell on May 31, 2017

    Can you show us, or tell us how you made the rocks ? Very Interested. :)

  • Deb Deb on Jun 01, 2017

    What is a "stripping" motion?

Comments
Join the conversation
2 of 328 comments
Next