


Upcycled Vintage Toolbox Shelf + Faux Rusty Tutorial
I found an abandoned beat up vintage toolbox at a flea market, plus an equally beat up vintage store coffee display shelf and married them together to make an incredibly unique piece for my black and white vintage kitchen.
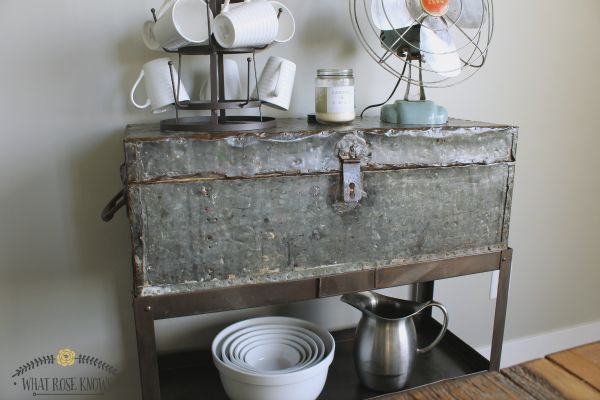
It was pure luck that the toolbox fit perfectly on top of the shelf.

Before
Even though I loved the aged red metal of the display shelf, I wanted it to match the rusty patina of the toolbox. After a little research on the net, I came up with my own method. I used Rust-Oleum Forged Hammered Paint and Primer in Burnished Amber and Rust-Oleum Rusty Metal Primer.
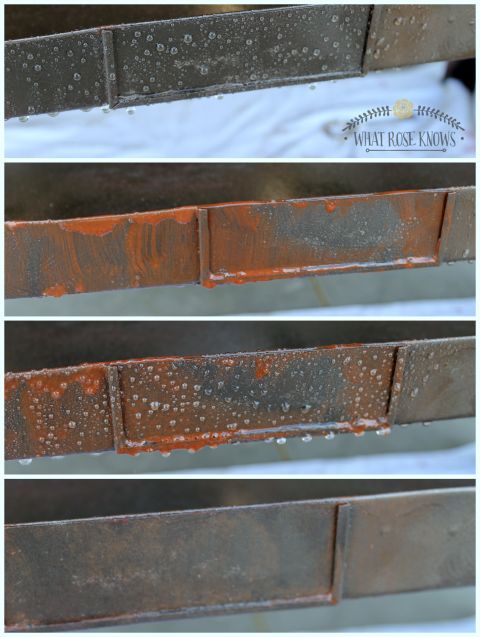
Here are the steps I took to get the rusty metal look....
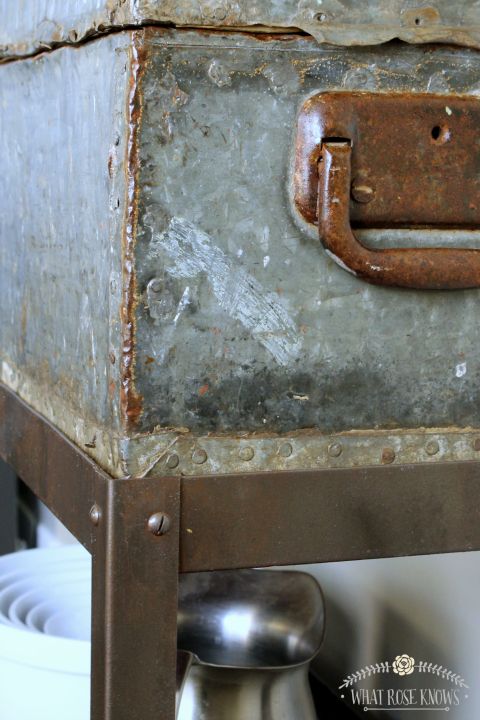
While you can never perfectly duplicate true rusty metal, I think this process looks pretty darn close. The handle of the toolbox is natural rusted metal with a coat of polyacrylic and the shelf is the faux rusted metal. I did not want the shelf too shiny so I only put a coat of the polyacrylic on the toolbox. The reason for this is because the polyacrylic brought out so much more of the character and age of the toolbox. I had power washed it previously and it was a little too dull for me. Water-based polyacrylic gives metal and wood a nice sheen without being overly shiny.

Want more details about this and other DIY projects? Check out my blog post!
Comments
Join the conversation
2 of 7 comments
-
Nicely done!!!
-
They are perfect together!


Frequently asked questions
Have a question about this project?