


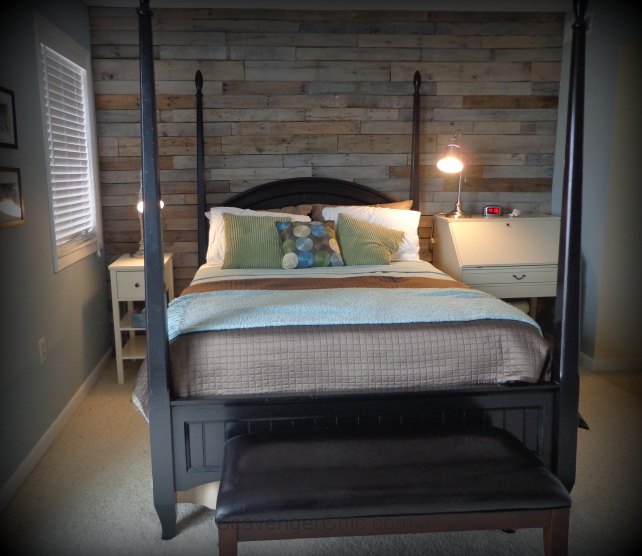
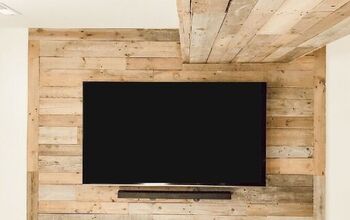
Warm and Rustic Pallet Wood Wall Diy
3 Materials
$3
Easy
The best part about pallet wood is not necessarily that you can get the wood for free, though that doesn't hurt, I just love the rustic nature of the wood. I love that it's a little rough and when it has sat out in the weather and starts to get gray it's absolutely perfect.
I've said it before, if someone would like to offer me a falling down barn, I would welcome the chance. I would even give up my pallet wood for barn wood...yes I said it. But until that day comes, pallet wood it is!
I've said it before, if someone would like to offer me a falling down barn, I would welcome the chance. I would even give up my pallet wood for barn wood...yes I said it. But until that day comes, pallet wood it is!
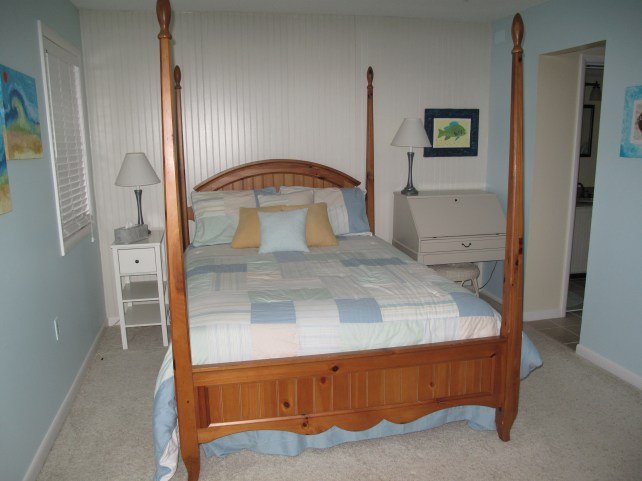
This is a before shot of a beach house guest bedroom. The furniture is all in great shape, not necessarily what I would have chosen, but in great shape.
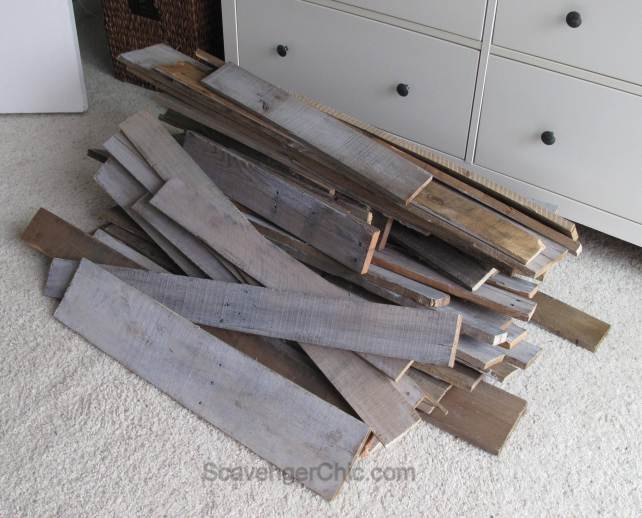
The first part, and probably the hardest part of the project, gather enough pallet wood to fill the wall and tear apart those pallets. It doesn't really matter the width of the boards as long as with any individual width you have enough to extend the entire wall for that row.

Before nailing your pallet wood up, paint the wall a nice dark color. I just painted directly over the paneling that was previously installed.This ugly mustardy color was in the ooops paint area for only a few dollars. It was still probably too light, a nice dark brown to black would have been a better background color.
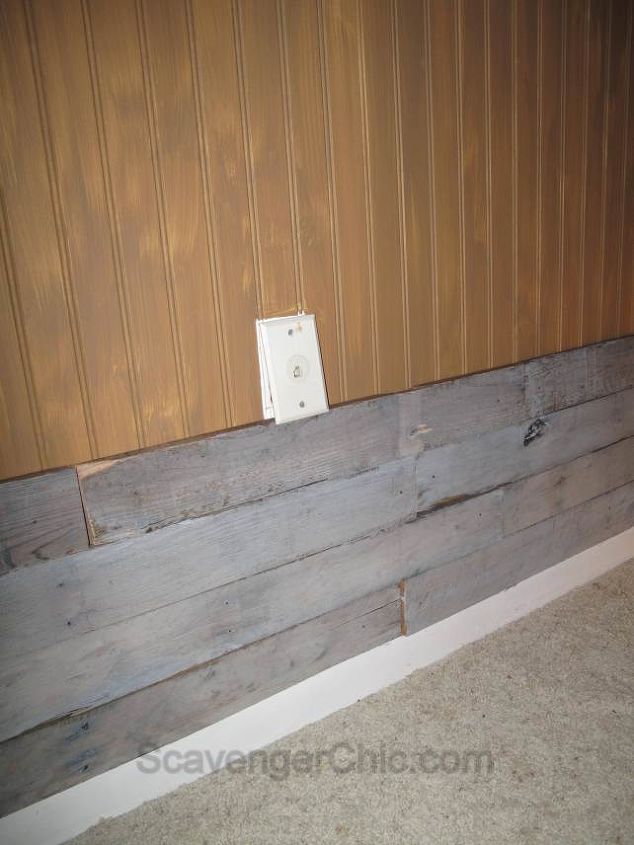
I started at the bottom leveling my wood against the baseboard and nailing each piece individually with finishing nails. When I got to an outlet, I just cut the wood around it. I didn't worry too much about the outlets sitting on top of the wood since they would be behind the bed. Again, each row must be the same width. Like floorboards, stagger the seams as you go.

The entire wall cost about $3.00 for my can of ooops paint, count on it costing more if you need nails.

Want more details about this and other DIY projects? Check out my blog post!
Comments
Join the conversation
2 of 117 comments
-
Beautiful!!
-
Awesome I really need do this .


Frequently asked questions
Have a question about this project?