


Redoing Vintage Buffet W/Mahogany Wood and Home Made Chalk Paint
I've been redoing vintage furniture, of all kinds, for the last 5 years. I especially love to bring back the wood from the dead! If I showed you the before photos of some of my pieces, you would bet the wood was destroyed beyond repair. But often times wood can be very forgiving. If you've done your homework and know some wood finishing basics, you can breathe life back into your pieces.
I'll briefly cover the basics here, but for the full detail on this piece, please click on the link to my blog post of this buffet. You will find the link at the bottom of this post. Thanks!
I'll briefly cover the basics here, but for the full detail on this piece, please click on the link to my blog post of this buffet. You will find the link at the bottom of this post. Thanks!
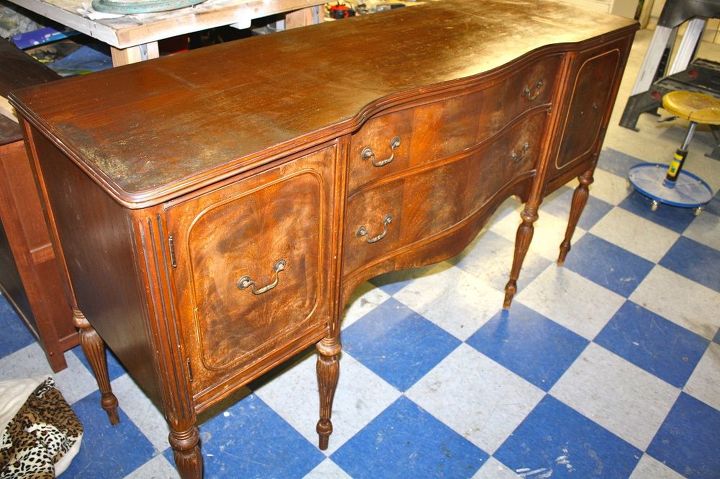
This was a mahogany buffet from the 1930's. Now, most of your buffets and a lot of dressers, were made from mahogany back then. Oak was popular decades before that. Most of time they used sheets of mahogany and ribbon mahogany (ribbon denotes the actual grain of the wood. You'll see what I mean in the close-up pic). The veneer was glued upon a lower quality piece of wood. The actual mahogany veneer is very thin, maybe 1/16th?? That's why when you sand these wood pieces you have be very careful, especially around the edging, not to be over zealous and burn through the veneer. There is no way to fix it when that happens.
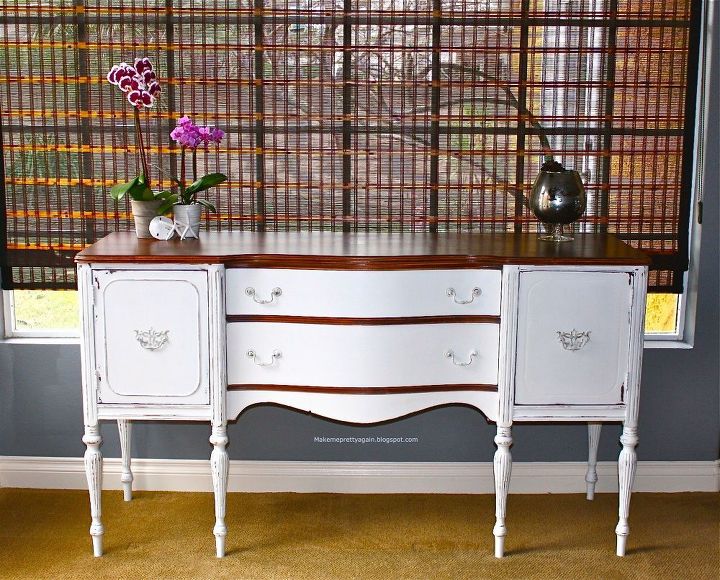
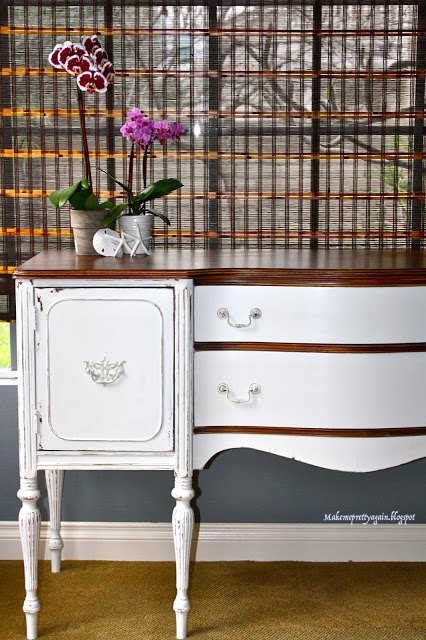
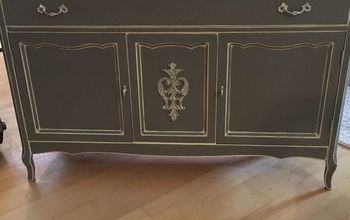
Here is the finished product to that beat up piece above! I often like to do two-tones because I get the best of both worlds. Oftentimes the top is salvageable, but the rest of the body isn't. Or maybe it's just not worth all the work. That's when I choose to paint. On this one, I made my own chalk paint. See the details on my blog post.
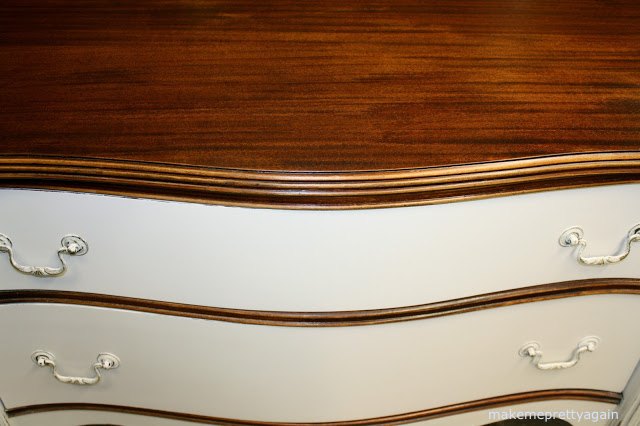
So here is the ribbon mahogany I was referring to. See the darker horizontal lines? You will find this in many pieces of this era. Also, mahogany is obviously very red. If you want to bring down the redness use a darker walnut color instead of a mahogany stain. You don't want to go too dark otherwise you will lose all of the grain. You could also go with a lighter stain as well. If you don't want to use a topcoat (please stay away from straight poly!) then you can use a tung oil or even wax or beeswax.
The guy that bought this said he was using it in a bathroom remodel. I sure hope he didn't mutilate too badly!

Want more details about this and other DIY projects? Check out my blog post!
Comments
Join the conversation
3 of 6 comments
-
Very well done. Looks fantastic.
-
It is beautiful .. attempting the same look on an executive desk that I have been trying to refinish. I discovered wood veneer as I sanded the top while prepping to stain . Glad I read this first to save myself the frustration.. now I will paint it instead.


Frequently asked questions
Have a question about this project?