13 Stunning Vintage Fabric Ideas That'll Send You to the Thrift Store
Are you a fan of all things vintage and love to add a touch of nostalgia to your home decor? Whether you're a seasoned collector or just starting to explore the world of vintage textiles, the thrift store is a treasure trove of hidden gems waiting to be discovered. Here, we'll take you on a journey through 13 stunning vintage fabric ideas that are sure to inspire you. You'll never pass up a scrap of vintage fabric at the thrift store again!
DIY home decor using recycled materials
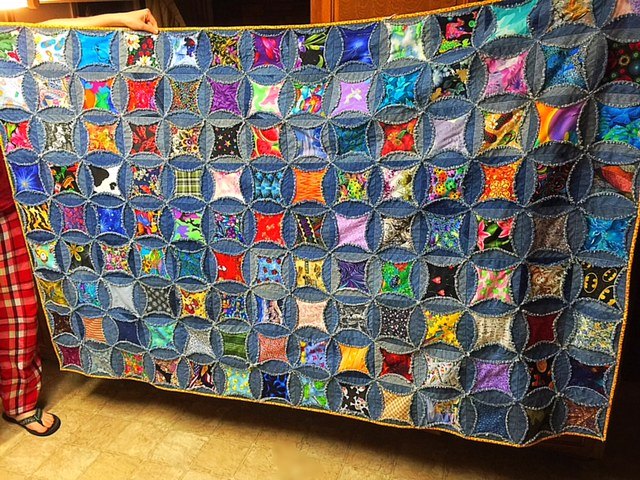
1. DIY denim quilt
In this first project, Shelly repurposed her husband's old jeans to create a unique and cozy rag quilt. This DIY quilt features a variety of different fabrics with no repeats, giving it a distinctive look.
To make it, cut open the jeans along the seams, trace circles onto the fabric, and cut them out. Then, I create square templates to fit inside the circles and sew the circles into rows. After joining the rows together, add pre-cut fabric squares and stitched them down. Get tutorial here
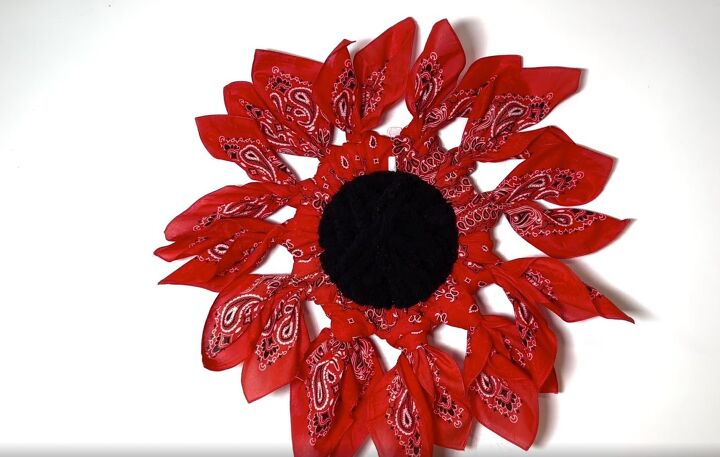
2. Bandana flower wreath
Create a vibrant and easy bandana flower wreath by grabbing some bandanas. Fold the bandanas into triangles, then fold and attach them to a wire frame to form the flower petals. Customize the wreath with different colors and sizes of bandanas or even fabric strips.
Complete the wreath by making a fuzzy center using chunky yarn and securing it to the frame. Fluff out the petals, hang it up, and enjoy the simple and colorful addition to your fall decor! Get tutorial here
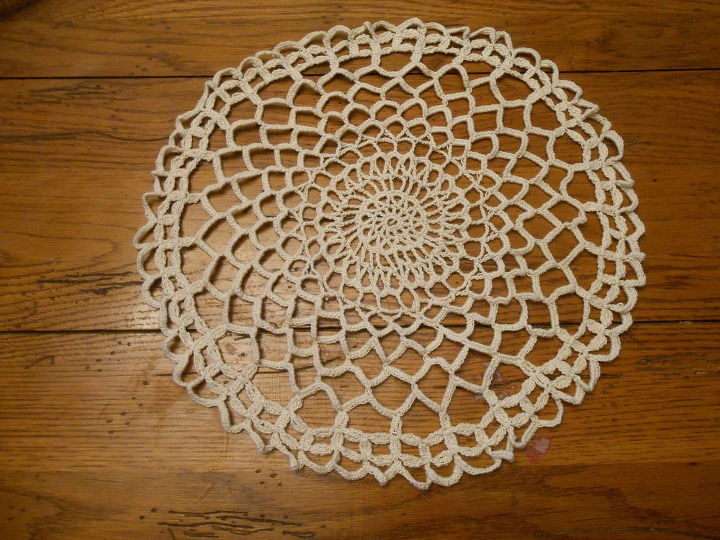
3. DIY cement lace
Transform your crochet doilies or other crochet items into unique and personal pieces of home or garden decor by soaking them in a cement slurry. With this project, you can create cement lace bowls, planters, candle holders, Christmas ornaments, and more.
Prepare your crochet items by washing and drying them, then mix a cement slurry using Portland cement and a concrete bonding additive. Coat the crochet items in the cement mixture, squeeze off the excess, and lay them on molds. Let them cure for about 12 hours, then mist them and cover them with plastic for at least a week.
Unmold the cement lace, allow it to dry, and paint it with quality spray paint or craft paint. Seal the finished pieces for added durability. The result is so impressive! Get tutorial here
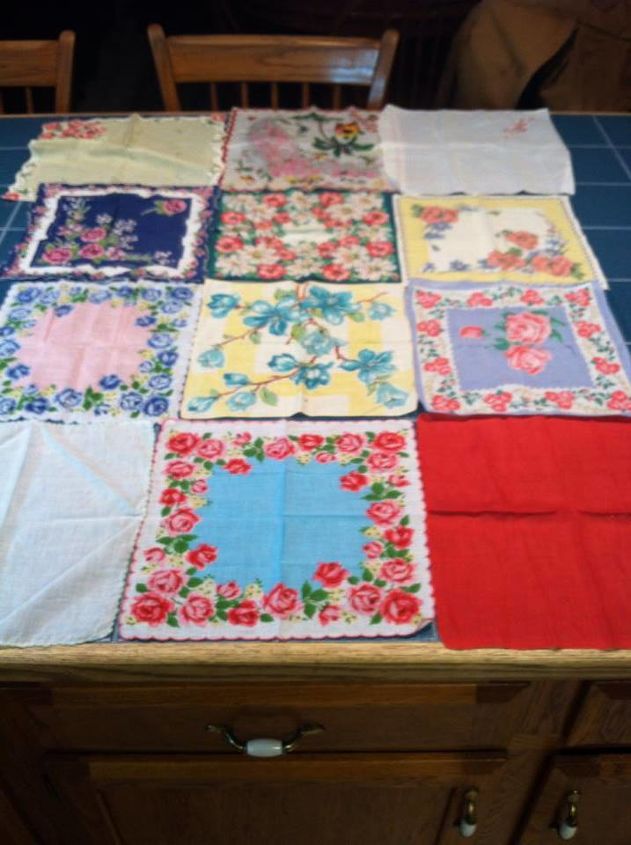
4. DIY baby quilt
This project involves repurposing vintage hankies into a handmade baby quilt. The hankies, which are about 70-80 years old, were laid out in a pattern and some were trimmed down. Fusible webbing was added to the back of each hankie for support.
The hankies were sewn together in rows, and the quilt top was framed with pink taffeta. The three layers of the quilt were pinned together and sewn around the edges.
The finished quilt includes personalized hankies and a soft white rosebud minkies fabric backing. A fabric label was created using freezer paper and an inkjet printer. The final quilt is so adorable! Get tutorial here
5. DIY area rug
This DIY project involves creating a custom area rug using placemats. Choose the placemats you want to use and lay them out to plan the design. Seam the placemats together using single-sided carpet tape, joining them one by one. Press the seams together firmly to ensure a tight fit.
Repeat the process until the custom placemat rug is complete. It's a quick, easy, and budget-friendly way to create a personalized area rug. Get tutorial here

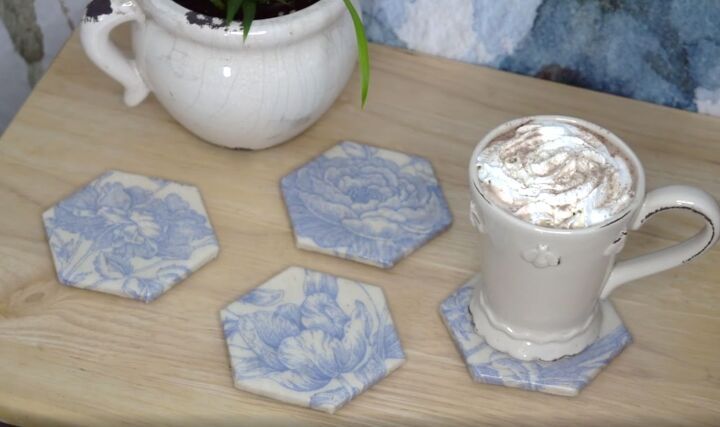
6. DIY fabric tile coasters
Learn how to create stunning fabric tile coasters and protect your surfaces in style. Gather your favorite leftover fabric and ceramic tiles for this easy and practical DIY project.
Adhere the fabric to the tiles using Mod Podge, ensuring a smooth and bubble-free surface. Seal the fabric with another layer of Mod Podge to preserve its colors. Once dry, apply resin following the instructions on the kit, allowing it to drip down the sides for a professional finish.
Add little feet to the corners of the tiles using hot glue, and voila! Enjoy your personalized fabric tile coasters. Get tutorial here
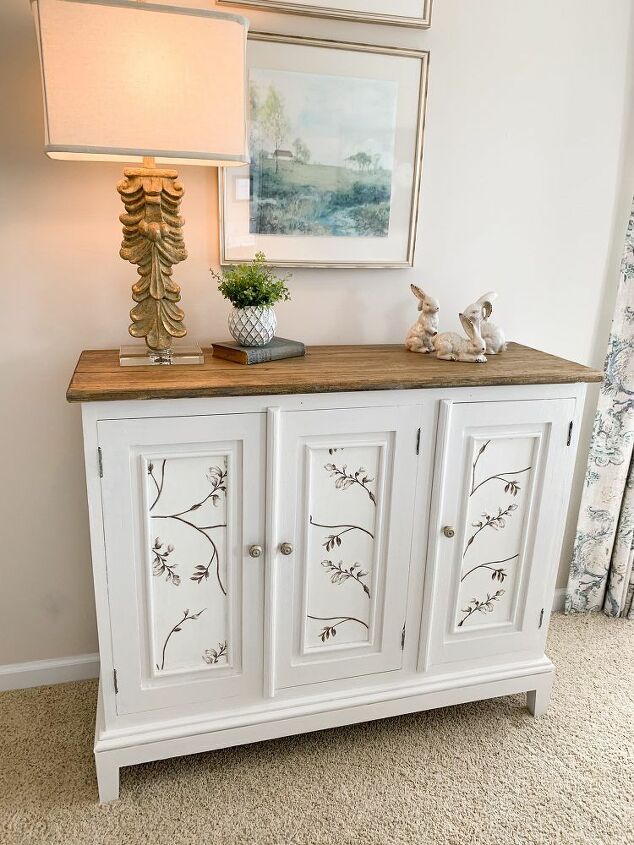
7. Fabric-covered dresser
Transform your old furniture with this tutorial on how to cover a dresser with fabric.
Start by cleaning and sanding the piece to prepare it for the makeover. Cut a piece of cotton fabric larger than the surface you're covering and apply a water-based topcoat or glue to the drawer top. Press the fabric onto the surface, ensuring it covers all the details. Apply another layer of topcoat and let it dry. Trim the excess fabric and sand lightly for a smooth finish. Apply additional coats of topcoat for a glossy or satin look.
Admire your refreshed dresser and consider adding fabric to the sides for a complete transformation. Give it a try and enjoy your newly updated piece of furniture. Get tutorial here
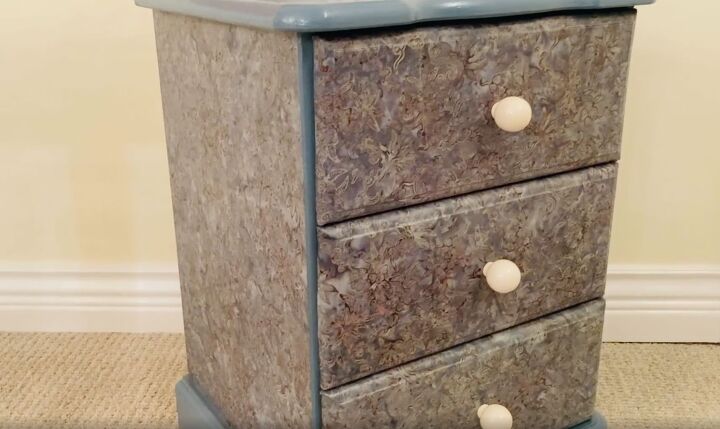
8. DIY decoupaged furniture
Learn how to save money on interior design by giving furniture a DIY makeover. In this tutorial, Jennifer shows you how to decoupage with fabric using Mod Podge.
Choose a fabric that matches your desired style and cut it to fit the furniture. Apply Mod Podge to the surface and gradually add the fabric, smoothing it out as you go. Coat the fabric with more Mod Podge for durability. Upgrade the look with new doorknobs.
This affordable project transforms bland furniture into a custom piece that looks expensive. Get tutorial here
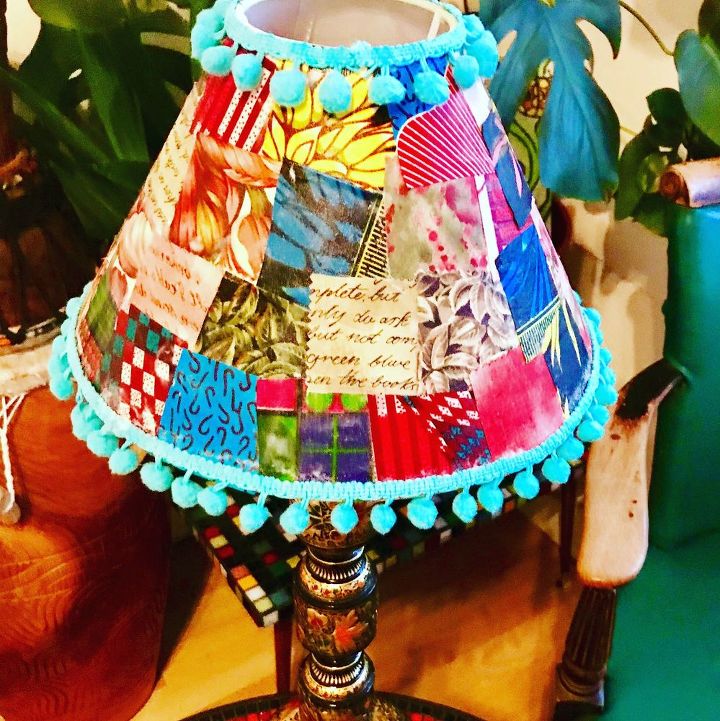
9. DIY decoupaged lampshade
Turn a plain lampshade into a vibrant and boho-inspired piece using fabric decoupage. Choose a mix of patterned fabrics to create texture and a blend of colors.
Apply Mod Podge Matte Sealant with a sponge applicator, starting from the top and working downwards, ensuring full coverage and overlapping fabric pieces. Seal the fabric with another layer of Mod Podge. Add a decorative touch by gluing a bobble trim along the top and bottom edges using Mod Podge.
The result is a completely transformed lampshade. Enjoy the colorful outcome of this simple and rewarding project. Get tutorial here
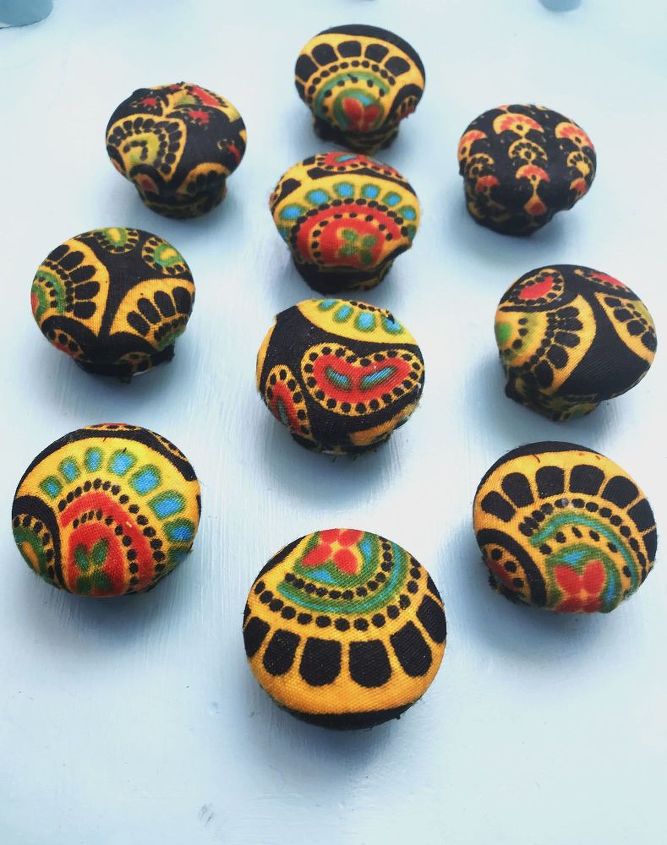
10. DIY decoupage drawer knobs
Susan also has another cute craft using the same technique. Give a budget-friendly makeover to a bedroom chest of drawers by changing the knobs.
Cut up an old cotton kaftan top and use the vibrant fabric to decoupage round wooden knobs. Apply Mod Podge Matte sealant to secure the fabric in place and create a durable surface. Trim the fabric and add a thin strip to finish neatly. Let the knobs dry and then attach them to the chest of drawers for a cheerful and transformed look.
Enjoy the satisfying outcome of this simple and cost-effective knob makeover project! Get tutorial here
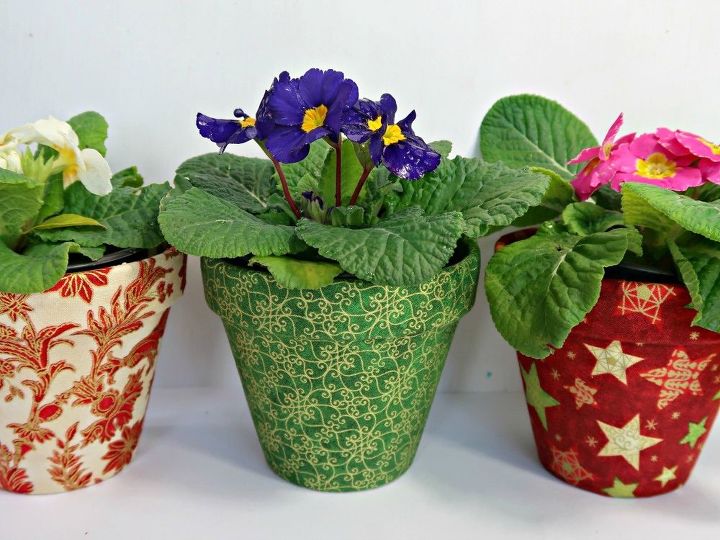
11. Fabric-covered flowerpots
Here, Craft Invaders shows us how to create lovely fabric-covered flowerpots as homemade gifts for family and friends.
Gather white glue, fabric, and terracotta flowerpots. Make templates for the fabric by tracing the top and bottom edges of the pots, adding extra for overlap. Cut out the fabric using the templates as a guide. Dilute the white glue with water to a creamy consistency and use it to adhere the fabric to the pots. Smooth the fabric into place and let it dry.
Finish the edges by cutting slits, folding them down, and gluing them. The result is a beautiful flowerpot that can be paired with a colorful plant. Get tutorial here
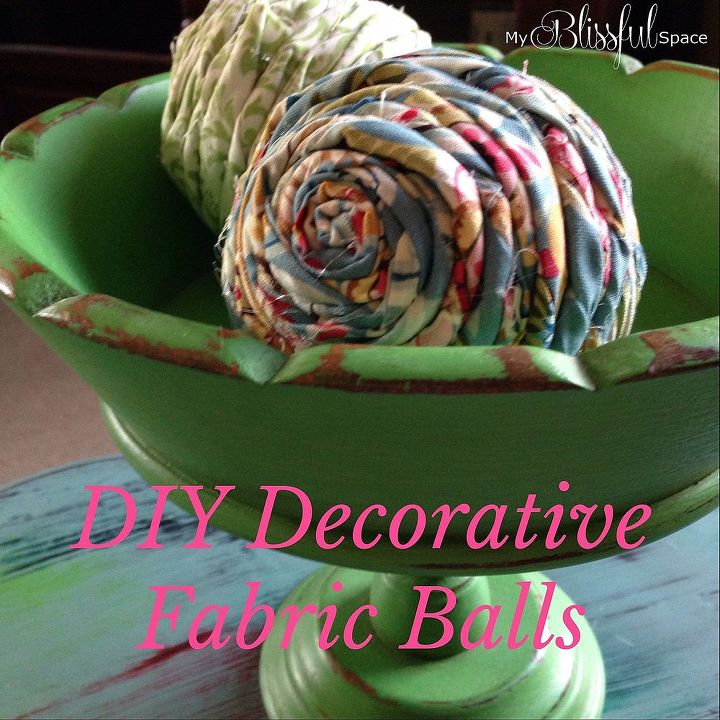
12. DIY decorative fabric balls
When you can't find what you're looking for, make it! In this tutorial, Crystal shares how to make DIY decorative fabric balls using Dollar Tree plastic baseballs and scrap fabric. This simple craft is effective and fun to do, too! Get tutorial here
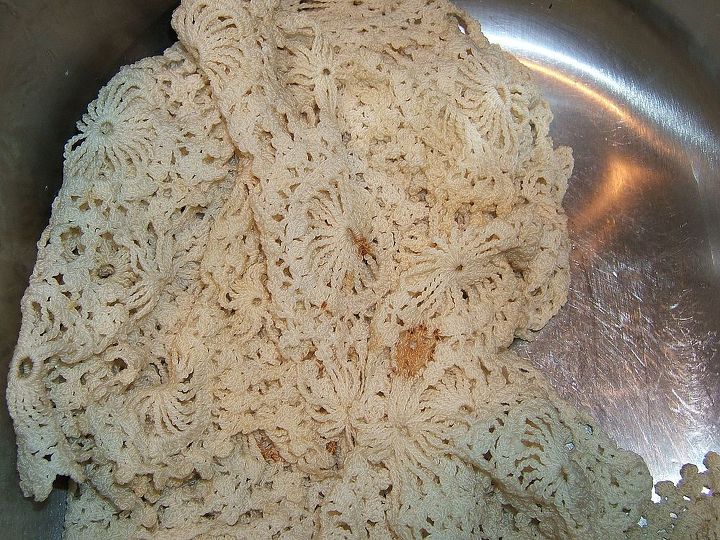
13. How to clean vintage fabric
Of course, you may be looking to restore your vintage fabric, rather than turn it into something new. In this tutorial, B shares a cleaning method for vintage linens that has worked for over 25 years.
The first step is soaking the linens overnight in Biz, a powdered detergent. If stubborn stains remain, bring water to a gentle boil and add powdered Cascade, adjusting the amount based on the item size. Test a small area before proceeding and stir constantly while checking the stains with tongs. Rinse by hand and line dry.
This is a great way to give vintage fabric new life again. Get tutorial here