


Craft Nautical Wood Art Using Stencils

1 Material
$50
2 Hours
Easy
Casual beach-chic decor can give a home a summer feel all year long. Coastal home decor is also easy to craft yourself using a stencil from our Nautical Stencil Collection. From anchors to mermaids, we have a beach inspired pattern that is perfect for your home. Today we're going to show you how to craft Nautical wood art. Let's take a look.
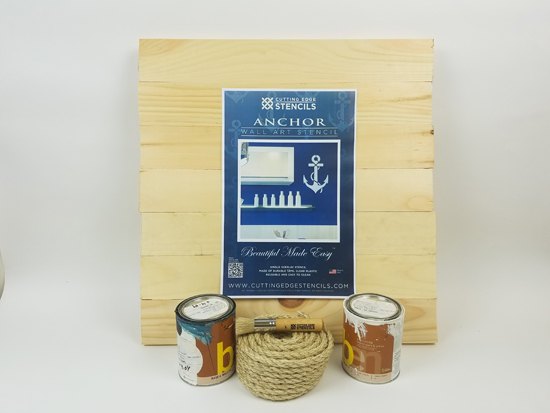
We purchased plain wood from Home Depot and decided to put a Nautical spin on it using our Anchor Stencil. For our visual fans, you're going to love this video tutorial. In this quick how-to video, we show fans how easy it is to stencil an Nautical wood art using an Anchor Stencil pattern.
Let's walk through the steps for completing this easy stencil project. Erika purchased plain wood from Home Depot. She picked up 1" x 4" untreated lumber and requested Home Depot to cut it into seven pieces. Then she also purchased 2" x 3" pieces of untreated lumber and cut it into three pieces. Erika laid her wood on the ground. She placed the three 2" x 3"'s along the back of the larger pieces of wood. Using a hammer and nails she secured the wood in place.
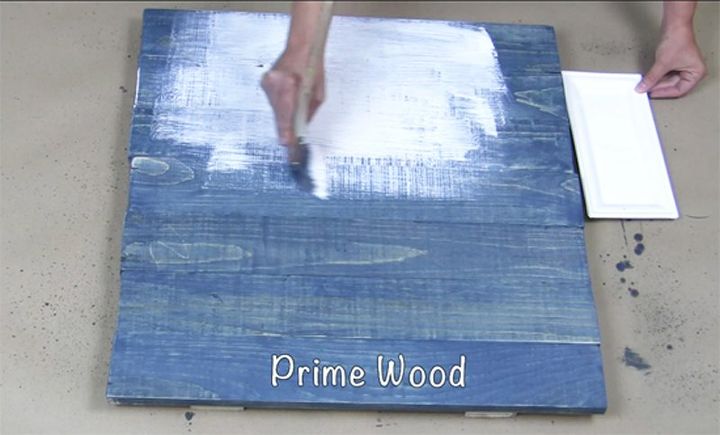
Once she had her wooden pallet, Erika was ready to start her Nautical project. She coated the wood with a blue waterbased stain and then applied a coat of Zinsser waterbased primer over the area she planed to paint. She used a low grade sandpaper to give an aged appearance along the edges
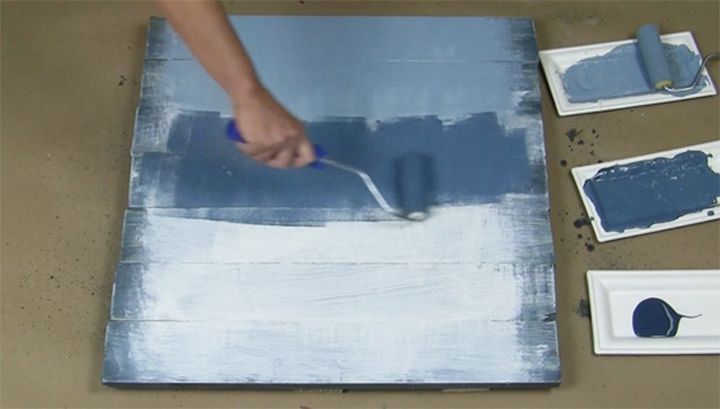
For this project, Erika used Benjamin Moore paint in Hale Navy and Navajo White. She wanted the wood boards to have an ombre look so she mixed three shades of blue using her two paint colors. Then she rolled on the paint using a small dense foam roller.

Once it was painted, she was ready to start stenciling. For this particular project, Erika chose the large Anchor Nautical Pattern. This classic beach inspired design had her hooked at first sight. Erika applied a repositionable craft spray adhesive to the back of the stencil.
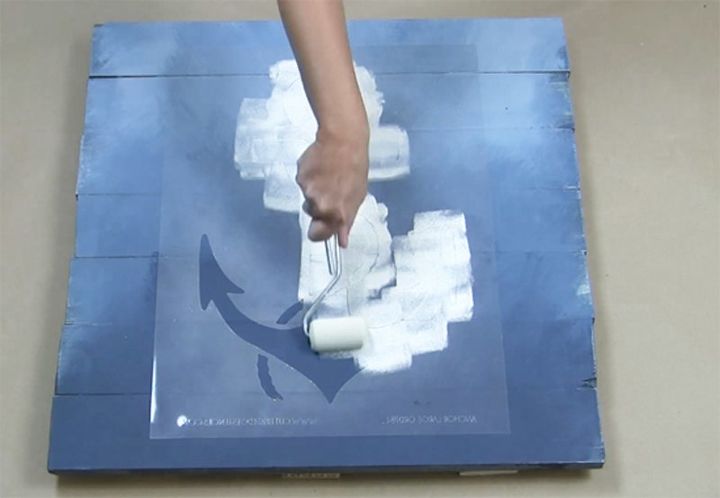
She positioned the Anchor Design on top of the ombre painted wood canvas and painted it using Benjamin Moore Navajo White.
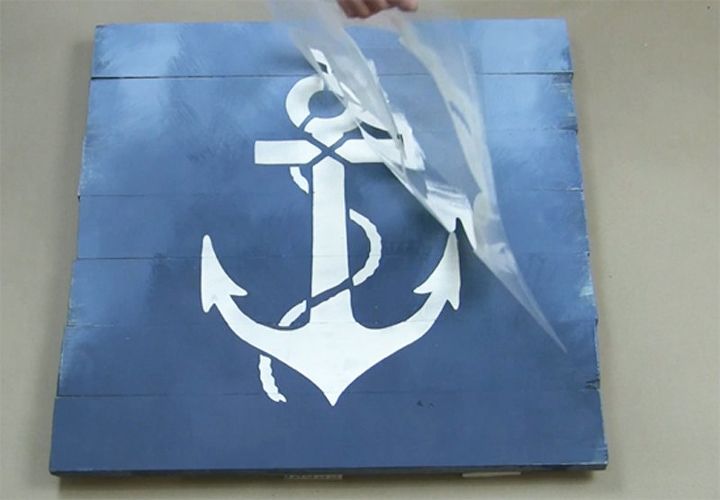
Erika lifted the stencil to reveal her anchor pattern and then stepped back to admire her creation.
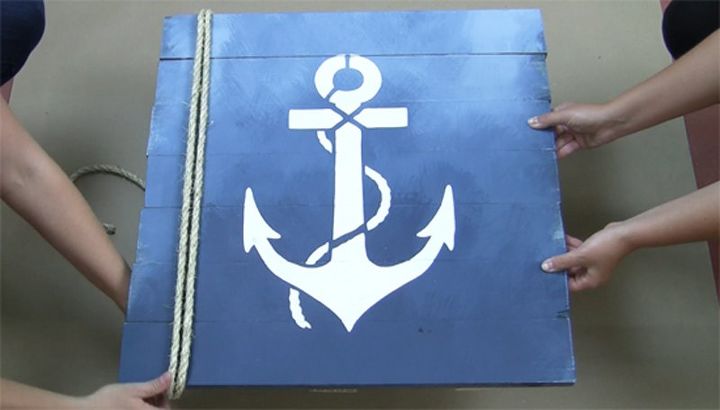
It looked great but sometimes a small enhancement can take a project to the next level. To upgrade her wooden wall art, she attached boating rope using a staple gun on the back.
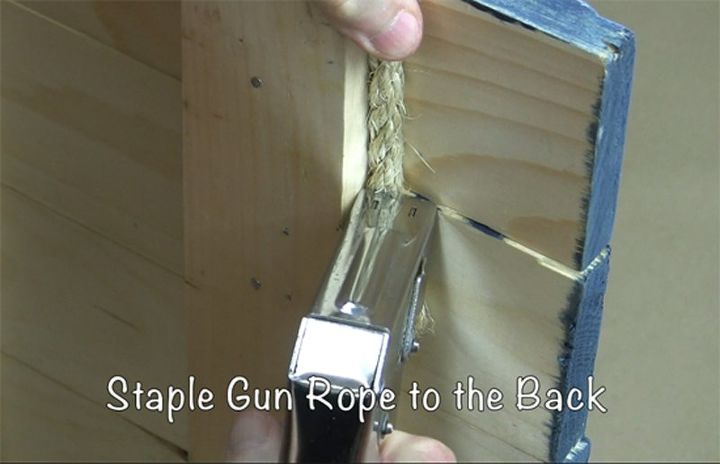
Then she wrapped the rope around the boards three times and stapled the end.
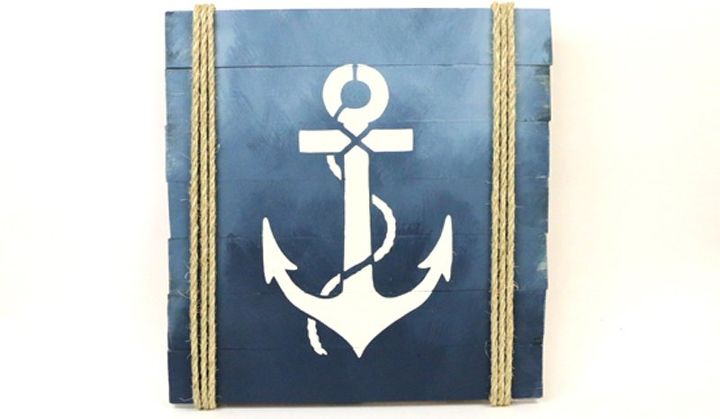
Are you ready to see how it all turned out? Here is Erika's stenciled Nautical wood art.
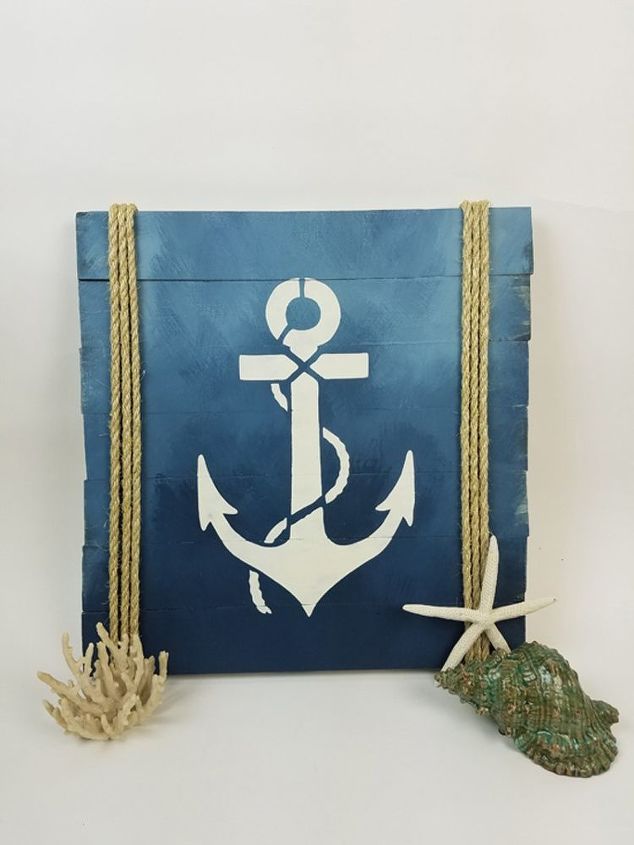
Erika let her creative dreams set sail and look at what she crafted! We are in love with her beachy creation.


Frequently asked questions
Have a question about this project?