Before & After: $5 Chair Redo on a Budget

NatNico Designs
by NatNico Designs
$30
4 Hours
Medium
I was on a hunt for cheap romance novels as a (obviously hilarious) gift for a friend when I stopped by one of the dustiest thrift stores I had ever seen. It was dirty and smelled funky and - wait, whats that in the corner? Pink velvet? I'm on my way. There it was under a terrifying pile of old afghans... a beautiful beat up creature and it was only $5. Sold.
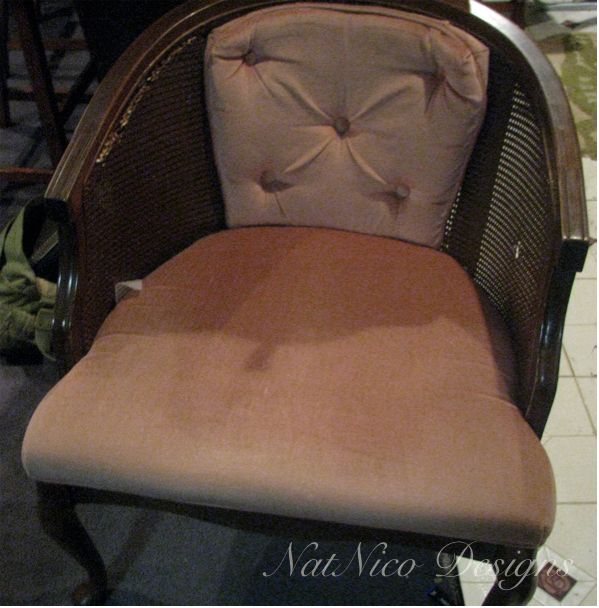
For awhile the chair sat in my living room as is. A few years later I was redoing my home office and I was looking evvvvverywhere for a new desk chair. Then one day I realized, with a little work, this chair could be the chair of my dreams.


I started with the frame. The seat easily came off by removing a few screws. The back cushion was attached to the frame by a few buttons which were also easily removed. After cleaning it off, I took the frame out to the driveway for a little sanding and a few coats of spray primer. The final coat was a black lacquer spray. Already it was looking like a completely different chair.


Since I was trying to redo the office with a very small budget, I used a fabric that I already owned to recover the cushions. I think it was about $10 a yard.


Using a staple gun and making sure the fabric pattern was lined up and straight, I attached the fabric to the bottom cushion. The back cushion was the most challenging part. I turned two pieces of fabric in on each other and laid them over the cushion. I pinned around the edges to copy the shape of the cushion. There might be an better way to do this but this worked out well for me. I sewed the fabric together and flipped the cover inside out. I slid the cushion inside and sewed the bottom closed by hand.


At first, I was intimidated by the thought of having to make cloth buttons but it was way easier than I thought it would be. I went to my local fabric store and the woman there showed me what is called "half ball button covers". They are basically a front metal piece that you wrap fabric around and secure with a back metal piece. Easy peasy. When I had finished sewing the buttons on, I reassembled the chair.
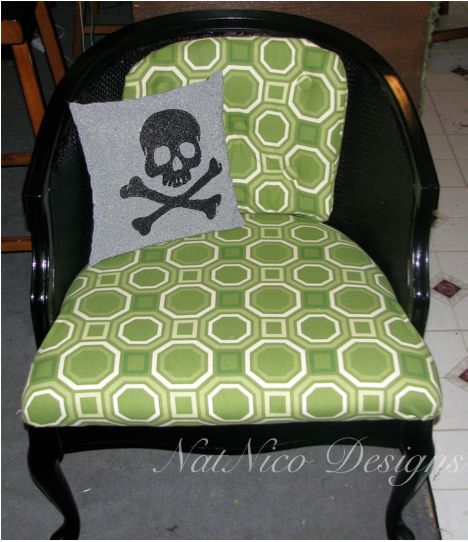
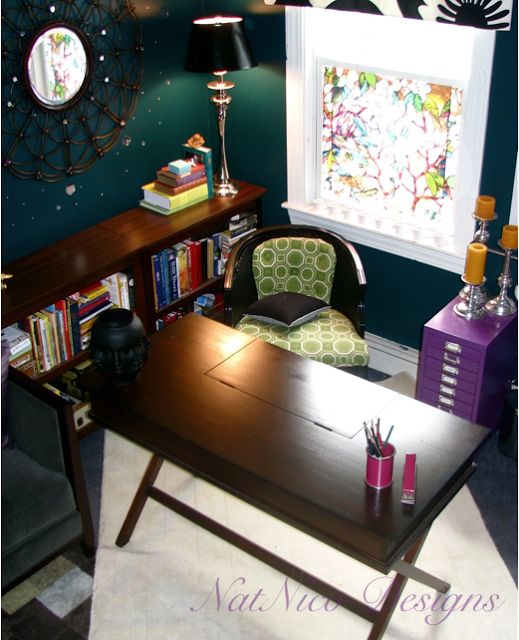
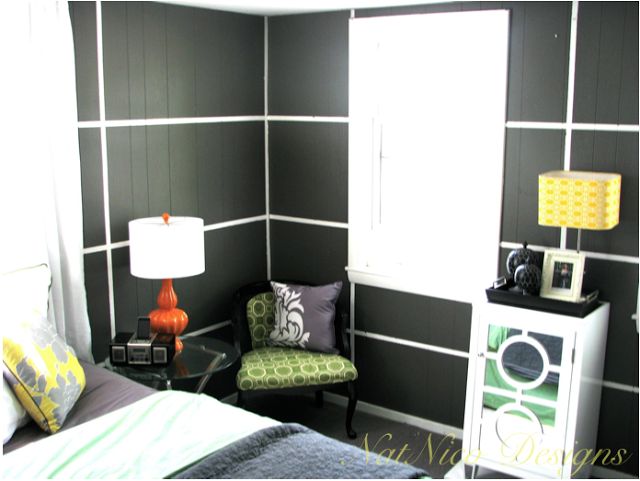
The perfect piece for my new home office. A year later it found a home in my gray & white bedroom.
For about a day of work and $30 total I had a brand new chair that was EXACTLY what I wanted. And ever since then, I've learned that for the most part, the dustier the thrift store, the cooler the stuff.
Frequently asked questions
Have a question about this project?
Comments
Join the conversation
3 of 5 comments
Next