


Tardis Boockcase/Media Storage - Tutorial

by
Pat Rios
$60
12 Hours
Medium
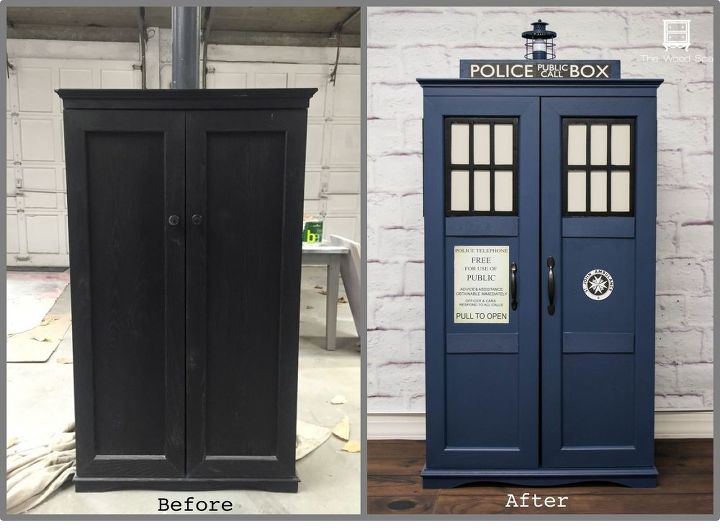
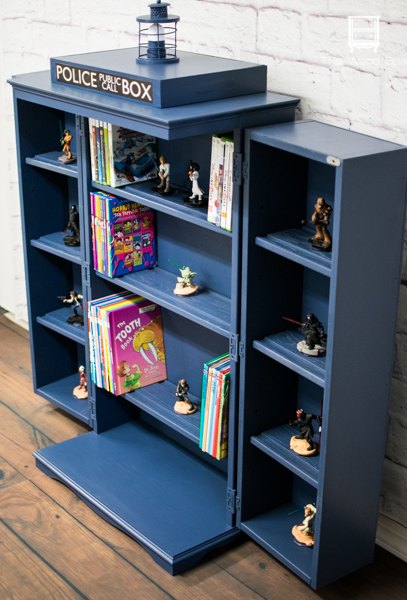
Any Dr. Who fans in your house? This is how I transformed an ugly DVD cabinet in a cute Tardis Bookcase, Media Storage and, of course, Time Machine!
Here is how I did it.
Part 1. The cabinet
To save time, I spray painted the entire cabinet, shelves and hinges with Valspar Indigo Streamer. You could also use foam rollers and high quality brushes to do this part.
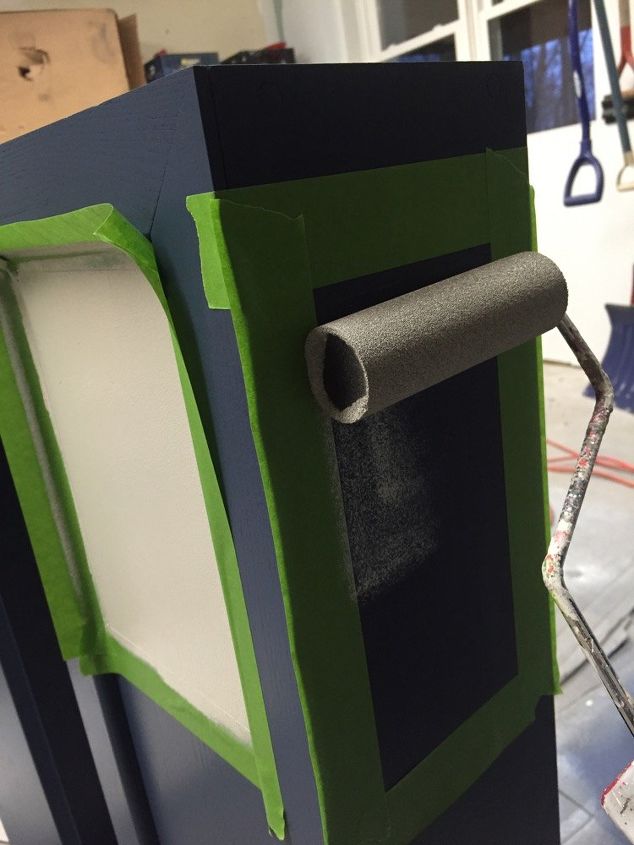
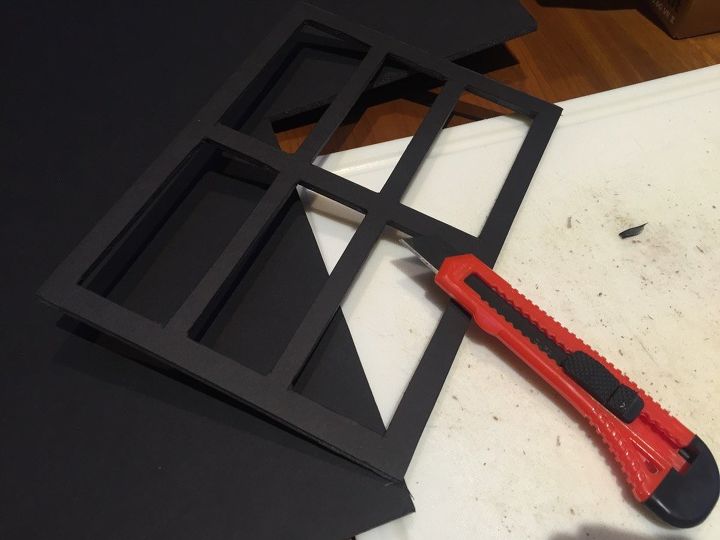
I drew and painted the window “glass” in light gray, using Frog tape to keep the light color inside the lines, and a sponge roller to obtain a smooth surface.
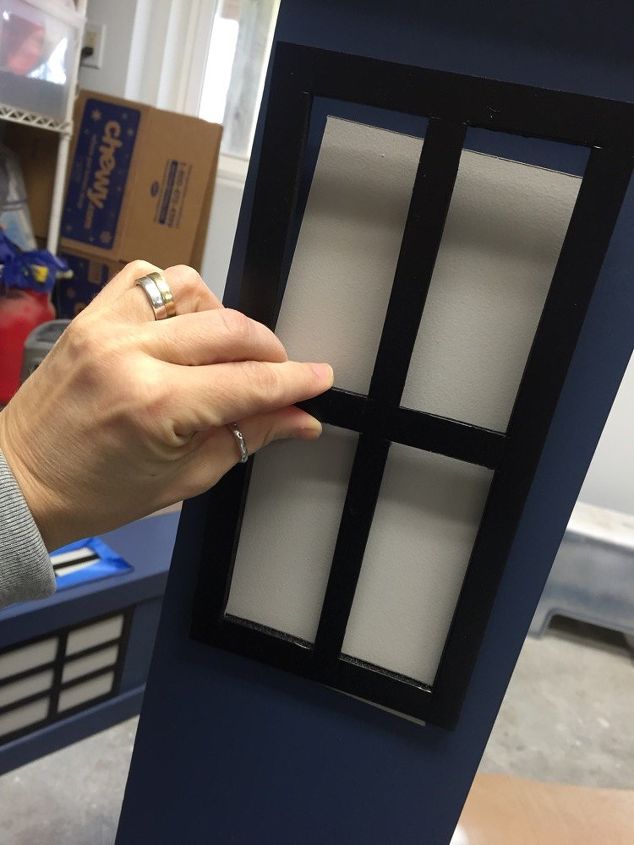
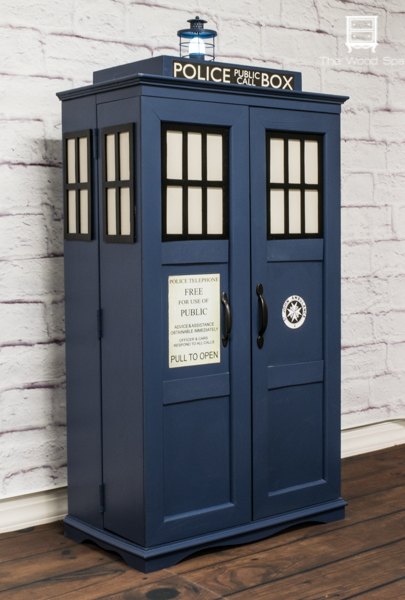
After all was painted and dry, I glued the window frames to the doors and sides, and the tray (upside down) to the top of the cabinet.
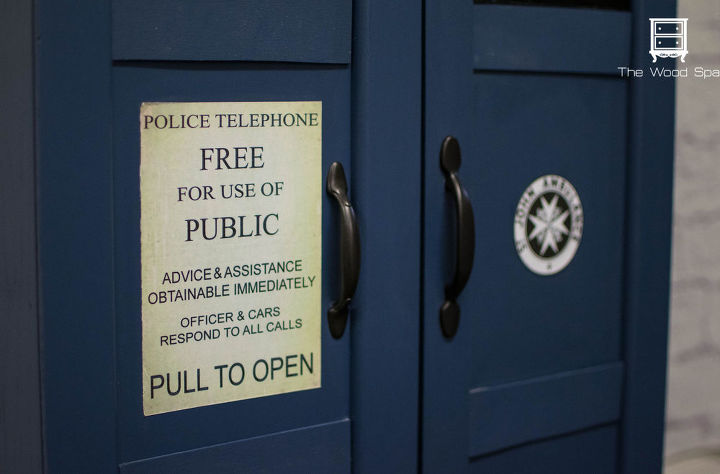
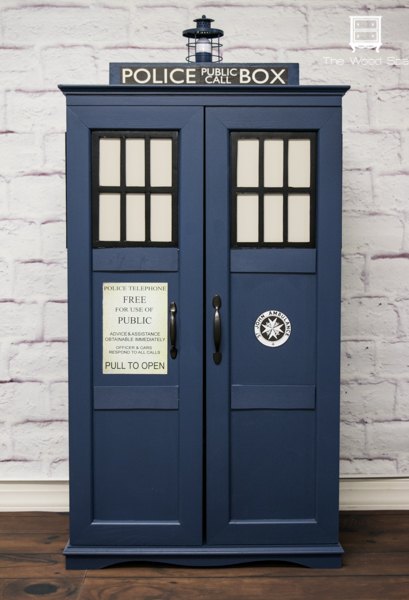
Before putting the cabinet together, I drilled the holes for the new handles and installed them (notice they go in different places!)
I used the same color on the inside of the cabinet and shelves.
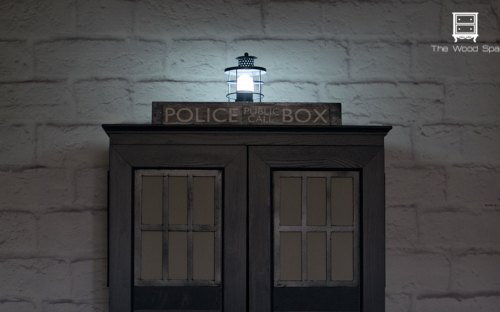
I attached the base of the light to the top using a 3M no-damage hanging strip.
Part 2 – Window frames, Top, and Light.
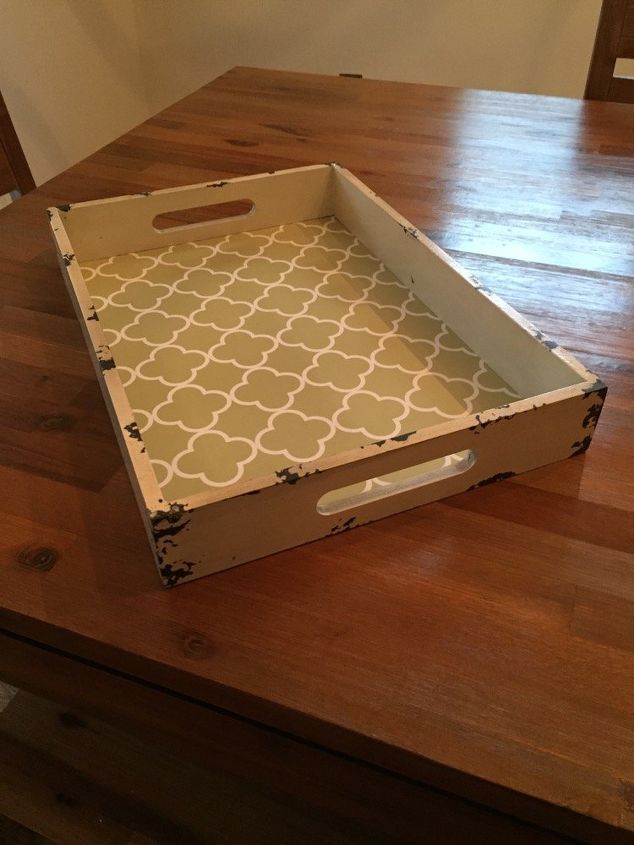
For the “box” above the cabinet, I found a rectangular wood tray at Michaels, and used the same black foamboard to fill in the handles and make a smooth surface on all four sides.
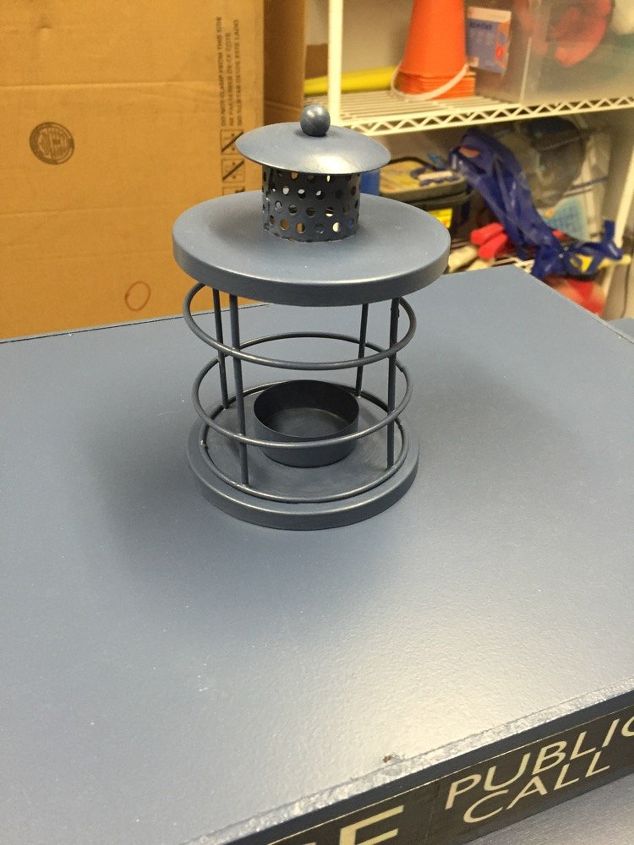
The little metal frame on the top light was a candle lantern I bought from an online store.
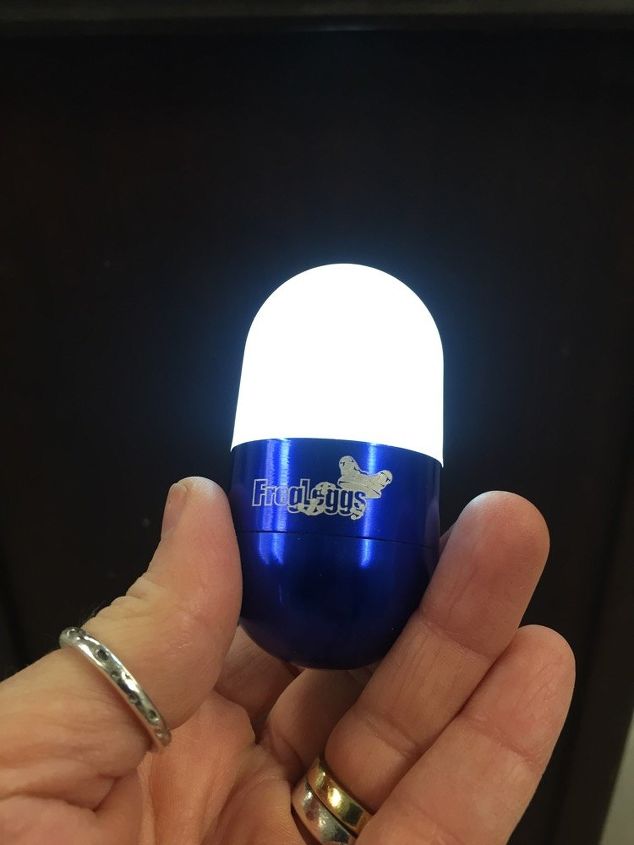
The light inside the candle lantern is a cheap pocket flashlight I found at Lowes.
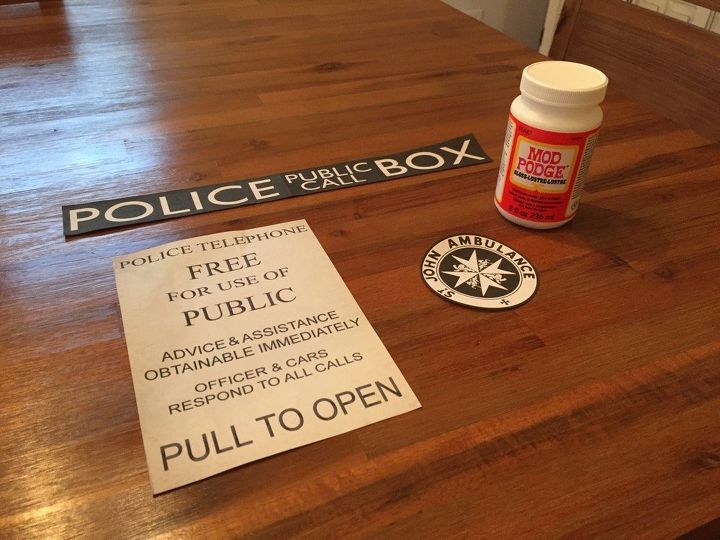
All signs you see on the doors and top were printed out of the Internet. Just google them and you’ll find dozens of options in all different sizes.
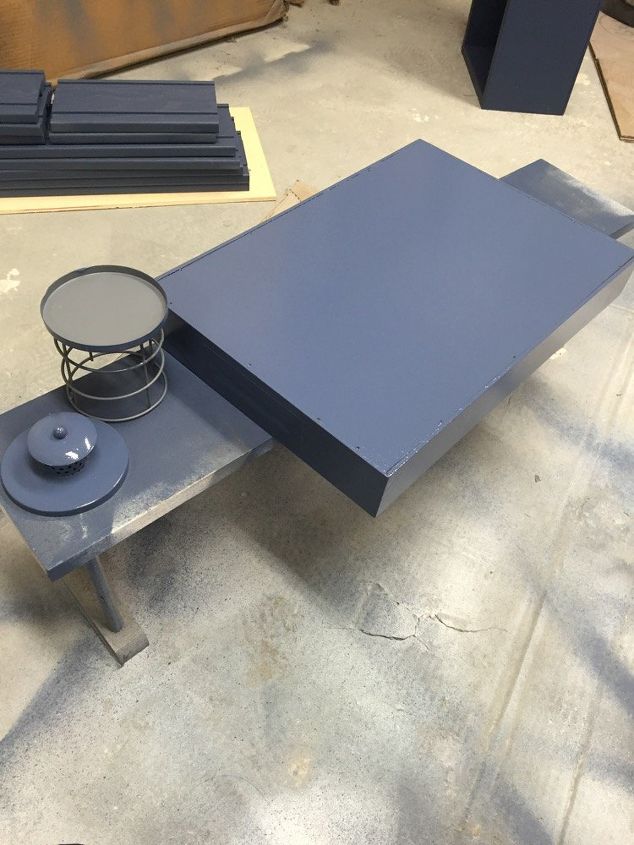
I painted all pieces in the same blue paint as the cabinet (Valspar Indigo Streamer).

I hope this tutorial was helpful! Let me know if you have any questions.
Want more details about this and other DIY projects? Check out my blog post!
Comments
Join the conversation
3 of 80 comments
-
Oh my GOSH! My sister is a big Dr. Who fan and she has a huge book collection. Wonder how multiple Tardis would look in the "library"...Must find out! This is just too lovely. Can't wait to make these!! Thanks so much for the share. You did a wonderful job!
-
The Doctor is IN!!


Frequently asked questions
Have a question about this project?
What kind of cabinet is this? I cannot find one anywhere with the shelves in the doors like that.