


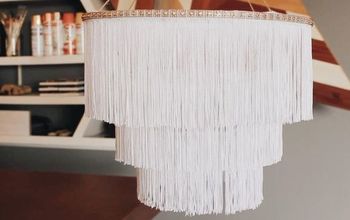
DIY Multi-Bulb Chandelier
$250
2 Days
Medium
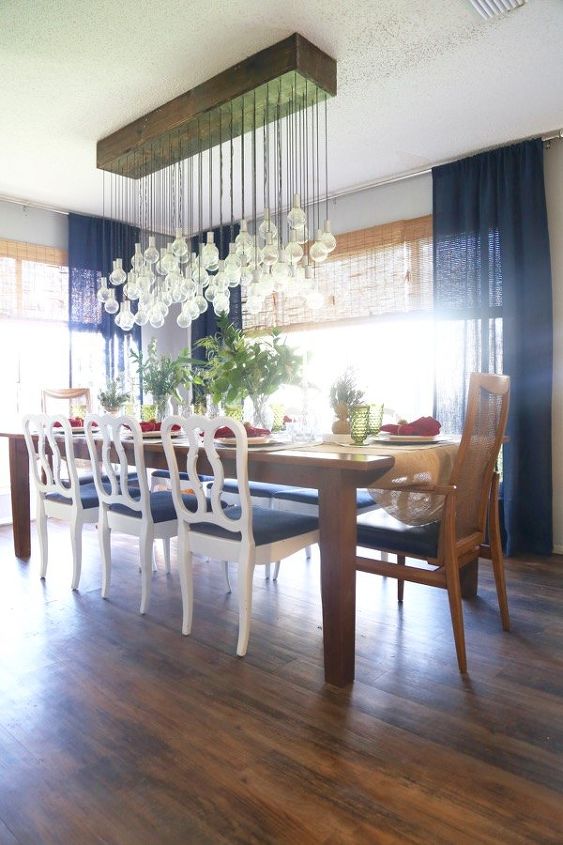
This project is my absolute favorite thing my husband and I have ever created! It's the absolute focal point of our entire downstairs, and it never fails that someone asks about it every time they come to our house!
It's much simpler to create than it may look, and we created it from absolutely nothing! The full tutorial is quite involved, so I'll give the highlights here, but you can click over to my blog to see all of the details.
It's much simpler to create than it may look, and we created it from absolutely nothing! The full tutorial is quite involved, so I'll give the highlights here, but you can click over to my blog to see all of the details.
Let's get to the explanation.
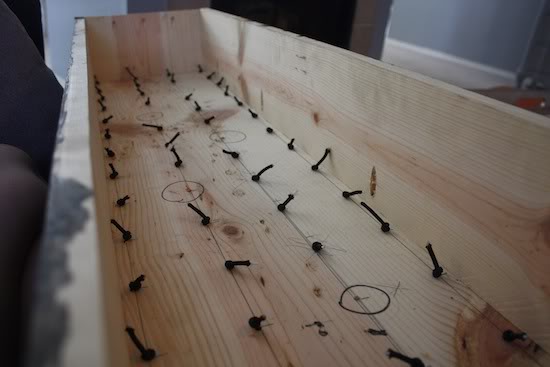
We drilled holes in the light box for where each bulb would go, and added top that was similar to our electrical wire to each hole with a non-working bulb. The ropes are various lengths, to add to the random look of the fixture (to see all the details of how we determined lengths and what we used, see the full post).
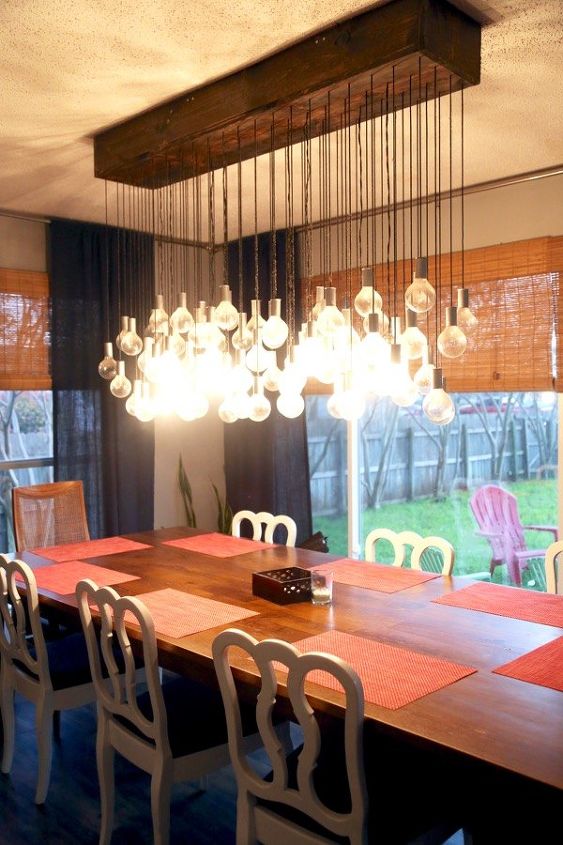
UPDATED: After lots of requests for a photo of the fixture lit up, here's one I took this evening! It's hard to really capture how it looks lit up in a photo, but this is a pretty good example. :)

Want more details about this and other DIY projects? Check out my blog post!
Comments
Join the conversation
3 of 105 comments
-
I think it would be fabulous is you painted the non-working bulbs with mercury glass paint.
-
This project has to be one of the best decor ideas EVER on Hometalk! It’s sophisticated, modern (yet not overly modern that it wouldn’t suit a more traditional interior), creative, unique and SO stylish!! You must be so very proud of your idea and I congratulate you and your husband. Well done!!!


Frequently asked questions
Have a question about this project?
How did you wire it?
It's so gorgeous. Great job.
what happens when the winds blows in the window?