Squeaky Staircase

Iamfarkie96
by Iamfarkie96
I just puchased a home with a very squeaky wooden staircase. There is no access to the underside and my guess is they used nails instead of screws to connect the pieces. Is there any sightly way to remedy this? I don't intend to cover the stairs with carpet and would really prefer this to be a DIY project as I am somewhat handy with tools.
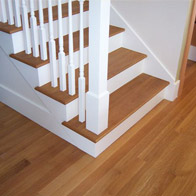
These are not my stairs but are very similiar in both material and look.
  14 answers
  • KMS Woodworks KMS Woodworks on Jun 07, 2013
    can you see "deflection" from the riser as the center of the tread is stepped on? ( a gap along the bottom of the riser). Sometimes a simple shim can fix those. The next best thing would be to install some screws in recessed hole that are then "plugged" with native wood grain plugs, (face grain oak) as opposed to end grain dowel type. This can work well for a few treads...if every step is squeaky then it might make more sense to open up the back side from the an adjoining room or hall...with access to all of the steps a more seamless repair could be made...then you repair your access location or convert it into some usable space with removable panel / door etc. I use the "dead space" under my stairs for storing paints and such. Since we do not have a garage and my basement shop is not heated full time. this provides proper freeze protection for these materials.
  • The best fix is from under the stairs if you have access to them. Normally on older stairs they used small blocks of wood cut in quarters and glued them across the risers and bottom of the stair tread. Over time the glue fails and wood shrinks breaking the bond thus allowing the stairs to move up and down when you walk on them. This results in the wood rubbing causing the squeak. If you have access you can simply as KMS suggested install tiny shims with a good quality glue to hold them in place. Or simply re-glue the angle blocks back into position. Check out this post done several months ago. Down near the bottom of the post is some sketches and repair ideas that may help you out. http://www.hometalk.com/diy/floors-ceilings/q-stair-treads-risers-separated-no-access-to-underside-1280445
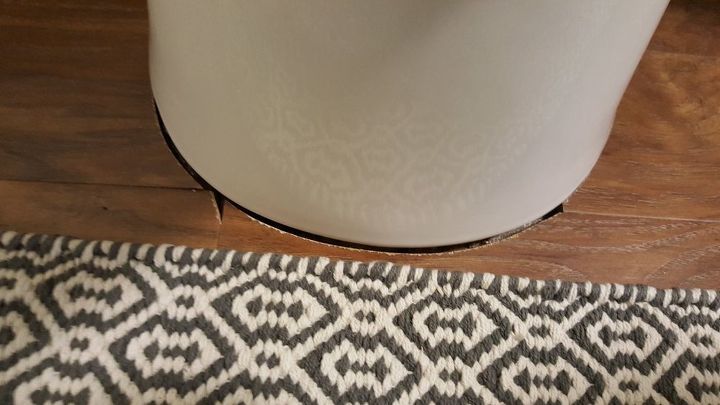
    Stair treads/risers separated, no access to underside
  • Iamfarkie96 Iamfarkie96 on Jun 07, 2013
    There is zero access to the underside and they mirror the steps down to the basement so it's a no go for storage either. I don't see any noticeable gaps and I'm not really up for tearing out the sheetrock that is under them now. So the screw idea is probably best. Where on the stairs do these go? Do either of you have a schematic I could reference? I think I can kind of tell from where the nails are but how many screws do I use and how should the spacing work? Thanks for you help!!!
  • Removal of the drywall below the stairs is far easier then drilling into the steps in a hope to stop the squeaks. The very design of the step does not allow enough wood to support a hole and screw. The result can weaken the step. In addition you will then need to put in plugs, sand, and refinish the steps. For an experienced wood worker this may be a easy task, but for the average homeowner, you may find yourself doing more harm then good and having a much harder time then you think. Drywall removal and replacement is really easy, Its low cost and is easy to finish. Much easier then the top of the stair method. If you checked the post that I suggested one of the responses I had shows how a stair is constructed so you get a better idea on how they are made, thus the method of repair that I suggest.
  • Spheramid Enterprises Spheramid Enterprises on Jun 08, 2013
    Find some slight cracks or gaps and dust in some talcum powder. Use a paint brush to force it in the gaps.
  • Spheramid Enterprises Spheramid Enterprises on Jun 08, 2013
    A few well placed and sunk finish nails can also fix the issue. First you have to zero in on the area.
  • Positive Solutions Inc. Positive Solutions Inc. on Jun 08, 2013
    You need TRIM SCREWS they have a sq. head and the head is small, then get mimwax wood filler (putty) that matches your flooring and screw the floor down, if the flooring isn't moving then its a pre-fab frame that used to have carpet and you have to open a access to the under side of stairs!?!?!?
  • Thanks everyone for the ideas. I'm posting this under my other profile because my other one is locking me out. I will try the trim screws. Talcum powder didn't work (tried that a month ago).
  • KMS Woodworks KMS Woodworks on Jun 08, 2013
    The talc powder trick is used in strip flooring squeaks...it "lubricates" the wood to wood movement. I'm with woodbridge...for a true a complete fix...attack from behind. Removing the sheet rock from the basement stairs is easy...to make this work even easier renting or buying an articulating ladder will allow you to work over the lower stairs. With the ceiling pulled you can have an assistant walk on the stairs with you underneath to pin point the exact locations... this will help you target just the trouble areas.
  • Jennifer, please understand that screws and powders are only a quick fix and unless your really experienced in wood working you may make a simple repair much worse. The way a stair is constructed is simple. If screws would have worked to keep them tight, they would have been constructed in this fashion when new. Simple blocking, and wedges are all that are required to keep a stair tight and quite. Some glue and some shims from behind the steps will make the stairs last another 20 plus years if it ever does need work again. Risking splitting the steps and dealing with caulks, and fillers will only be a short order repair.
  • Jill Jill on Jun 08, 2013
    I was in the same position a few years back Jennifer. My dad told me I should go from underneath but I just didn't feel comfortable doing that. Needless to say, two years later I had to hire someone to come in a fix the mess I had tried to do myself. It cost me a fortune because they had to rebuild sections of the staircase where the treads split and cracked over time. That meant taking the railing out and reinstalling it, besides having the wall cut into. In the end, the professional did a great job, and also built me some storage space with doors and little drawers under the stairs. I should have just had him do it from the start as it would have been a lot cheaper in the long run.
  • Iamfarkie96 Iamfarkie96 on Jun 08, 2013
    Jill, thank you for the reminder that sometimes DIY is not always a savings. I'm starting to think I'm in over my head on this one. Thanks EVERYONE for your help on this. Think I'll call a contractor.
  • Spheramid Enterprises Spheramid Enterprises on Jun 09, 2013
    It is best to open the underside, bec. I see some here assuming that these are "drop in" premade stairs, and they very well could be site made with 2x material and applied treads and risers. On many jobs I have been on, the temp. framing stage stairs are simply covered with the finish materials, not too many are shop made and use wedges or glue block assembly, stair shops here are largely non existent, and few if any site carps even know how to properly construct a stair case. Once you know what type of construction ( if site made, there will be no glue blocks or wedged housings to shim tight) you can attack at will with the best method, screws or nails may be the only option.
  • Jeanette S Jeanette S on Jun 09, 2013
    Hey, what's wrong with squeaking stairs? At least no one can sneak up on you! HA! (Actually, I have no idea how to fix something like this so it would call for a professional!)