


Repurposed Antique Bakers Rack
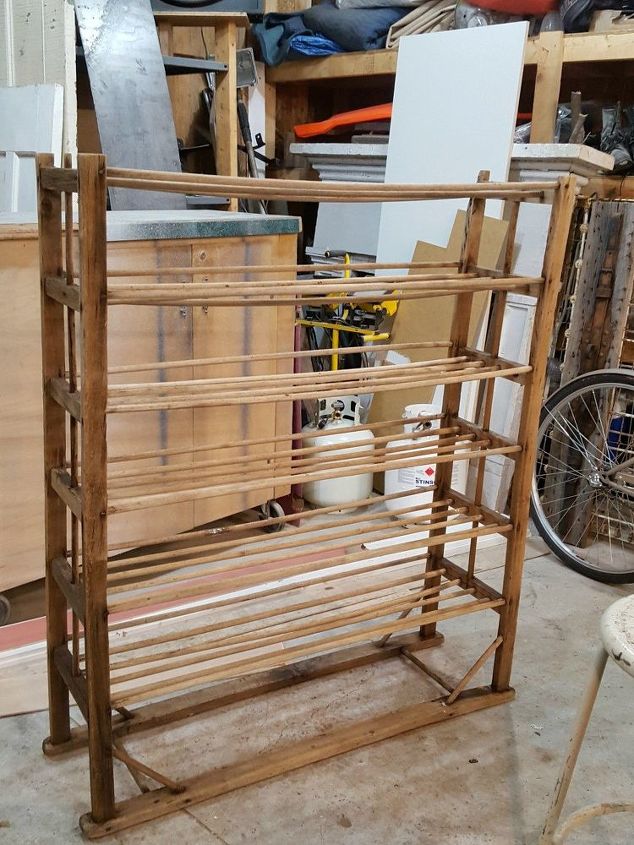
I bought this antique baker's rack a few months back... I bought it for our pantry, envisioned it beautifully organized with pantry type stuff on there, some fancy linens with beautiful ironstone dishes, some major farmhouse deliciousness... logical right? Well as things would have it around here, logic went right out the window!
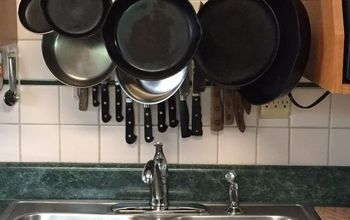
To put it mildly it was a challenge to keep it tidy... what ended up happening was someone (not naming names) would just toss random pots & pans and just pan tops there! Somehow even plastic containers ended up on the baker's rack! I mean seriously... it's an ANTIQUE baker's rack for goodness sakes. I even found a bag of forgotten apples there one time, NOT pretty! Do I sound bitter? I was a little at first maybe, but sometimes most times things just work the way they were supposed to, yay for happy accidents!
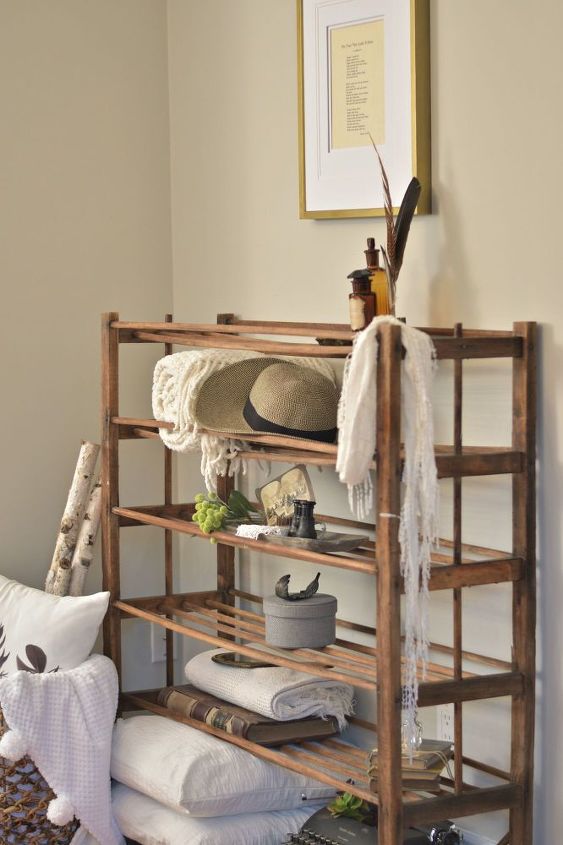
I realized that keeping the rack in the pantry was a loosing battle and it bummed me out, until I decided to put it in our master bedroom! Off my rocker? Maybe! I'll let you decide.
Our master bedroom has been an ongoing project... it's been in the works for over a year now, you can check out the plan post here ~~> http://www.vinyetetc.ca/master-bedroom-retreat-the-plan/... we are almost done, after this project I have one large project left to do, then we will be doing the big reveal, I can't wait!!!!
Moving the baker's rack upstairs to the bedroom lit a fire under my butt to finally refinish it, I'm really happy with how it turned out and I'm thrilled to be sharing this repurpose with you.
To put it mildly it was a challenge to keep it tidy... what ended up happening was someone (not naming names) would just toss random pots & pans and just pan tops there! Somehow even plastic containers ended up on the baker's rack! I mean seriously... it's an ANTIQUE baker's rack for goodness sakes. I even found a bag of forgotten apples there one time, NOT pretty! Do I sound bitter? I was a little at first maybe, but sometimes most times things just work the way they were supposed to, yay for happy accidents!
I realized that keeping the rack in the pantry was a loosing battle and it bummed me out, until I decided to put it in our master bedroom! Off my rocker? Maybe! I'll let you decide.
Our master bedroom has been an ongoing project... it's been in the works for over a year now, you can check out the plan post here ~~> http://www.vinyetetc.ca/master-bedroom-retreat-the-plan/... we are almost done, after this project I have one large project left to do, then we will be doing the big reveal, I can't wait!!!!
Moving the baker's rack upstairs to the bedroom lit a fire under my butt to finally refinish it, I'm really happy with how it turned out and I'm thrilled to be sharing this repurpose with you.
Steps to refinish an antique bakers rack.
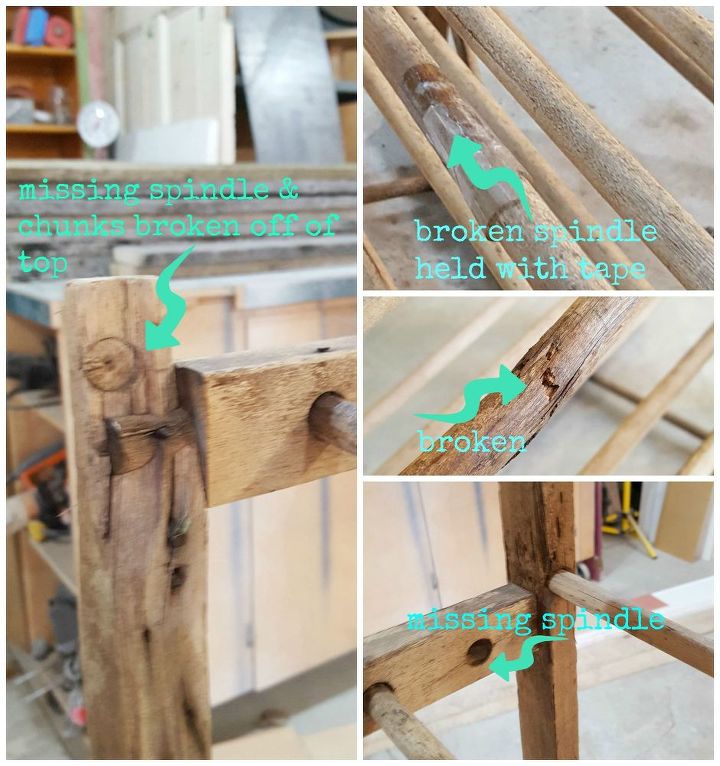
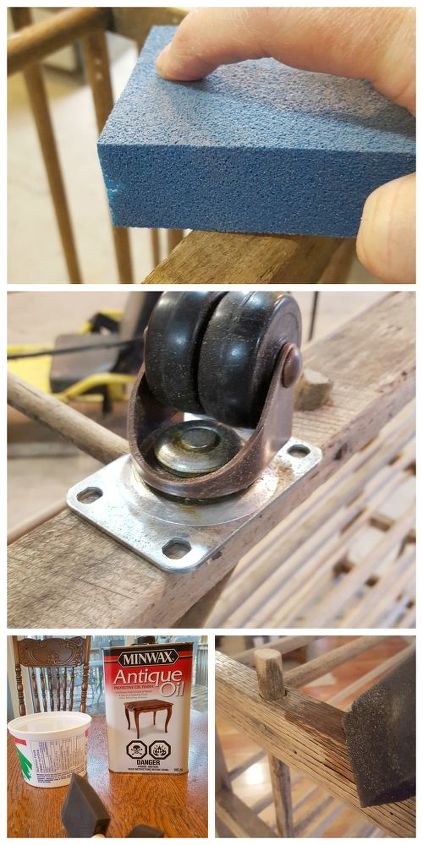
2. Assess the entire rack, this baker's rack had a few spindles that were broken and the top section was a mess, there were no castors with this rack either, so I decided to make the whole thing shorter by one level and use the good spindles as replacements for the broken ones.
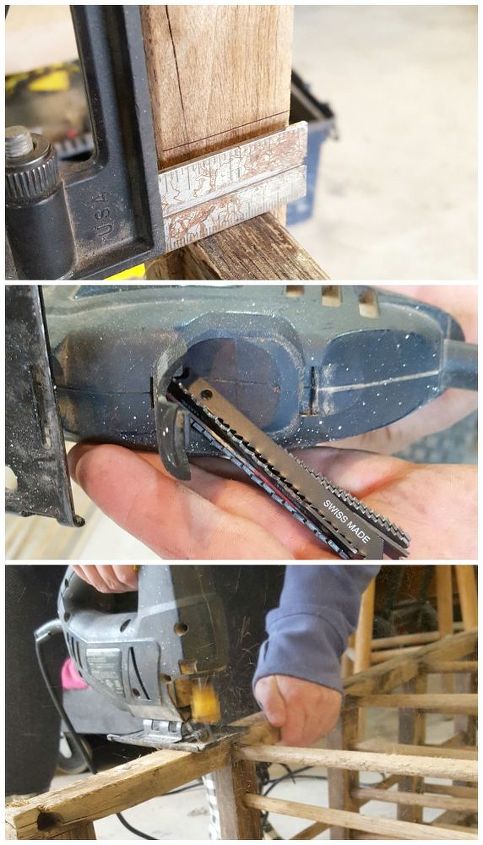
3. It's always a little hard for me to cut into an antique piece, but... with all of the damage, I knew I had to make this farmhouse baker's rack sturdy. Once I decided to cut the top level off, I went to the next level and measured from there. I used the second level end brace and measured up an inch in each corner. Make sure your jig saw has sharp blades then cut where you marked.
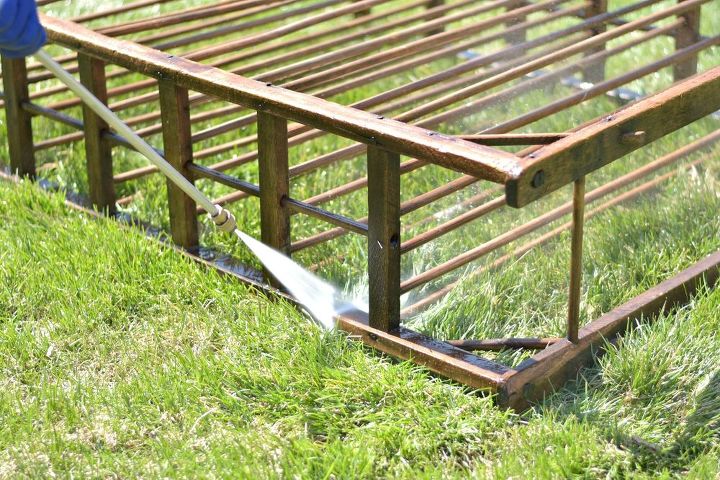
3. Once all of the cutting is done, use a foam sanding pad and go over every inch... washing it with the power washer will raise all of the wood grain, sanding will make it smooth again. It's not as bad as it sounds... a fast sand with a foam sanding pad will do the trick. Add your castors... I was so in love with these castors that I didn't even mind that the metal plate hung over a bit... you can't see that now and really it's not a full on bakers rack that needs heavy duty wheels... if I do someday decide that this needs to be in a pantry, I will change out the wheels. Once the wheels were installed, I used an antiquing oil. I used Minwax antique oil, tung oil would work great too!
That's about it, pretty simple actually... I let it dry for 48 hours, I wanted to make sure no oil residue would come off on any of the goodies I was about to put on this rack. Now on to the fun part, the reveal.
Pop by the blog to see all of the baker's rack goodness and a ton of other farmhouse projects! http://www.vinyetetc.ca/

Want more details about this and other DIY projects? Check out my blog post!
Comments
Join the conversation
4 of 8 comments
-
Gorgeous piece!
-
Lovely piece, and great tutorial - thanks!


Frequently asked questions
Have a question about this project?