Painting those ugly kitchen cabinets!

by
Roe Stevens
+18
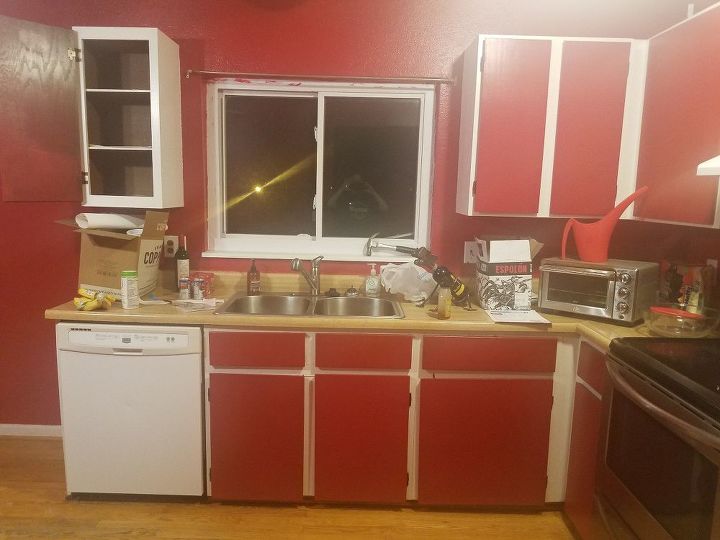
My cabinets r peeling at the bottom, pressed board with some kind of paper on them. They look awful. What can I do to them??

At the bottom the paper like stuff is peeling, curling!
16 answers
-
I had a similar issue in our former home's bathroom. My hubby attached a thin 'border' made out of wood to the bottom, then I painted the whole thing (door and the new 'trim'). You'd never know it wasn't made that way. And since the part he added was real wood, it lasted much longer.
 CK
on Jun 07, 2016
CK
on Jun 07, 2016
-
Regardless of any repair, this is going to be a continuing problem unless the cabinets are raised off the floor. Will it be too disruptive to raise them - even by as little as an inch? Otherwise, you could try inserting a much thinner (and non-corrosive) metal strip under each side of each cabinet, which would at least have the benefit of stopping their immediate contact with the floor which, in a kitchen, is bound to be washed on a regular basis.
 Mother
on Jun 07, 2016
Mother
on Jun 07, 2016
-
Hi Roe! Are you looking to just repair this peeling paper, or planning on painting over the cabinets? If you just want to repair, then you need to find the best adhesive- there are many on the market to choose from- that you can re-attach the paper edges. Then you need to seal them with a clear poly to protect them from re-peeling. If you are thinking of painting the cabinets anyway, then I would peel away the paper until that first groove in the panel to create a clean line. If the cabinets are pressed board, they will not have the same texture as the rest of the covered parts, so you will need to smooth that part out with some putty or calk. Then paint over everything. Good luck!
 Country Design Home
on Jun 07, 2016
Country Design Home
on Jun 07, 2016
-
I had the same idea as Connie from Mandan, we did the trim idea just as a decorative idea so it would be a good fix for you. Less expensive is good in my book unless you want to replace those doors. But trim and new paint would work. Don't forget to put a little wood putty to cover any areas where the trim doesn't sit flush so you will have an expert looking job well done. It is all in the little touches.
 Kathy Bitzan
on Jun 07, 2016
Kathy Bitzan
on Jun 07, 2016
-
My storage cabinet in the garage did that, I took the doors off gave it a light sanding and used self leveling (kitchen cabinet) paint and it came out pretty good.
 Patrice Paige
on Jun 07, 2016
Patrice Paige
on Jun 07, 2016
-
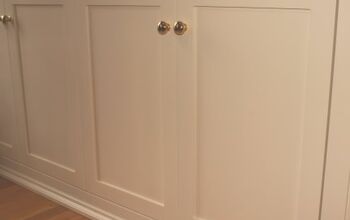
I would peel off as much as I could and add trim all around the edges and paint them to give them a shaker style look
 Karen
on Jun 07, 2016
Karen
on Jun 07, 2016
-
The kind of doors you have are not solid wood but one way to fix the problem is to add some wood trim or even plastic trim found at your local home improvement store. The trim can be flat or a decorative molding that way it will keep the edge of the doors from pealing up. Make sure that you use a panel adhesive with either finish nails or screws. place the adhesive on the wood and from the inside of the door use the nail or screw to make sure they stay affixed. I would trim the whole door on all of them and cover the cut detail up then paint the doors. Hope this helps let me know if you need more info. Teresa
 Teresa
on Jun 07, 2016
Teresa
on Jun 07, 2016
-
I did as Karen (Canada) suggested with the trim. Here's how I did it. Sand off the peeling veneer, fill in the indented design on the corners (either plastic wood or polyfilla; only corner as trim will probably cover the grooves on sides and top of doors), sand these areas you've filled. I purchased 1/8" mdf (you could use 1/4" but the 1/8" is approx. the same as professional profile/design) by the sheet and had the store rip/cut 2" strips. Measure your door(s) and cut to fit (you can use your own little saw and mitre box. Put a few pieces of the mdf or a piece of wood, eg. 4x1, in the mitre box to raise the mdf strip you are cutting.) I did but joints (not mitred corners). Glue them on with [I used] No More Nails and I used clamps and also, get this, the large bullnose paper clips. Buy a bunch at the Dollar store and use them along the strip you are gluing; works like a charm. Fits only though if you use 1/8" mdf. Sand the edges and use polyfilla to fill in any gaps on the edges. Don't forget to fill in the hole for the door knob if the trim is too close or covers the hole (fill it in from the back in that case) and sand. You will have to drill new ones, probably, before you paint. Prime and paint. Mine turned out great, not the best paint job, but the doors look like they were original and the 1/8" trim doesn't make them look homemade. I'd send a pic but I'm not tech smart! Good luck....hope you love it as much as I do mine!
 Janice
on Jun 07, 2016
Janice
on Jun 07, 2016
-
Meant to say....sand down each door, both sides and edges and wipe off excess. Do this before you glue on the trim. Also, the bullnose paperclips may fit if you use 1/4". These work well because you can us many of them on each strip of trim. You'll need at least 4-6 per strip to ensure it adheres evenly.
Janice
on Jun 07, 2016
-
If the inside of the panel is in good shape, you could remove the all the doors and flip them around so the plain side is facing outward and the damaged side is facing inward. I have seen this done when door style is outdated and changing to a plain door was more modern. I believe that person also added shaker style trim.
 M. Himef
on Jun 07, 2016
M. Himef
on Jun 07, 2016
-
They look hideous right! My problem also. Cannot afford new ones so like you, I have decided on painting them.
 DORLIS
on Jun 08, 2016
DORLIS
on Jun 08, 2016
-
Sanding won't work well. The pressed board has likely absorbed moisture and therefore the glue holding the 'wood' together has weakened. Trim is the best bet. Or replace the doors entirely.
 Lavonne
on Jun 08, 2016
Lavonne
on Jun 08, 2016
-
i had this happen and we sanded the bottom, then spread a thin layer of bondo sanded it smooth and painted them gray. that was 3 years ago and they still look great.
 Julie
on Jun 08, 2016
Julie
on Jun 08, 2016
-
I sanded the bad part of my old cabinets completely off. I was able to do this because there was enough overlap that shortening the door by 1/4 inch was not noticeable. Also, it was a plain door, with no trim or molding to point out the ever so slightly shorter doors. If they are very bad, I would go to the home improvement store with one door, and see about getting them to cut new doors for you (most stores cut to size for free). With a little time and effort, you could come up with a complete redo, for very little money. I saw a recent redo that was done with one single sheet of plywood and about $20 worth of trim... looked phenomenal.
 GoddessOdd
on Jun 08, 2016
GoddessOdd
on Jun 08, 2016
-
They all had good ideas!!!
 Roe Stevens
on Jun 09, 2016
Roe Stevens
on Jun 09, 2016
-
Good luck. When I sanded mine, I sort of beveled the edge a bit while I was working to keep from making the problem worse instead of better, in other words, sanding the worst part on the edges off, then evening up the entire length of the door. When I had it smoothed off I put several coats of Killz, or any good sealant, to make sure the bottom was completely waterproof (water was the start of the problem) painted them all with oil based, high gloss paint and they looked great for years. Just be careful not to take too much off. I put a mark on the inside of the door, to show where it touched the bottom of the cabinet. If you prefer, you can sand and then glue a strip of the laminate veneer to the bottom, but I couldn't get a good match.
GoddessOdd
on Jun 09, 2016
Sign Up to Answer