


DIY Goldfish in a Bag Soaps
10 Materials
1 Hour
Medium
Learn how to make these DIY goldfish in a bag soaps for a fun addition to your bathroom or to give as party favors!
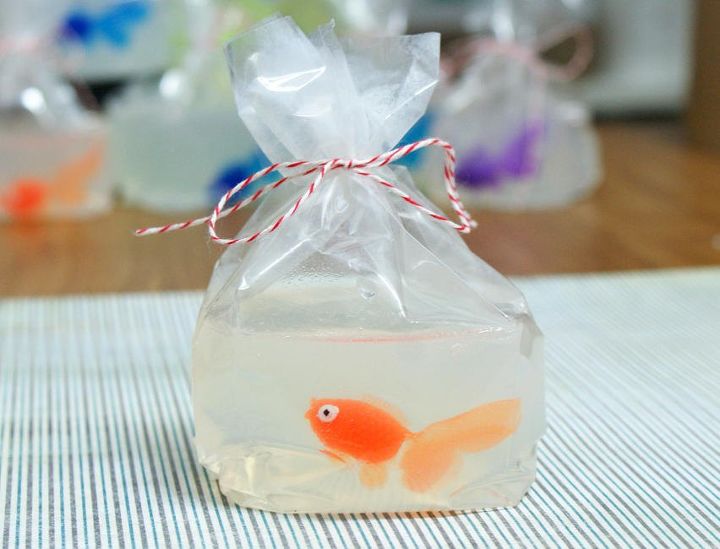
These DIY goldfish in a bag soaps are so cute and they look like a snap to make. However, as I discovered when I made these the first time, they are a little trickier than I had anticipated and it took me a few tries to get them perfect.
This project yields one goldfish in a bag soap.
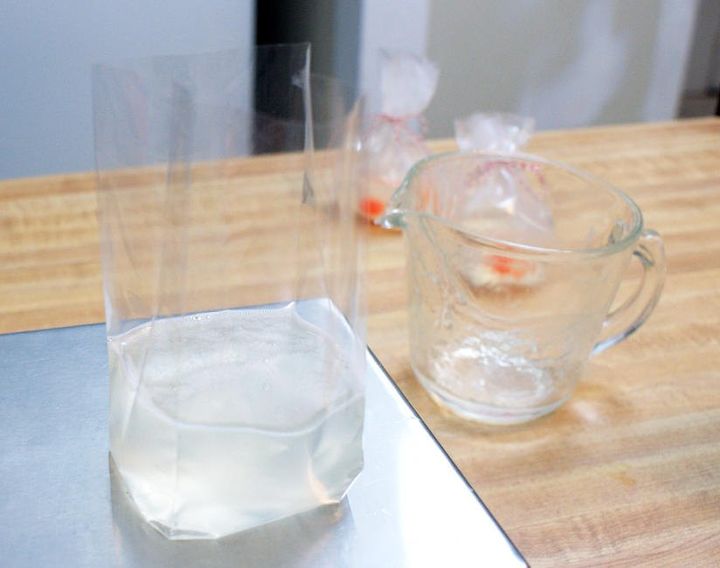
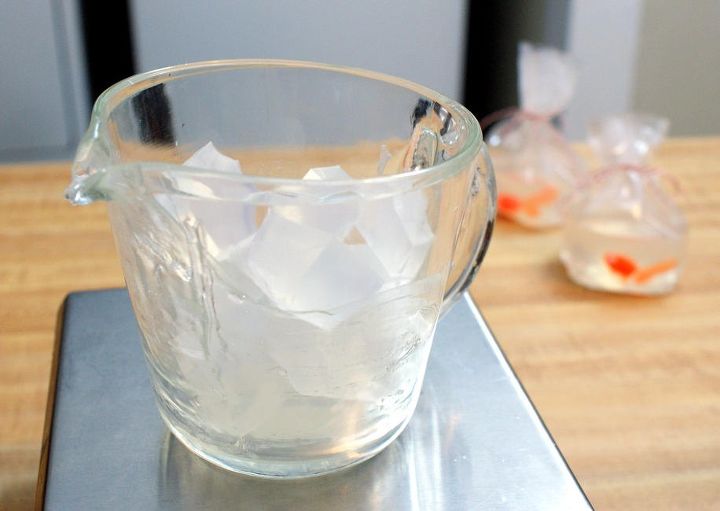
Allow the soap to cool slightly, until a think layer of soap starts to solidify on top of the soap. Mix the soap again then slowly pour the soap into a bag. Be careful to pour the soap directly into the center of the bag so it doesn't hit the sides going down. You may want to stop partially through the process to readjust the bag. If you don't have a steady hand, place the bag in a dish that will hold the bag and still keep it slightly upright.
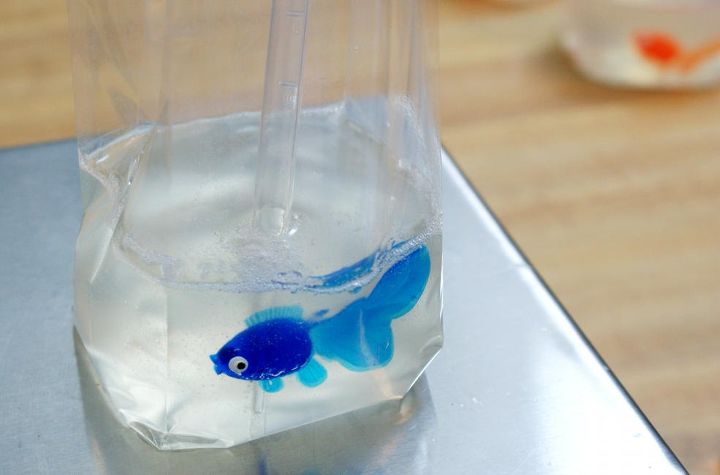
Place your goldfish in the bag and use a pipette or chop stick to press the fish in the desired position against the very front of the bag. Leave the pipette in the bag to hold the fish in place until the fish stays in place upon removing the pipette.
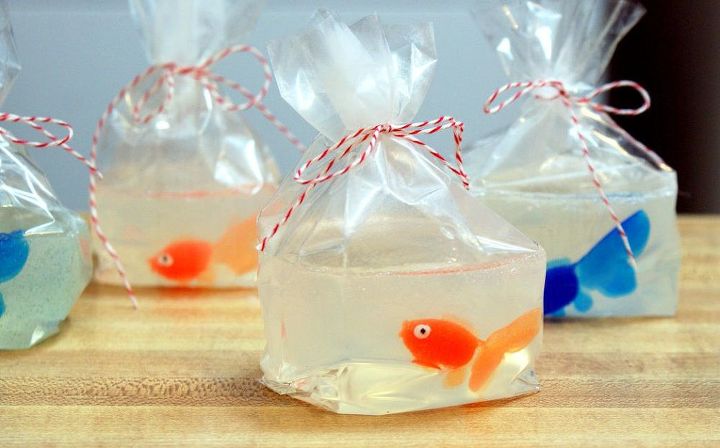
Mix it up. For "colored" water, add a pinch of superfine emerald green or Caribbean blue glitter when you add the fragrance. You can also substitute the fragrance oil for another of your choice, but be sure it has 0% vanilla and is clear, not yellow.
Resources for this project:
See all materials


Any price and availability information displayed on [relevant Amazon Site(s), as applicable] at the time of purchase will apply to the purchase of this product.
Hometalk may collect a small share of sales from the links on this page.More info

Want more details about this and other DIY projects? Check out my blog post!
Comments
Join the conversation
2 of 55 comments
-
I see it says vinyl goldfish......good. I cant think of meaner things people do, like using real goldfish in projects......glad you clarified it was vinyl goldfish
-
sounds like a good thing to do with my grand daughters when pandemic subsides


Frequently asked questions
Have a question about this project?
Any idea what the final cost comes out to be for each?
Where did you get the goldfish?
How many soaps does one order of the soap suspension make?