


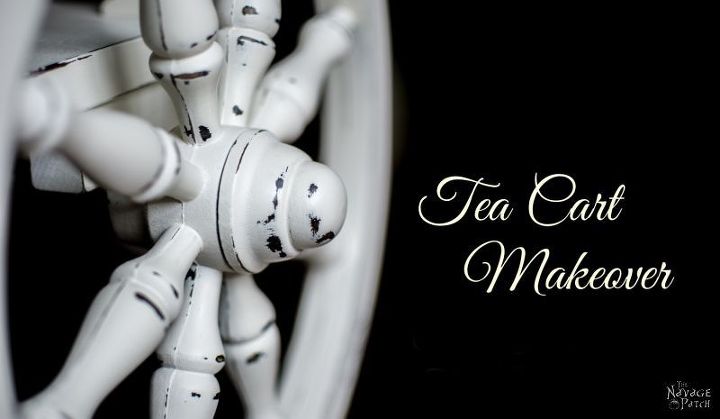
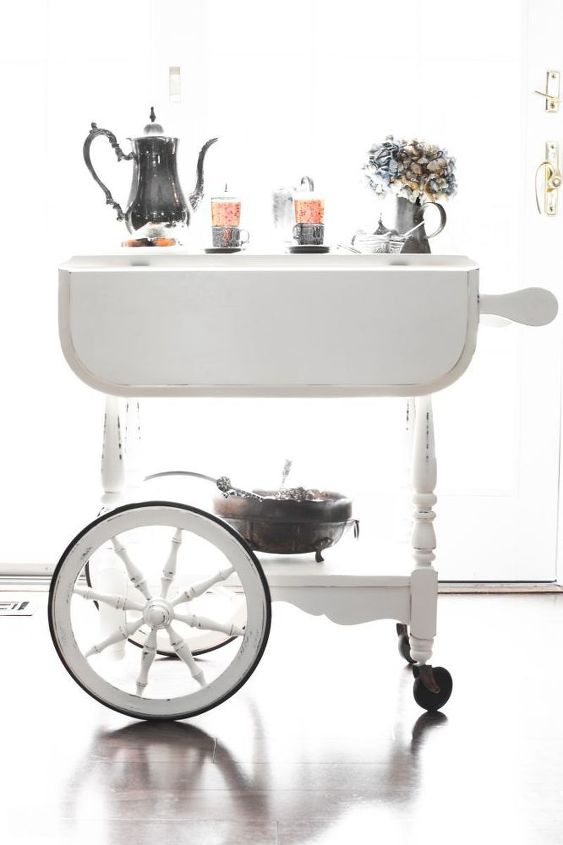
Tea Cart Makeover
Medium
We finally managed to finish the second area in our Big Backyard Makeover right before the summer kicked in full-force. But the rest of the areas will have to wait until early Fall, as they involve a lot of transplanting. Besides, Connecticut summers are perfect for paint projects, so I don’t want to miss the great weather for all the makeovers I have to tackle, such as this tea cart makeover I finished last weekend.
*Affiliate links used in this post*
*Affiliate links used in this post*
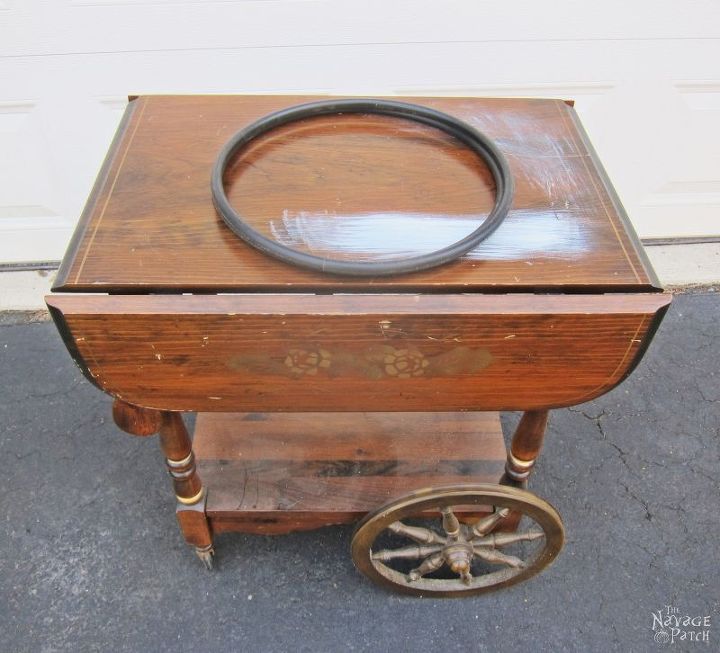
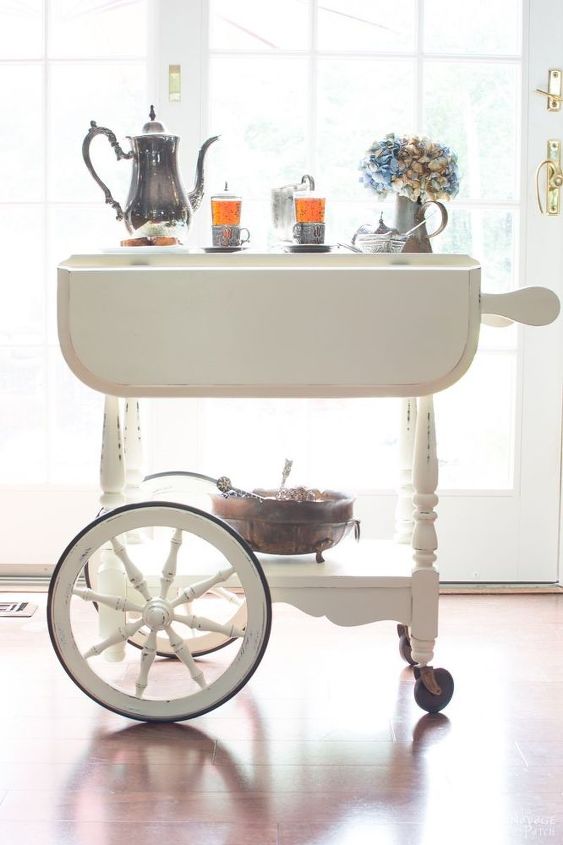
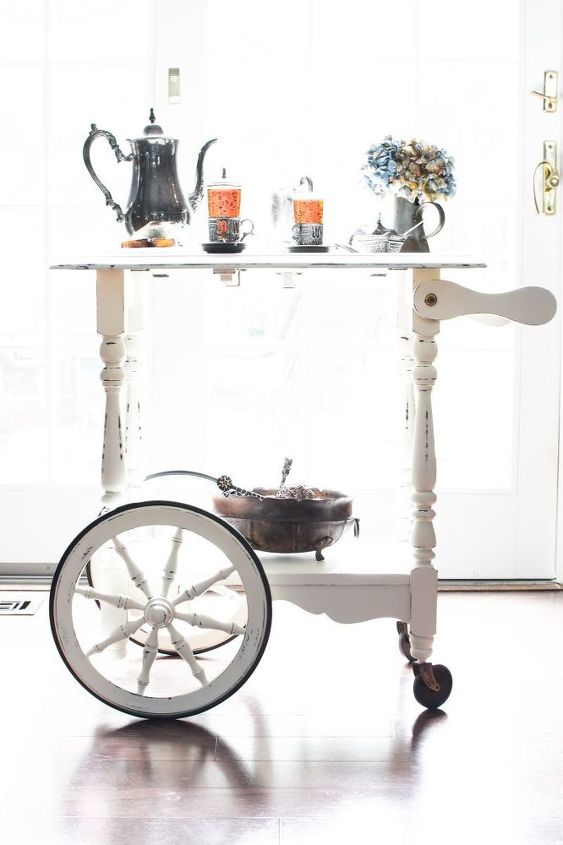
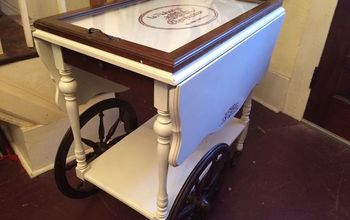
We bought this little tea cart two years ago at a tag sale for $20. It was in pretty good condition, with only a few scratches on the top. But it wasn’t anything special, made from just a cheap plywood and veneer, hence the bargain price.
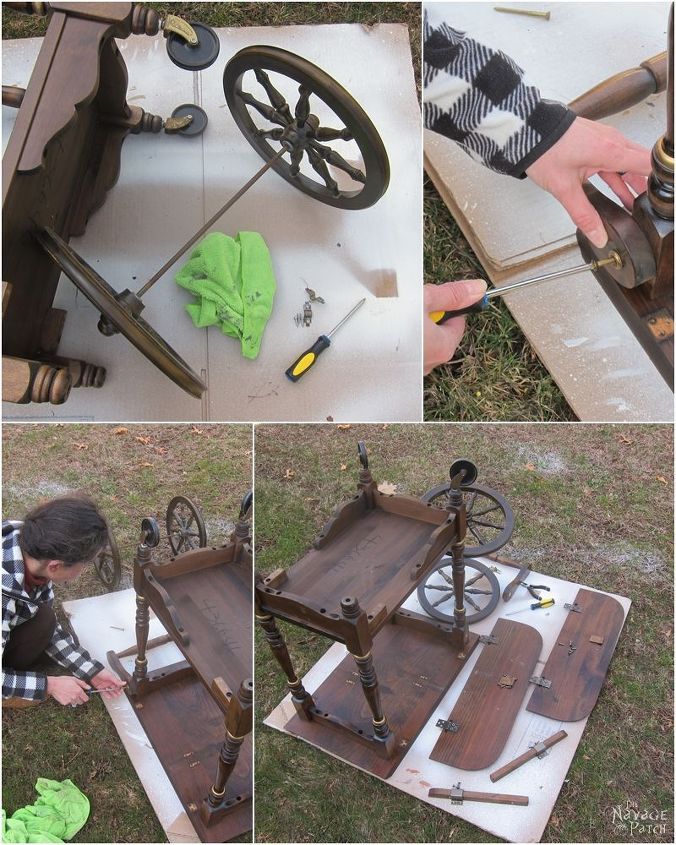
As it wasn’t made from real wood, instead of giving it to Greg as a project, I decided to paint it. To do so, first I took it all apart and cleaned each piece with a damp cheesecloth.
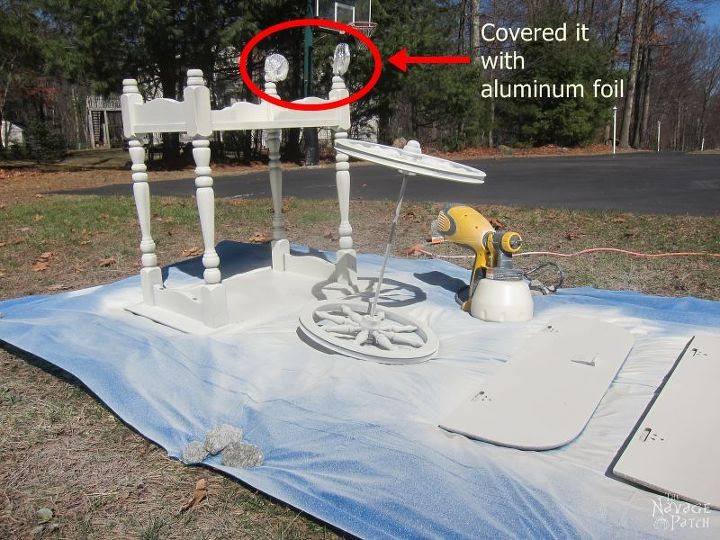
I prepared my homemade chalk paint modifying the recipe for spray painting. You can find both recipes, for spray painting and for brush painting, on our blog post.
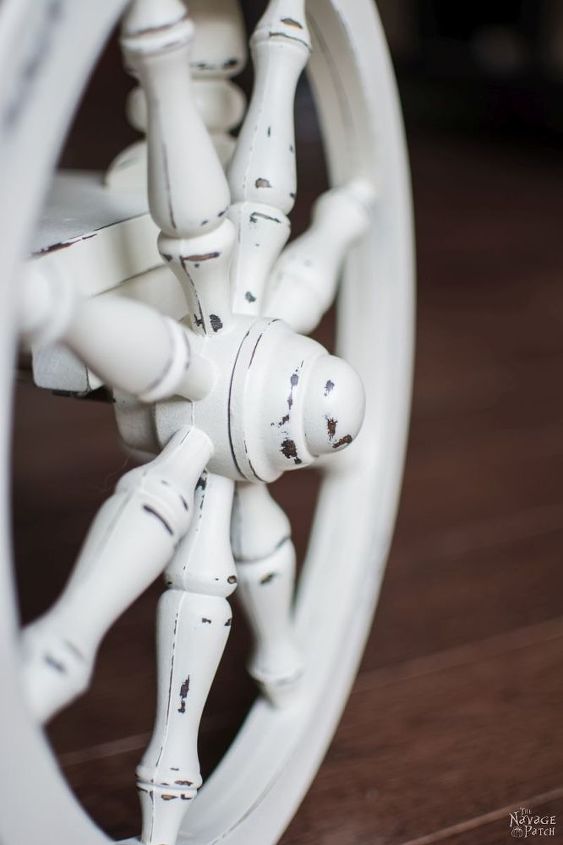
Next, I gave every piece a slight sanding with 320 grit sandpaper. That was so I would have a perfectly smooth surface all over. While I was at it, I also distressed a little.
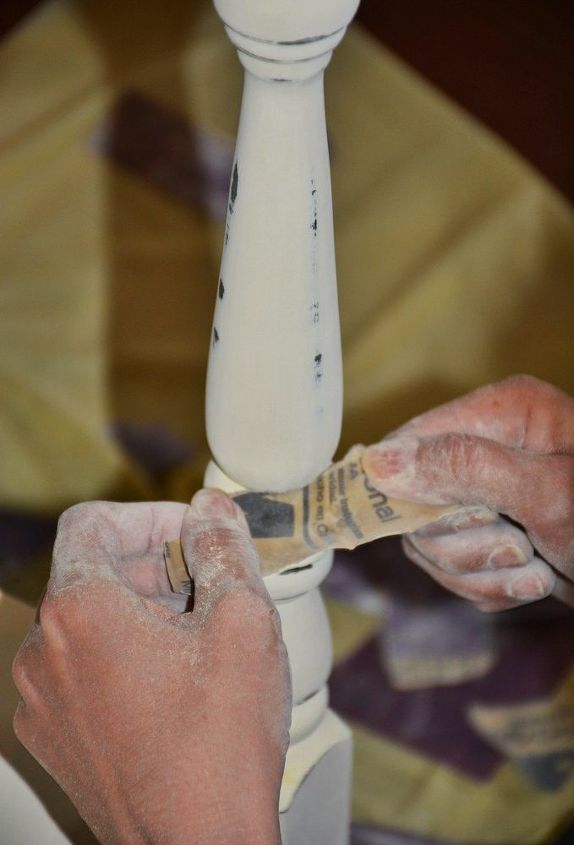
Once the sanding was done, I vacuumed the dust off of every piece and once again wiped the all the pieces with a damp cheesecloth.
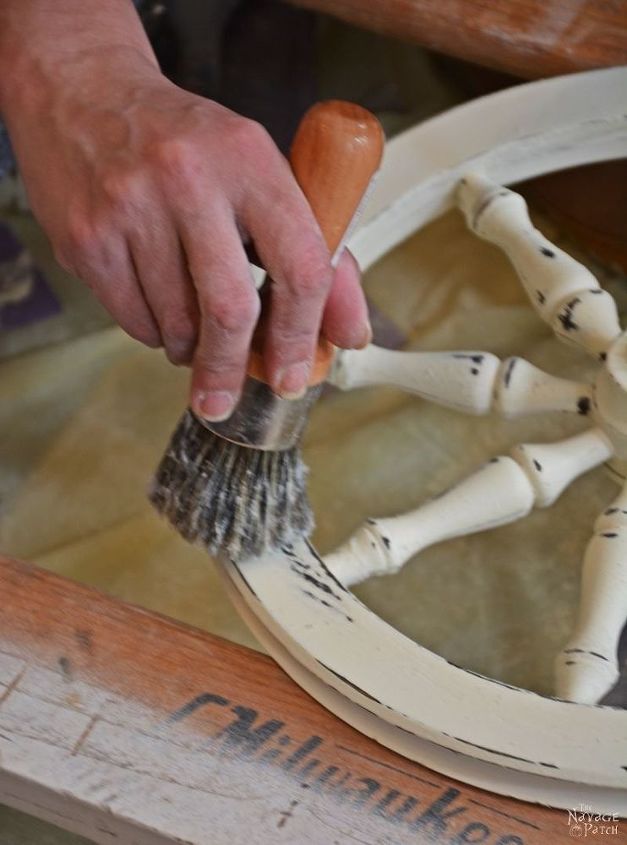
When working with Annie Sloan’s wax, I always work in sections. I brush some wax on, then I wipe the excess with a cheesecloth and buff it a little. Since I buff everything with an electric buffer at the end of the project, I don’t spend too much time to make it shine while waxing.
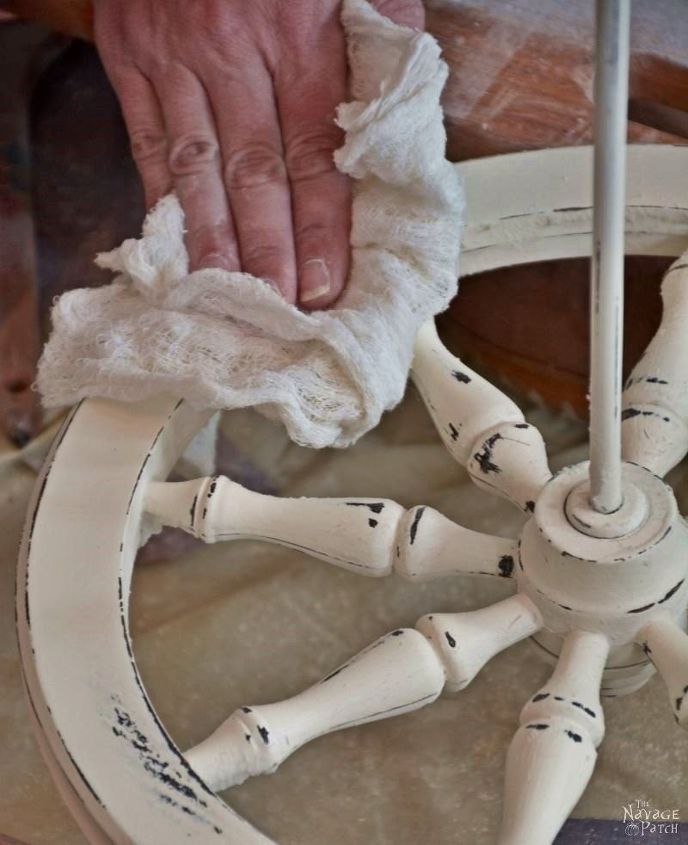
After I finished waxing, I grabbed my $5 tag sale buffer and buffed all the parts.

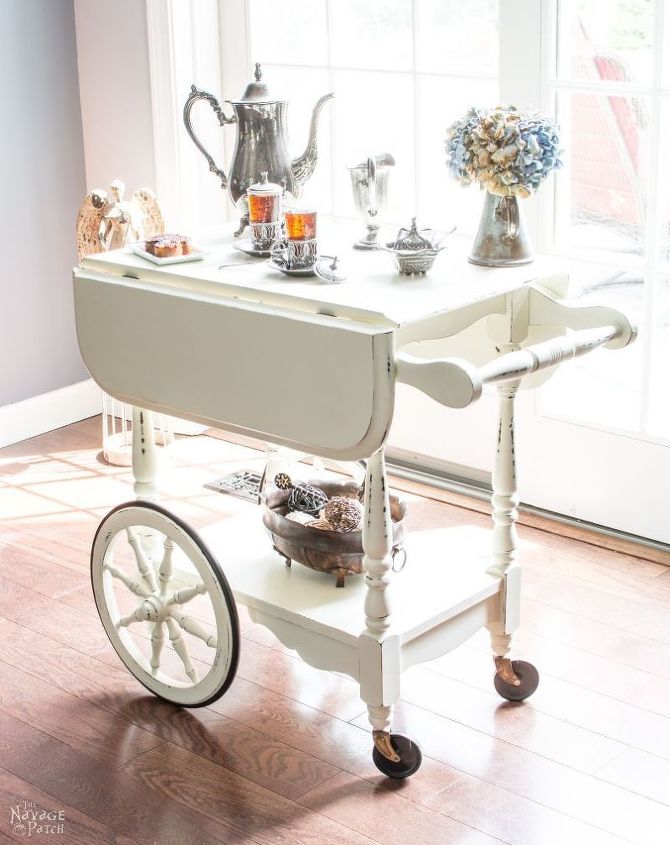
And as last step I reassembled the tea cart.
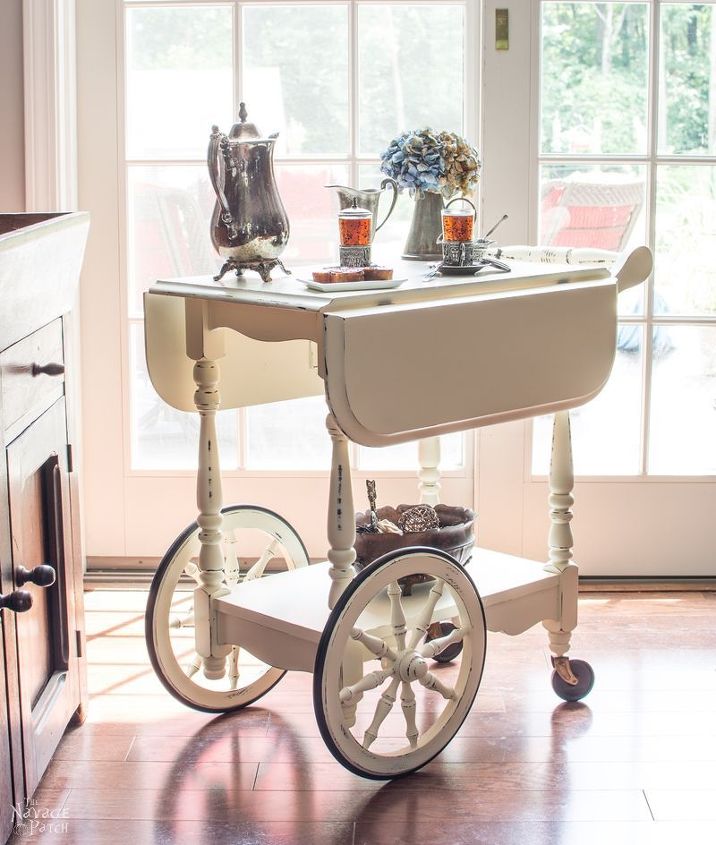
Although along the way I was contemplating whether to put stencils on it or not, in the end I decided not to. I am so glad I didn’t, because sometimes just simple one-color paint and a little bit of distressing is more than enough to give that refreshed look I love.
And here is my favorite picture of this pretty lady!
As usual some close-ups to show you the details and the finish a bit better.

For more information on the homemade chalk paint recipe and further details of this makeover please visit our blog post.

Want more details about this and other DIY projects? Check out my blog post!
Comments
Join the conversation
3 of 96 comments
-
I love this transformation! I did my tea cart transformation thiss summer. I used dark grey. It's one of my favorite pieces. You did a great job and the foil idea on the feet...ingenious!
-
Love this transformation just beautiful! Bet it's worth a lot more now!


Frequently asked questions
Have a question about this project?
How did you remove the rubber from the wheels?
How did you get the rubber off the big wheels