Mercury Glass Lamp Pendant

Amanda C, Hometalk Team
by Amanda C, Hometalk Team
4 Materials
$22-32
4 Hours
Medium
Don't you love the look of old time mercury glass? There are loads of tutorials online about how to make your own, so I thought I would give it a whirl. I wanted to make something that light could beam out of and perhaps fit the style of a friend of mine. That's why I decided to make my own lamp pendant and give it a "mercury glass" finish. Making this pendant is pretty easy with some simple drilling and a bit of spraying!
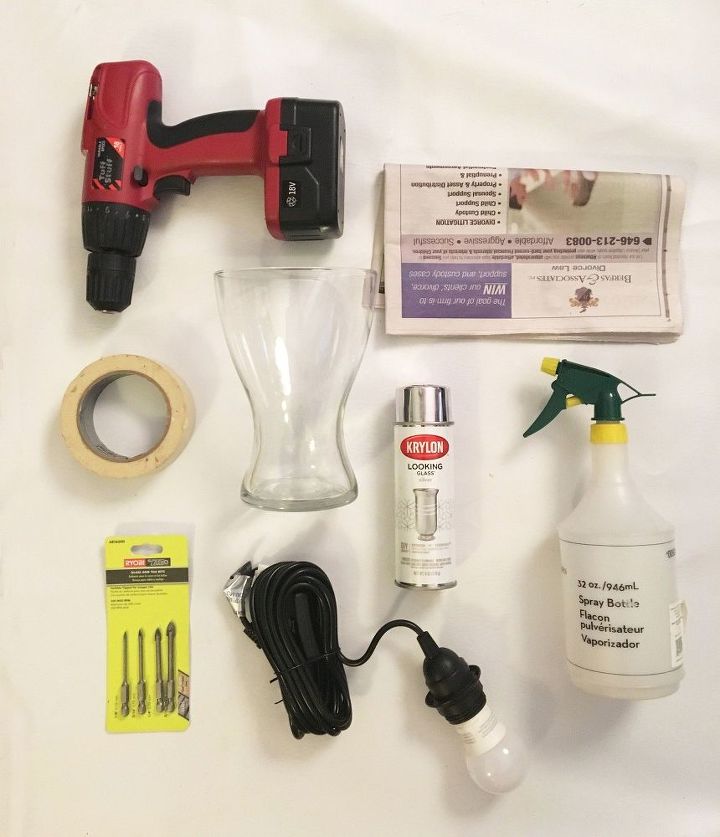
I saw a pendant similar to this at the hardware store for $45, and I have supplies left over and could make multiples for a fraction of the cost. The looking glass spray was really a large chunk of the cost, but I have so much left that I could make loads of other mercury glass items.


SUPPLIES:


-Water Bottle (with water in it)


-White Vinegar (not pictured)


-Drill


-Glass / Tile Spade Drill Bit Set


-Masking Tape


-Lamp Cord Set


-Krylon Looking Glass Spray Paint


-Newspaper


-A Glass object large enough to fit a lightbulb in
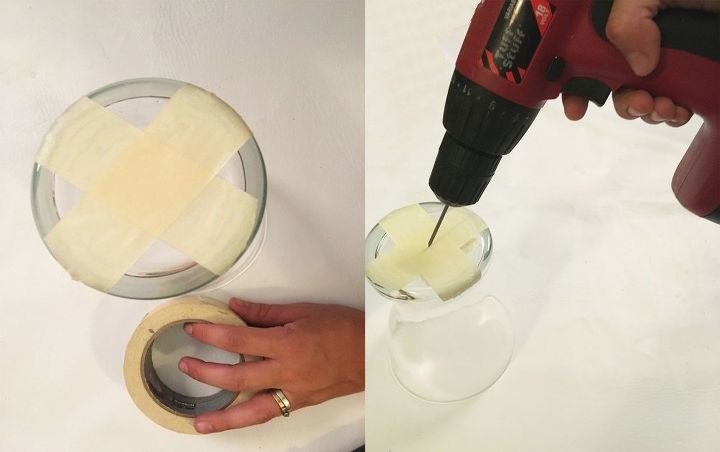
STEP 1: Drill a Hole


First we are going to make a hole in the bottom of our glass object (or wherever you want the light to hang from).


*If you have a glass light fixture already you do not have to do this part, but if you are making your own then follow along!


To drill a hole in glass you need either a diamond bit or a glass + tile spade bit. I bought a set of spade bits in increasing sizes to use for this project.


First you want to take some masking tape and put an x over the spot where you want your hole to be. This will help the drill from slipping on the glass.


Once your tape is in place, take your smallest spade bit and drill a small divot into the glass.


*Temperature increase can cause the glass to crack or shatter so have some water on hand to spritz where the drill is contacting the glass in order to keep it cool.
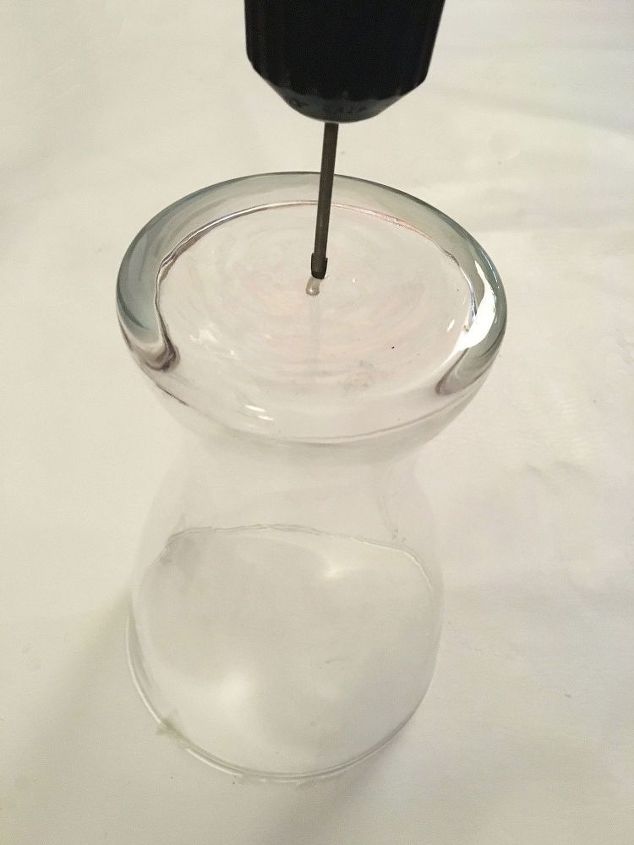
STEP 2: Make the Hole Bigger


Once you have a divot in the glass you can remove the tape.


Now simply drill at a medium speed with your bit until it goes completely through.


Once there is a hole in the glass you can increase the size of your bit to the next size and drill it through. Repeat this with each of your increasing drill bits until you have achieved the size hole you need.
STEP 3: Spritz it With Water and Vinegar


Now that your pendant is ready you can wipe it clean of any dust or dirt.


Take your spray bottle with a bit of water in it and add some white vinegar. The ratio should be 1:1.


Now using your water/vinegar mix, spritz the pendant down so that little beadlets of water form on the glass. *Be ready for the next step!
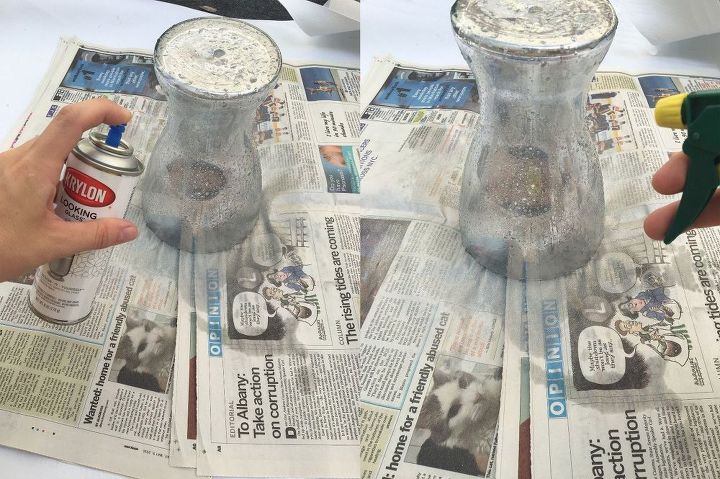
STEP 4: Quickly Spray On the Paint


Immediately following your spritz down in step 3, spray the pendant with the krylon looking glass spray in light even strokes.


Follow up your looking glass spray with another light spritz of your water/vinegar mix.
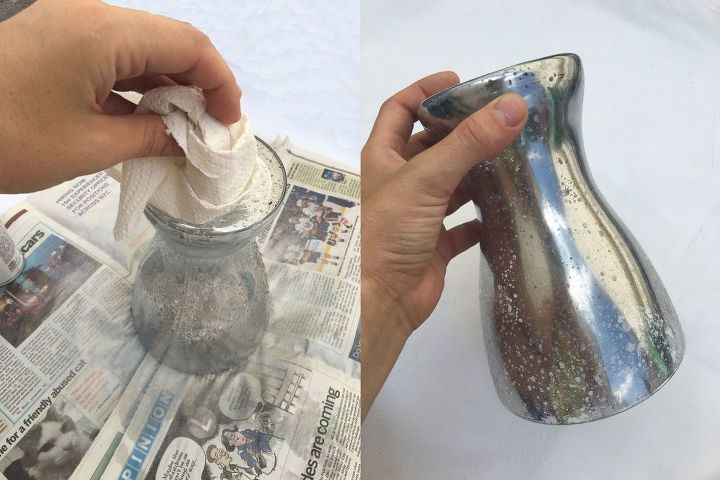
STEP 5: Let Dry and Repeat


Allow your glass to dry for 2 minutes, and then dab the water beads off with a paper towel.


Repeat steps 3-5 until you have the depth that you want for your glass. I did 3 coats for mine, but you can do less or more depending on the look you are going for.


Allow the glass to dry for about 2 hours before handling. It felt dry within 10 minutes, but I let it dry for a while just in case.
STEP 6: Disassemble Your Light Cord


While your glass is drying you can begin to disassemble your light cord. You will need to disassemble it so that it can fit through the hole that you made earlier and lie flush to the top of the glass. Here is a GREAT tutorial on how to take your cord set apart!


http://www.instructables.com/id/How-to-Disassemble-an-IKEA-Hemma-Cord-Set/


Once your glass has dried and your cord is disassembled you can feed it through the hole.


This part was a bit tricky because of the shape of my glass, but now is the time to reassemble the light cord once it is inside the pendant. Be sure to remember how you disassembled the cord and you can reassemble it simply by going backwards in the steps that it took to take it apart.
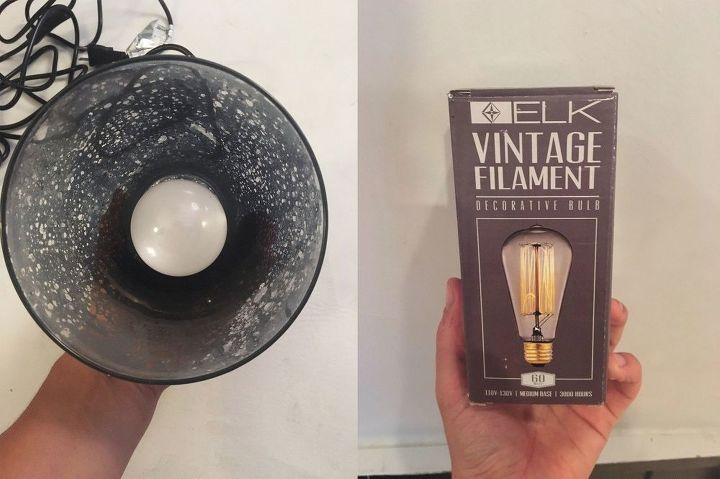
STEP 7: Screw in Your Light bulb


Now all you have to do is screw in your light bulb!


*On the left is a standard bulb, but I found the wattage to be too high and it was far too white for my liking so I inserted a vintage filament bulb I had on hand. This gave the glass a nice warm glow and some added pizazz. (I know these bulbs are pricey so you could also probably just get a lower wattage, but since I had this on hand, I thought I would use it until I got a replacement. (All the completed pics are with the filament bulb.)
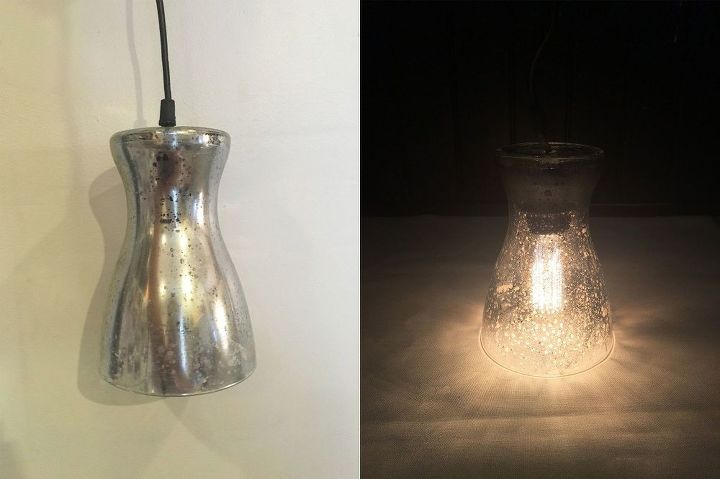
Here is a picture of the piece when turned off vs. with the light on.
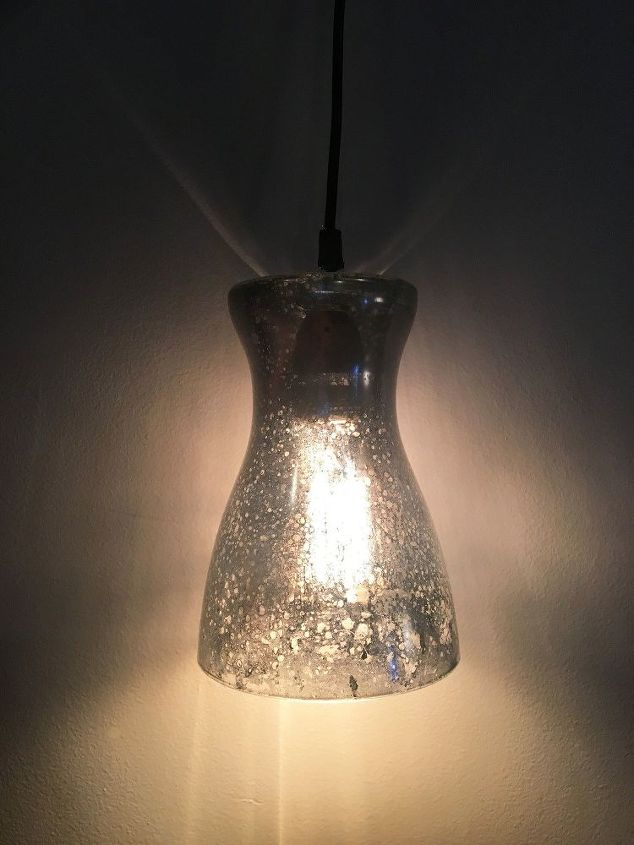
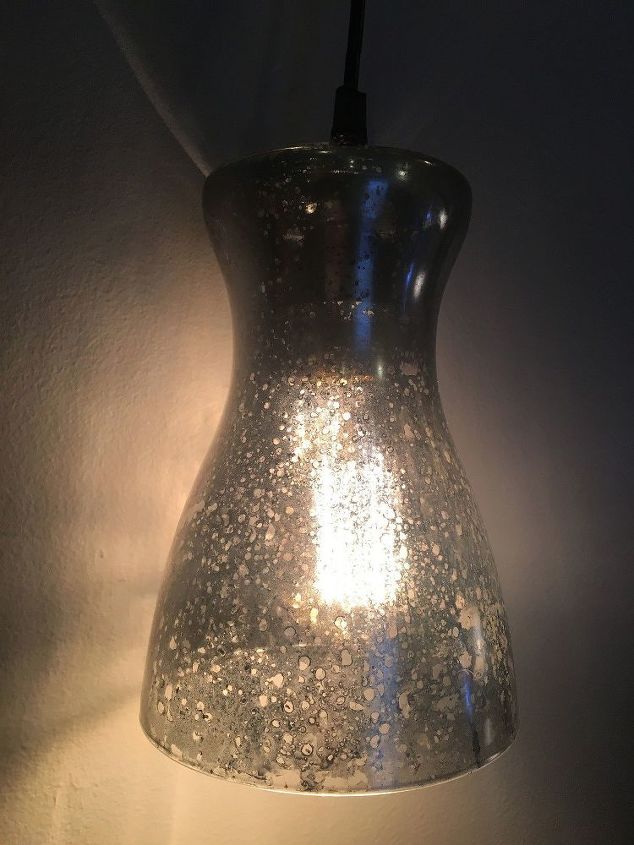
Look at all that character! Can't wait to gift this lil' fella!
Suggested materials:
  • Krylon Looking Glass Spray   (Michael's)
  • Glass Vase   (Ikea)
  • Lamp Cord Set   (Ikea)
See all materials
Frequently asked questions
Have a question about this project?
  3 questions
  • Nancy Nancy on Aug 10, 2016
    Beautiful ! How is it hung ? Do you just use the light cord?
  • Rose Rose on Aug 10, 2016
    All of my accents are mostly gold and I have seen gold mercury glass. Does the mirror paint come in gold or is there something else that I could use?
  • Sheila D Sheila D on Aug 10, 2016
    Love it! thanks for tutorial. If using on a vase for silk/dried arrangements - does it matter if mirror is on the outside or inside?
Comments
Join the conversation
2 of 33 comments
  • Carol Carol on Apr 10, 2017

    This turned out beautifully! Going to try it in gold.

  • Mimi Mimi on Jul 07, 2018

    Beautiful! But i want to make a 5 tier pendant with mason jars. Would i have to cut the bottom of jar off, for light to shine more?

Next