


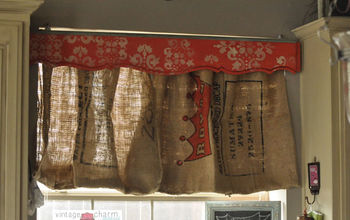
Burlap Bag Curtain

Lately I've been trying to evaluate my decor, get rid of things that aren't really my style anymore, and come up with new things to make. One of those things that I decided to make was a curtain over my side entry door (we use this as our main door). Ever since moving in to our house almost 4 years ago, there has been a nasty blind hanging from/taped on the door window. (Yes, the sides of the blinds were legit taped down with masking tape...I'm assuming the person living here before didn't want them banging against the door every time he opened it.). I'm constantly on the go and stay busy, so I never really stopped to let it bother me too much until this past week. I finally said to myself, "okay those disgusting blinds HAVE to go!" When I was down in South Carolina visiting my mom a few years ago, we went to this AAAAAMAZING antique mall where several vendors have their antiques, repurposed items and other creations set up, and I found 2 burlap sacks. Being the crafting hoarder that I am, I purchased them ($30 for both) with the intention of eventually making stool/ottoman cushions out of them. That never happened -- so this week when I was looking at my gross blinds, I decided to finally use one of my burlap sacks. I was pleasantly surprised at how quick and easy this facelift was for my door window!
This project was so simple, I almost felt like I needed to add steps just to make it appear a little more involved, but it really was so easy, and I thought, "why add more steps when it can be as easy as 1-2-3?!"
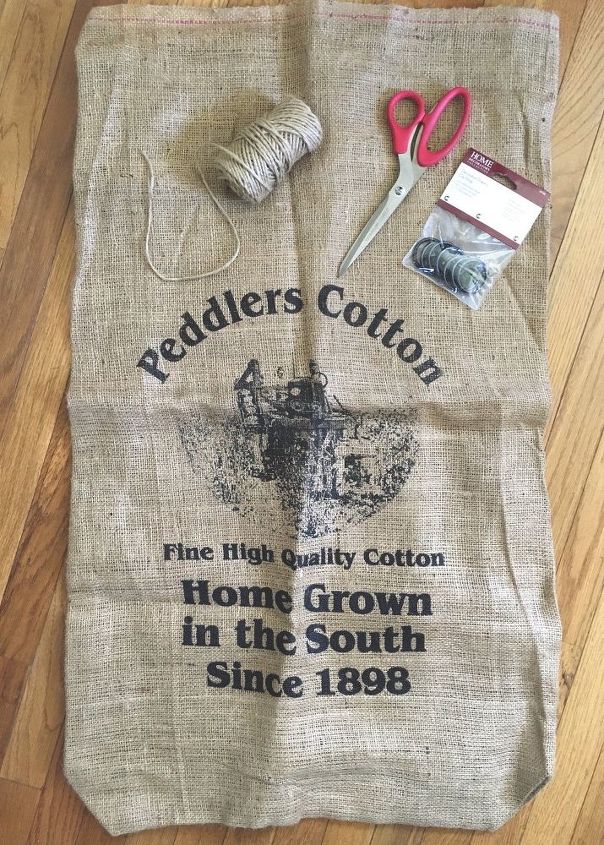
Supplies:
- burlap sack (If you don't have an antique mall near you or don't want to go searching for burlap sacks, you can find burlap for sale at most fabric stores, such as JoAnn Fabric. If you really want to get crazy with these burlap curtains, you can even choose a different color and create a stencil to paint on it, or they have burlap that already has designs on it--I've seen chevron, polka dots and other patterns available.)
- round curtain clips
- fabric scissors
- *Note: I ended up not using the jute twine.
- Not pictured here: -iron
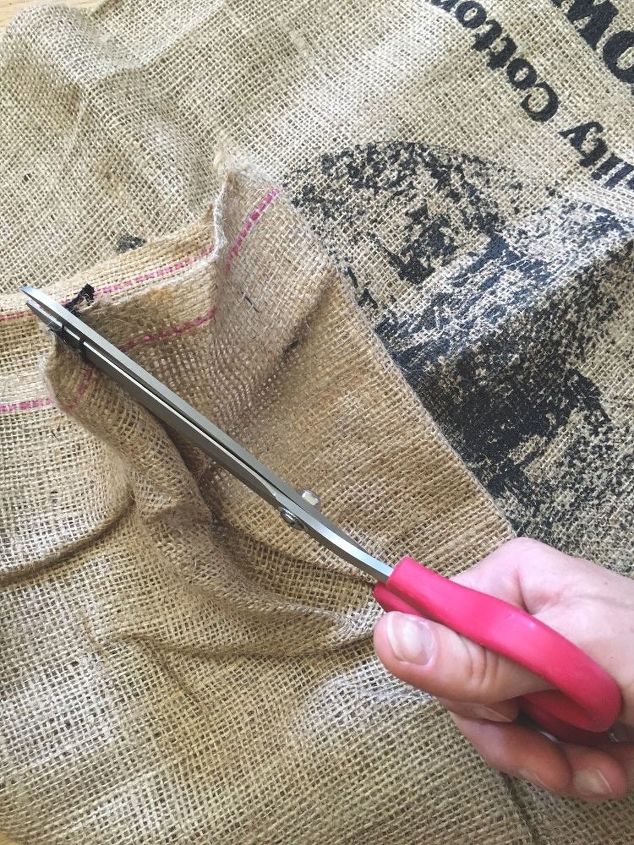
STEP 1: Remove Seam (optional)
If you're using a burlap bag, you'll want to remove the seam. Be careful with this step because you won't want to inadvertently cut your burlap. I cut the end thread, pulled the two ends of burlap apart enough so that I could slide my scissors on a few loops of thread and cut again--I did this until the entire seam was removed, and I could lay my sack out flat as one piece. *Note: I assumed my burlap sack was two pieces of burlap stitched together but it was actually just one huge piece stuck together on one side.
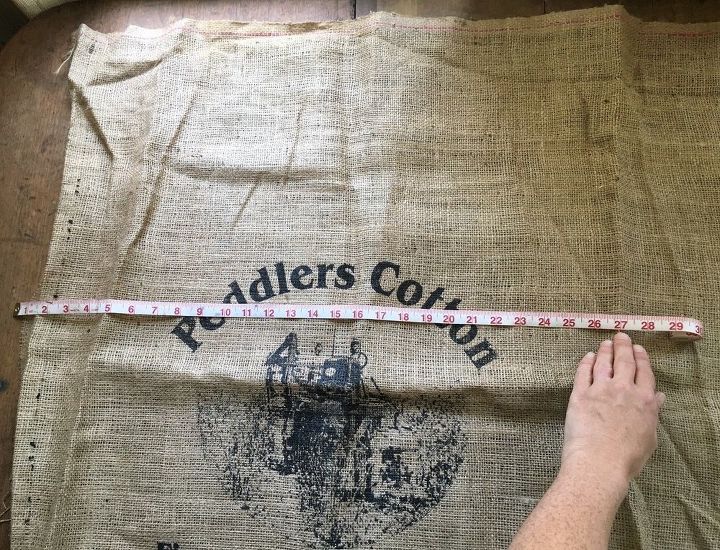
STEP 2: Measure & Cut
Next, I measured across the front of my opened burlap sack. Where you see my middle finger (at 27") is where the original fold was so I decided to cut there since I knew my window was approximately 24" wide.
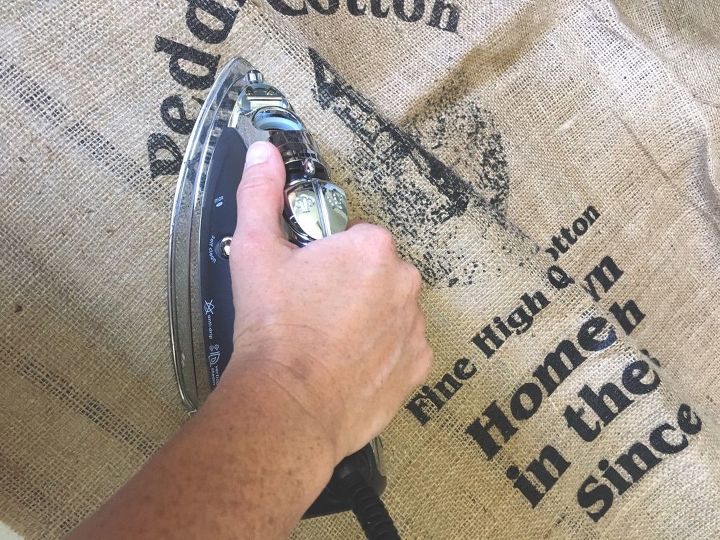
STEP 3: Iron
After I cut my burlap, I quickly ironed it since it had been folded up in my basement for a while. I put the iron on the cotton/linen setting and pushed the steam button a few times which got the wrinkles out quickly. The only thing I would suggest is if you have a thin piece of fabric (an old sheet or something similar), you may want to cover your burlap with it while you iron if your burlap has any type of design on it. I'm not sure if my design was painted or screen printed on, but some of the black got on my iron.
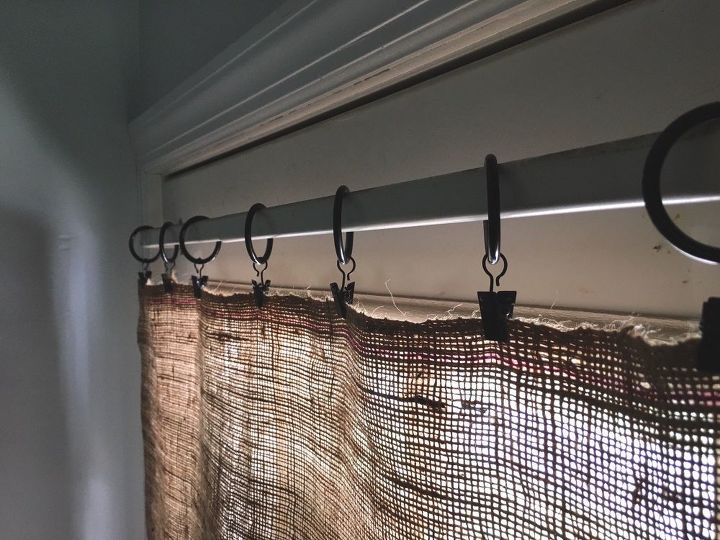
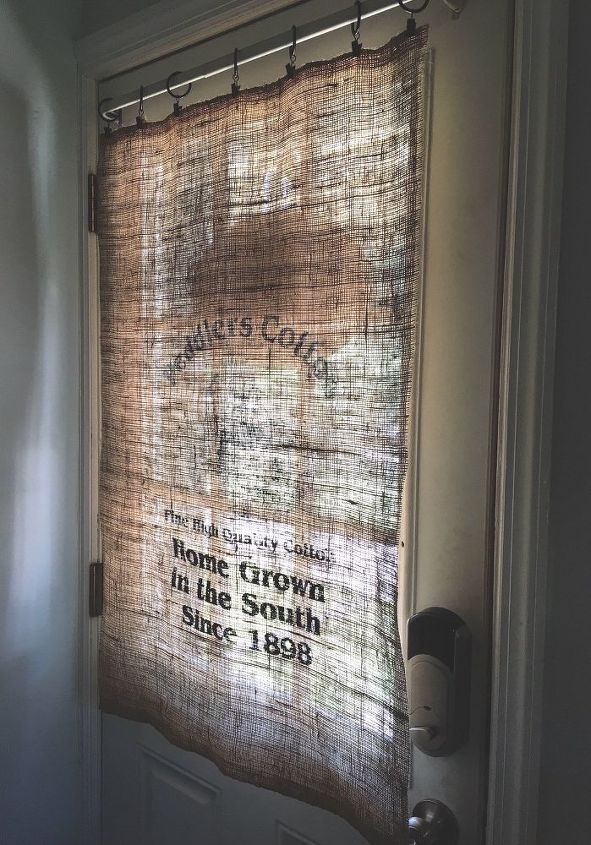
STEP 4: Attach Clips
After my burlap was nice and wrinkle-free, I simply slid my round curtain clips onto my curtain rod and attached my burlap to the clips. I eyed up my design to be centered in the window and clipped the left and right ends of my burlap first, then evenly distributed the remaining clips throughout the middle of the burlap. It was THAT easy!
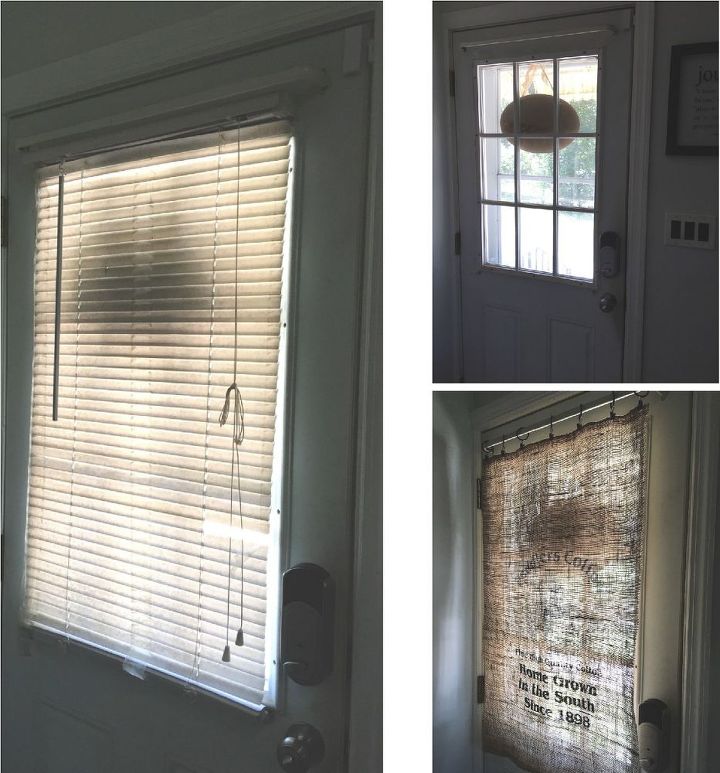
Sorry for the lighting, but I'm happy with how this simple burlap curtain came out. I'm slowly but surely transitioning to a new look/style in my house so that everything sort of flows (which, might I add, as a person who loves elements of several styles, it is so hard to do when everything I see--whether it's rustic, country chic, modern, etc.--I must have or make!) but even still, I think I'll always have eclectic taste and will never have a perfect "theme". That's what I love about style and art though, you're free to be creative and funky if you so choose!
Resources for this project:
See all materials


Comments
Join the conversation
-
Yes I
would love too.
-
This is a cute curtain. For anyone who doesn't have burlap, it's reminiscent of Osnaburg natural cotton fabric. I used a ready-made Osnaburg curtain with rod pockets at top and bottom to get privacy on a door like this. The curtain rods mount very close to the door, are secured to the hardware with little pins, and hold the curtain stretched between them--all very snugly arranged.


Frequently asked questions
Have a question about this project?
How do you treat new burlap--purchased at fabric store-- to stop the "shedding" of fibers?
What kind of curtain rod did you use ?
Is the writing backwards from the outside? Love the idea though!