


DIY Industrial Desk: No Power Tools Needed!

by
Alchemy Home
$125
2 Days
Easy
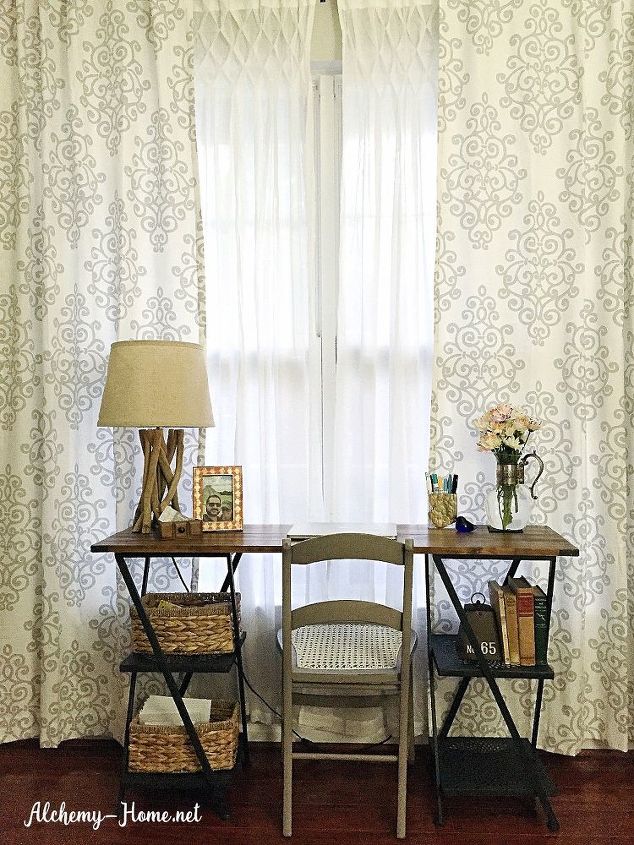
Our guest bedroom is tiny and I was in dire need of a long and narrow desk to maximize the 90 sq/ft space. After searching high and low for something I liked (that was also in my price range), I decided to make my own. Here is how I built a custom, industrial style, desk without using any power tools!

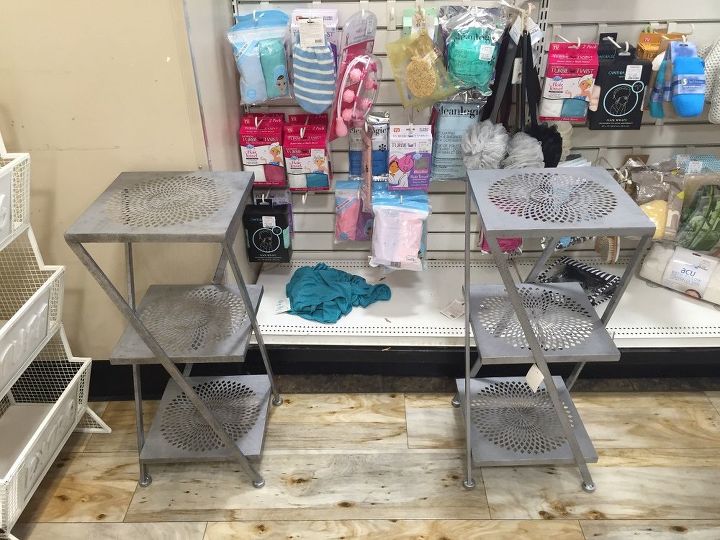
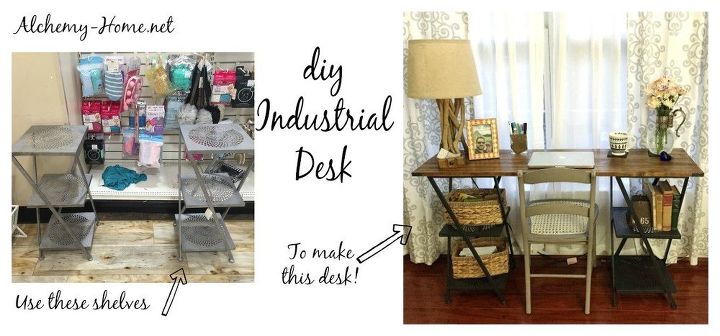
When I spotted these two little metal shelves at Home Goods last week, I had an idea. I've seen tons of tutorials on people using file cabinets to make a desk base, so I figured that I could use anything as a base, as long as I had two pieces that were the same height. I whipped out my tape measure (yes, I am the only person I know who carries a tape measure on their keychain!) and they were 29" height and 13" depth, which was the perfect size.
Here's where the "no power tools" trick comes in. I'm sure most of you know this already, but for those who don't, most home improvement stores will make straight cuts of wood to size for you in store, which saves lots of time and cleanup! So, I selected a 1" x 8" x 10' piece of pine and had them cut it into (2) 52" pieces. There are pro's and con's of using pine wood for this project, but for my purposes I knew that I wouldn't have to bother getting out my drill to attach the base and top together because it's a softer wood.
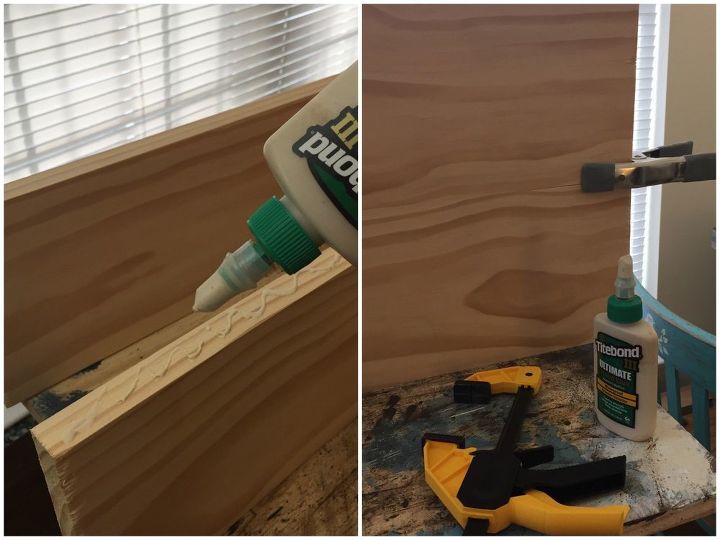
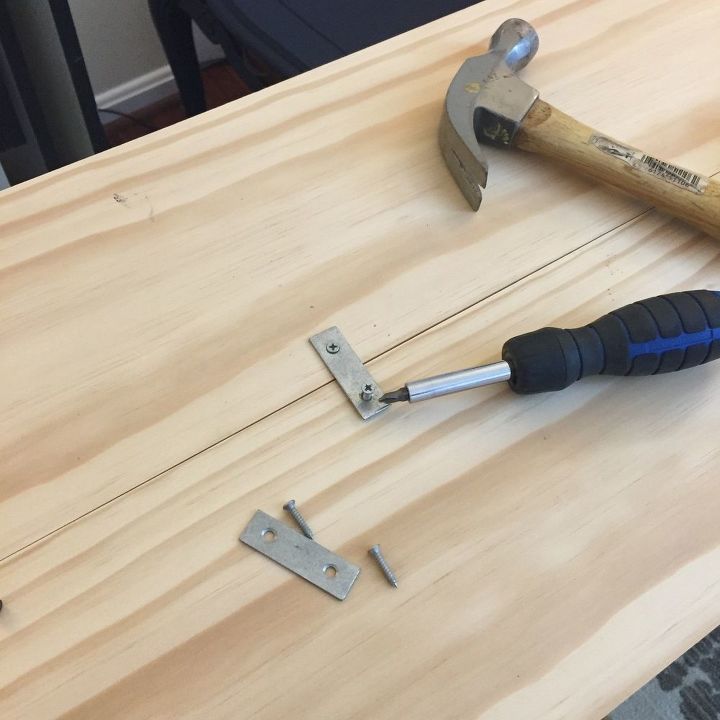
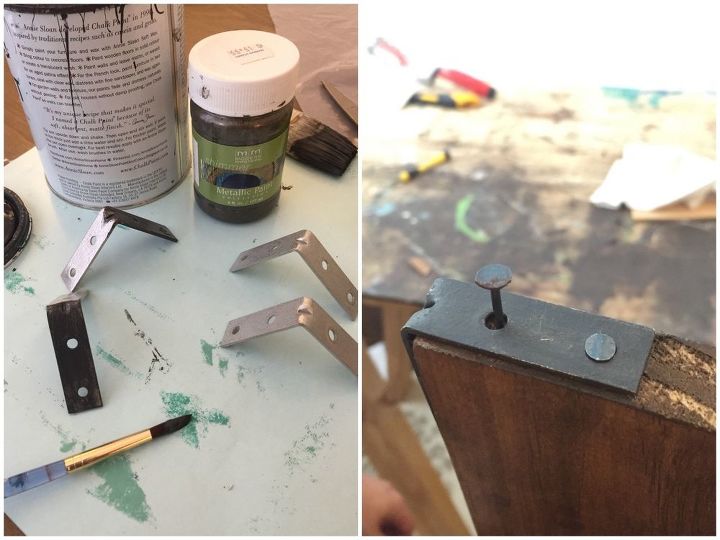
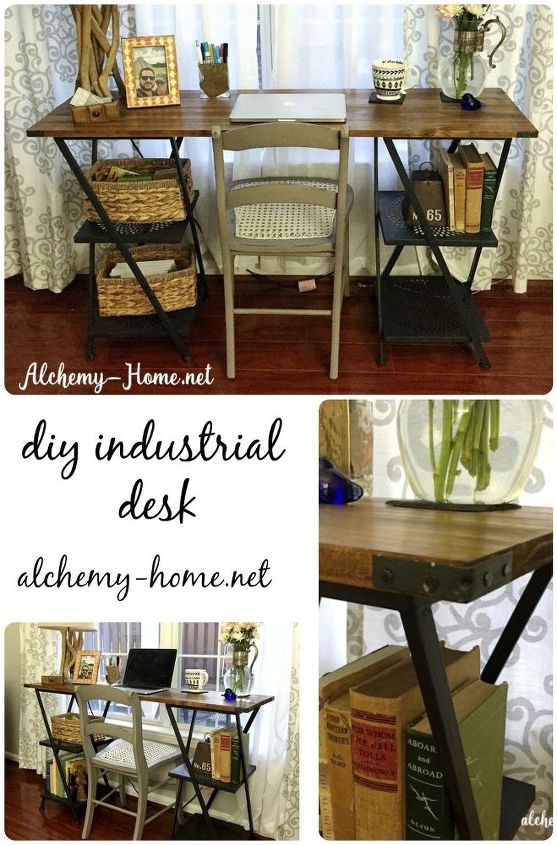
When I got home, I turned the pieces on their side and used Titebond wood glue + clamps to join the two pieces of wood. I waited a few hours, then I added two "mending plates" across the back for a little bit more stability. *Tip, when working without using a drill, you can use a hammer to nail a little "starter hole" to help hold the screw in place!
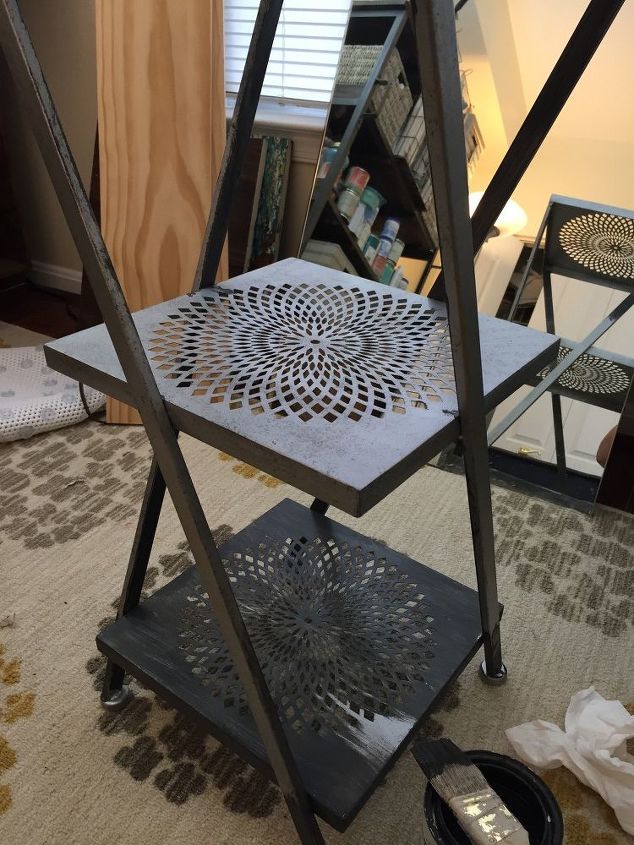
While I was waiting on my wood glue to dry, I started painting the metal shelves black. It would have been a lot easier and faster to use a metal spray paint on these pieces. However, being the cheapskate that I am, I knew I already had some graphite chalk paint on hand (which works great on metal) and didn't want to spend the extra $7 on spray paint. I did regret this a little bit later, because they were a pain in the you-know-what to paint, but the end result was the same. It took 2 coats of paint and one coat of a clear polyacrylic to get the coverage and protection that I wanted.
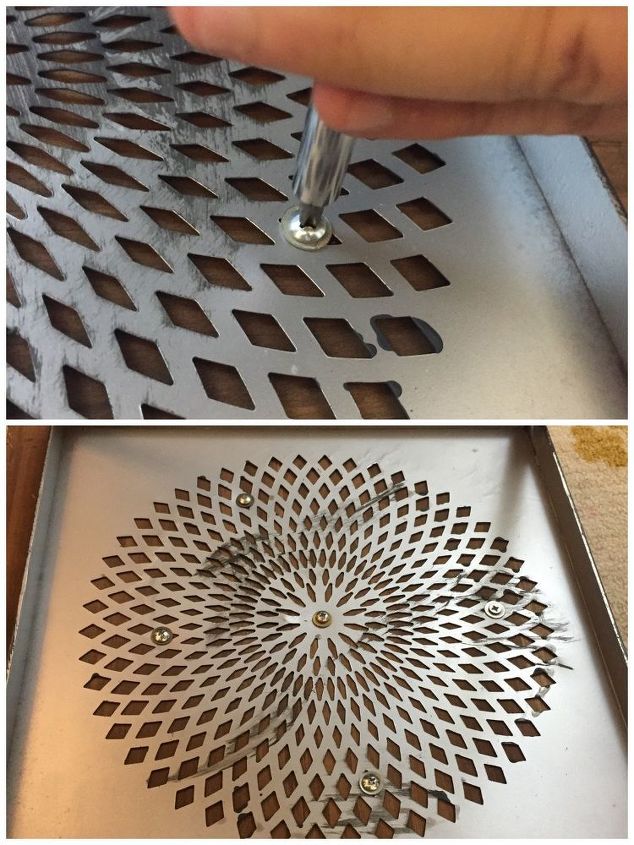
I also bought these little metal corner plates to add a little something extra to the desktop. They are around $4 for a pack of 4 (you can find them in the hardware section of any home improvement store) and I painted them in the same black and the metal bases.
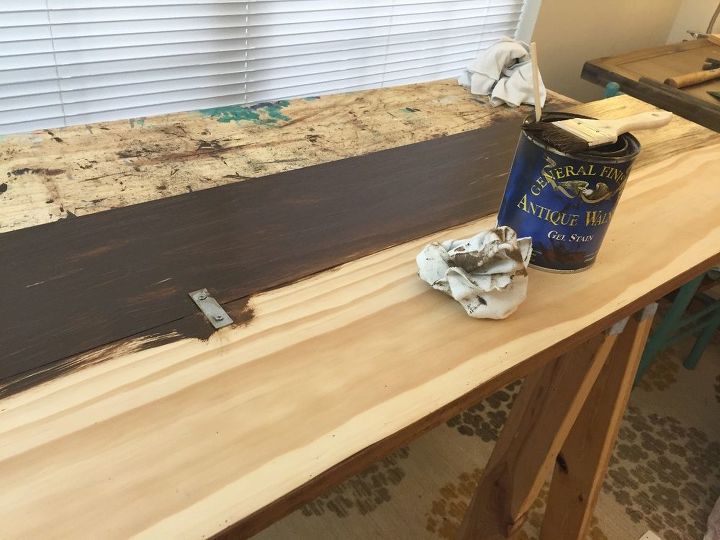
After a few hours to let the wood glue dry, I sanded and stained the desk top using General Finishes Gel Stain in Antique Walnut. If you haven't tried GF Gel Stain yet, do it! It's by far the easiest stain to work with that I have tried and turns out beautifully with just one coat, even on pine, which is not known for it's stainability.
The next day I added two coats of General Finishes clear, water-based topcoat to the shelves and desk top, with a light sanding in between coats. After that it was just putting everything together.
That's it! Once base is attached to the top, your new desk is ready! I couldn't be more happy with how it fit in the space and looks in the room.
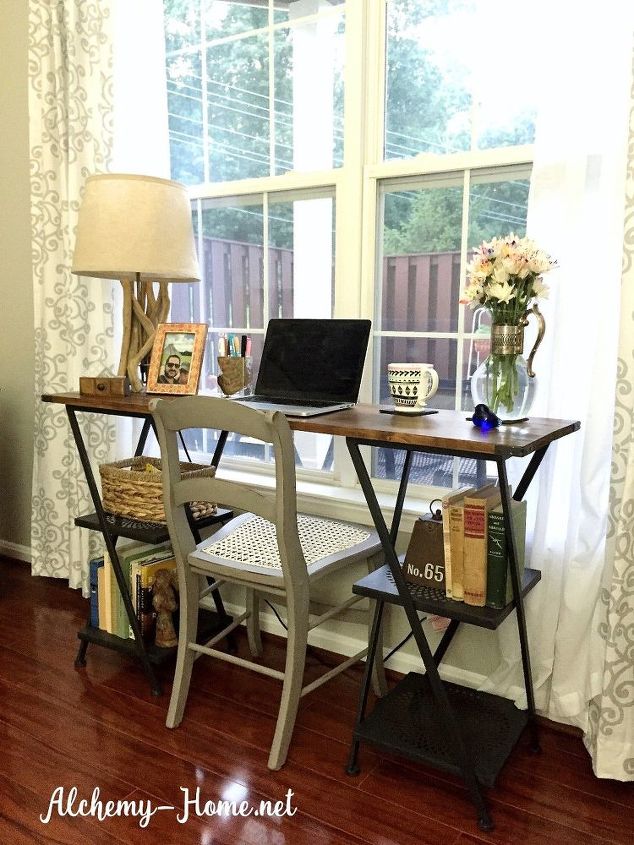
I love that the guest room window looks out on to the back patio; having the desk there really maximizes what was otherwise an empty wall of curtains.
I ended up only spending around $125 total on this project for the two shelves, wood, metal mending plates, and corner brackets; the rest of the materials I already had on hand. And the best part? I didn't have to break out a single power tool for the job!
Want more details about this and other DIY projects? Check out my blog post!
Comments
Join the conversation
2 of 76 comments
-
I do the same thing but with old (top only) rusted file cabinets and a nice plank piece of (usually scrap pile from Home Depot/Lowes) Oak, Knotty Pine, Maple, Cherry or some other very expensive hard wood that is PENNIES on the dollar B/C its in the scrap pile...and Vuelah!!! El Desko with Six (count em) SIX drawers!!
-
Your desk turned out great! I, too, am one of those women who carries a small tape measure, 10- footer, which has come in handy many times. It's in a pocket in my purse. I also carry measurements of things I need that I might find when shopping second hand stores or at the hardware store.


Frequently asked questions
Have a question about this project?