


Fun to Make Mouse Trap Clips!

by
Susan Myers
Places like the dollar store, grocery store and even Home Depot are full of great inspiration. And oddly enough, even a simple mousetrap can become a tiny work of art...
So I was perusing the dollar store the other day and ran across the mouse traps. After staring at them a bit, I threw a pack into my cart and was met by my husband's questioning stare.
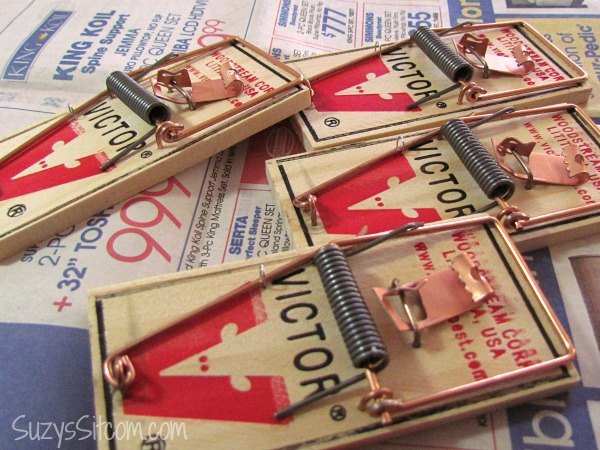
Begin by taking the mousetraps apart, removing everything but the big metal spring.
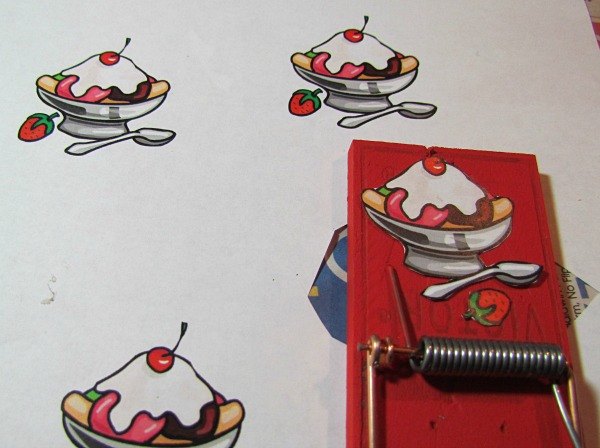
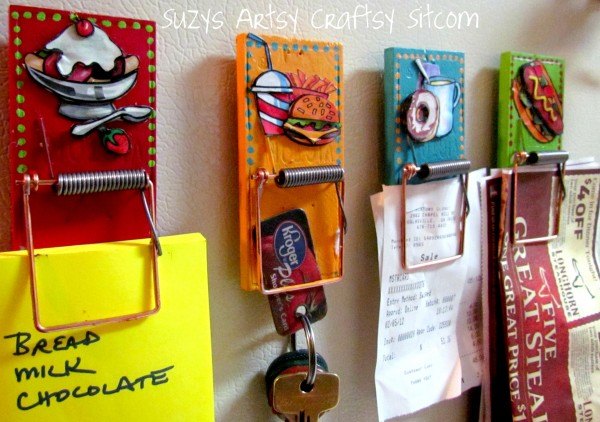
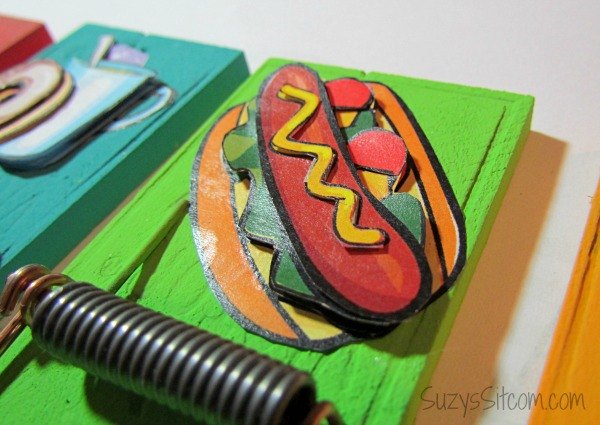
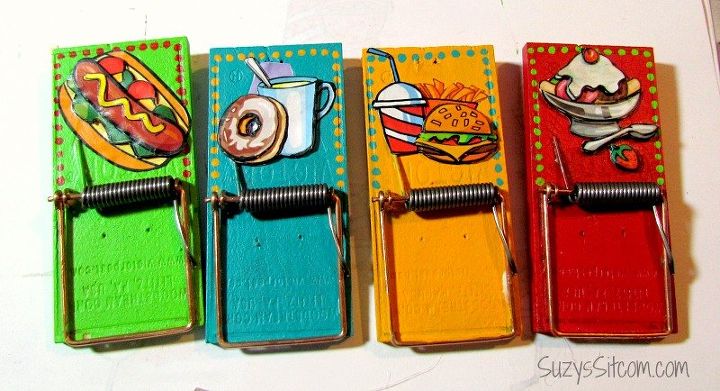
I decided to go with the four major food groups. You know, ice cream, fast food, hotdogs, and donuts. (You really didn't think I was going to say veggies, did you?)
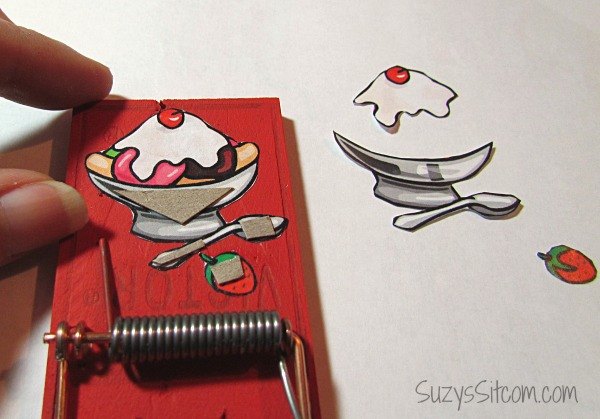
Using a second graphic, cut out the next layer. We are going for a 3D effect here by raising those areas that would be closer. Cutting some thin cardboard, glue it down on top of the areas that you are raising using the white glue.
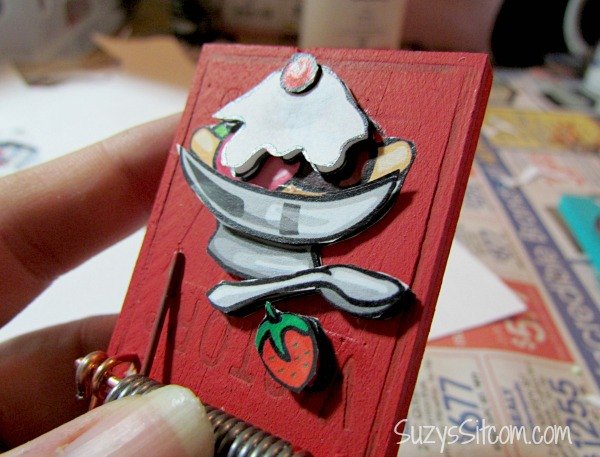
Repeat this process with a third layer, choosing items that would be even closer, cutting them out and gluing them over tiny pieces of cardboard to raise them.
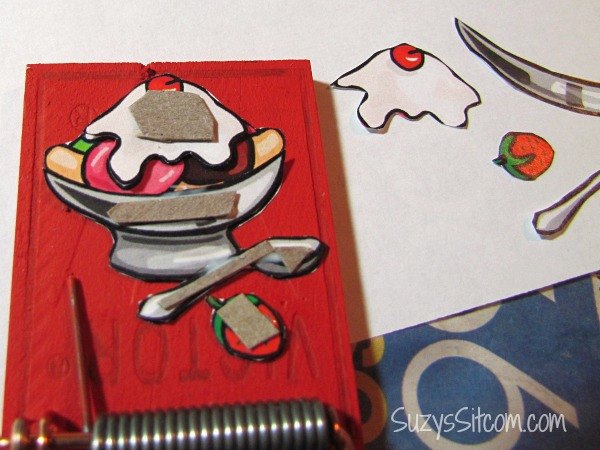
This will create a great 3D look. Repeat the process on the other traps using other clip art.
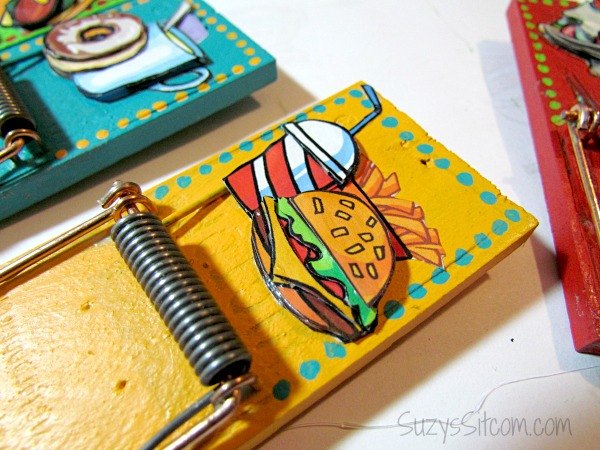
For an extra touch, you can add some dots around the edges in contrasting colors. Coat the whole thing in Matte Mod Podge to protect the paper and give it a finished look.

The final touch was adding a magnet to the back of each one with hot glue. And what do we use these for?
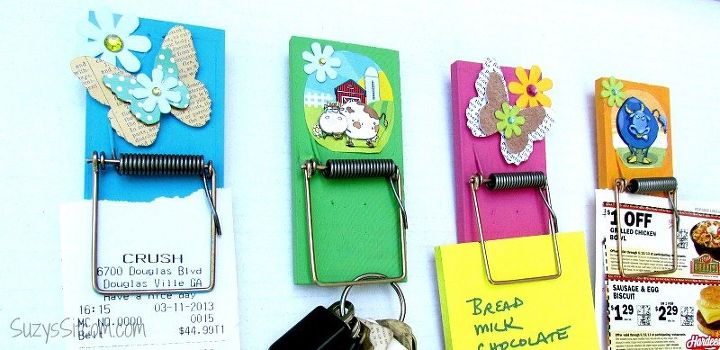
How about holding your notepads, your keys, your receipts, coupons, whatever? Right there on the fridge where you can't miss them! And all being held in place by cute little mousetrap clips. Pretty cool, huh?

Click the link below for the full details!
Want more details about this and other DIY projects? Check out my blog post!
Comments
Join the conversation
2 of 83 comments
-
I can do this for our beach house !
-
**Very cute idea** Going to make these!!


Frequently asked questions
Have a question about this project?
Is it hard to open? Was thinking maybe a small keyring to make it easier? Just a thought. I want to make these for my mom. She has notes all over my fridge!