


Before and After: Grey and White Traditional Bathroom Makeover
3 Materials
Yay! It’s before and after bathroom day! I honestly thought this day might never come! We started this renovation in our master bathroom in October of 2014, so yeah, about 15 months ago, and now we’re finally ready-ish to look back on all the scary “before” pictures and pat ourselves on the back for just how far we’ve come! It’s been a year of a lot of work, and a lot of pickyness on our parts as we tried to make this room absolutely perfect for our family, but now we can finally say it was all totally worth it. Well, mostly.
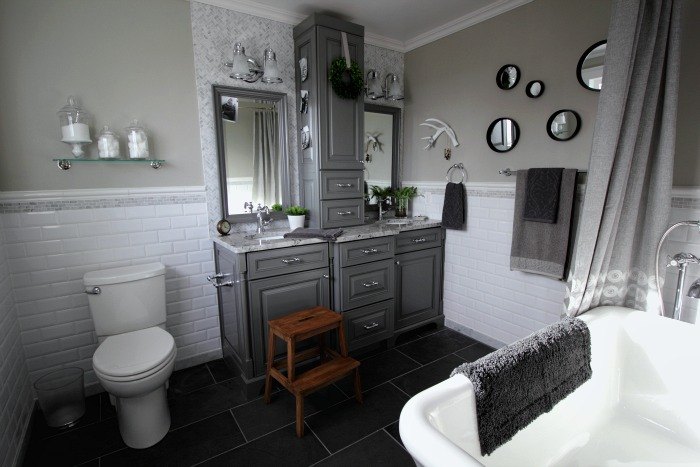
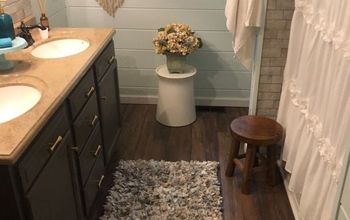
Here is the finished product.... I love that this room is super fancy (by my standards at least!) and traditional in style, but it still feels fresh and approachable and totally like “us”. I always think you know you’ve done a really good job designing a room when it becomes really easy to decorate it and make it look good, almost no matter what you try.
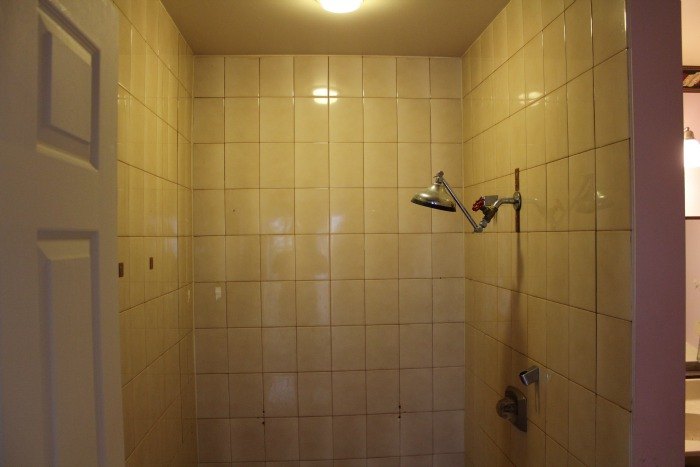
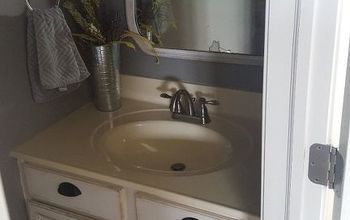
This is a "before" photo of our bathroom.... Keep in mind that this is after the bathroom had been completely abandoned for a few months.. so it’s a disaster! We basically just left our stuff in there, closed the door, and started using the other bathroom. We took these pictures the day before we started ripping everything out.
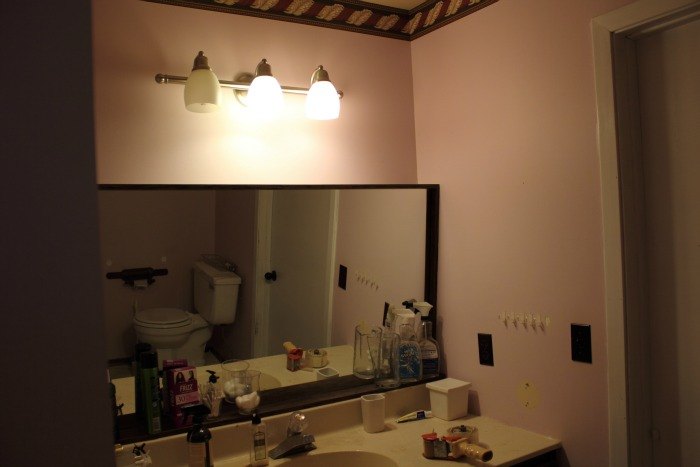
This was the vanity area. Disaster. I really don’t miss the pink paint with the maroon wallpaper border, believe it or not!
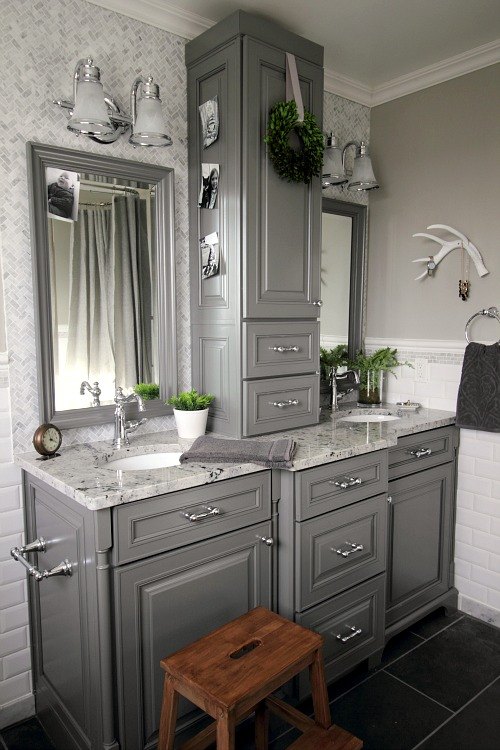
This is how our vanity looks now! It is one of the main focal points in this room, which I was extra-super-duper lucky to have provided to me by KraftMaid. It’s just full of amazing storage solutions too, which you can read more about here!

Want more details about this and other DIY projects? Check out my blog post!
Comments
Join the conversation
3 of 11 comments
-
I love the extra storage between the mirrors.
-
Lovely ,and the grey looks so refined


Frequently asked questions
Have a question about this project?
So lovely! Can you please share the color of your floor tiles? Thank you !
what is the color on the walls? Thanks