


Etched Wine Bottle Soap Dispenser

10 Materials
$30
1 Hour
Easy
If you're like me, I am always looking to buy in bulk to save money. So when it comes to purchases like dish soap, olive oil and vinegar, I come home with big ugly containers that I don't want to display on my counter, but I also don't want to store away because I use them often.

Here is a project that solves that issue: an inexpensive, rustic chic dispenser that is sure to be a conversation piece! *Note: if you don't have space on your sink or counter for a full-size wine bottle, you can use a glass soda or beer bottle. I've also seen smaller moscato bottles that would be perfect for a bathroom.
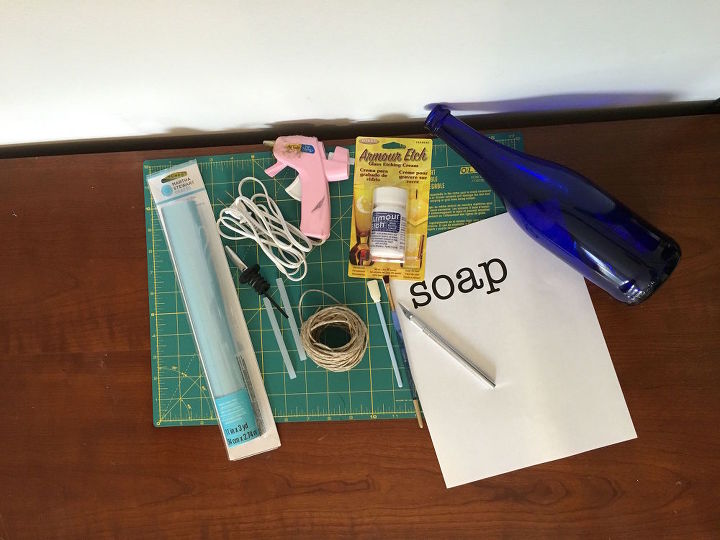
To get started making these versatile pour bottles, you'll want to clean the bottle inside and out, and remove any labels from the bottle. I already had a few clean wine bottles laying around but if you're starting from scratch, you'll need to submerge the bottle in a sink filled with soapy water - I usually do warm water but I'm sure cold will work too - until the label looks like it's starting to lift from the glass. [Note: The longer your bottle soaks, the better chance you have of the label being easier to remove without scrubbing. I usually try and let it sit for an hour or more because it takes a while for the middle of the labels to get soaked.] Rip off as much of the label as you can; if it doesn't rip off clean (if there's any annoying residue or paper left behind), take a Brillo or SOS pad and scrub the label until the residue comes off (not too hard though because you don't want to scratch your glass!).

To create your lettering, print the word "soap" in the font of your choice, cut off the excess paper and tape the word to your roll of adhesive stencil film.
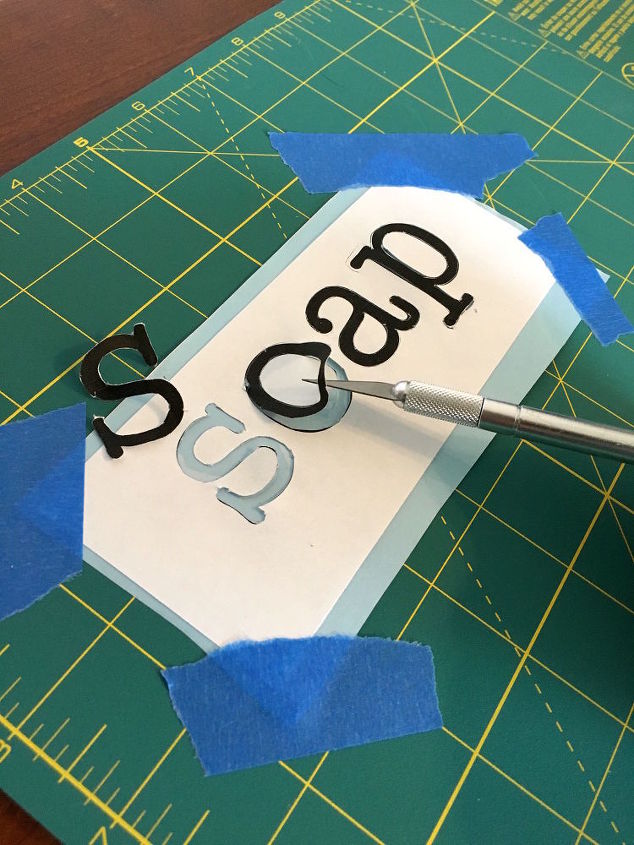
Using your X-Acto knife or box cutter, carefully cut each letter out.
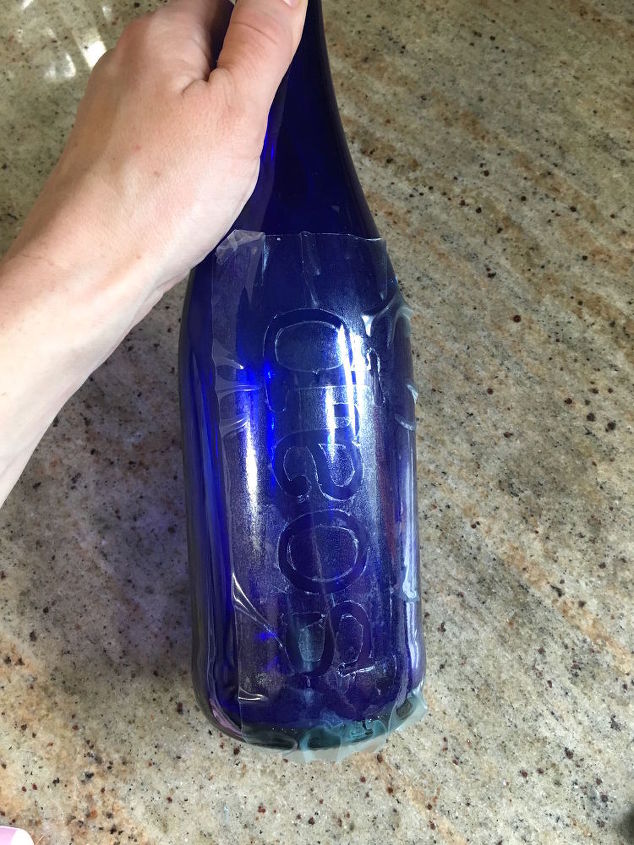
Once you've cut the letters, remove the tape and paper stencil so that you are left with the adhesive stencil. Carefully apply your newly created "soap" stencil to the bottle and make sure that it is flush with the bottle (no gaps in between the glass and the stencil or your etching cream may bleed!).
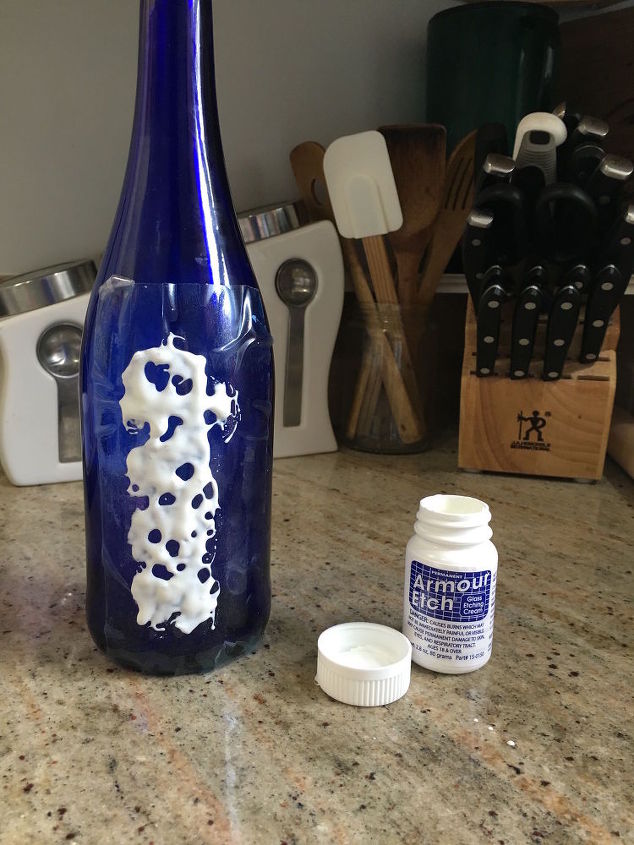
After your adhesive stencil is applied, take your brush or small sponge and apply the etching cream. You may want to wear gloves for extra protection because you don't want this cream to get on your skin or clothes. You'll want to cake the cream on thick to the point you can't see the letters of your stencil - however, be careful not to go outside of your stencil! Once the cream is applied, let the bottle sit for about 5 minutes.
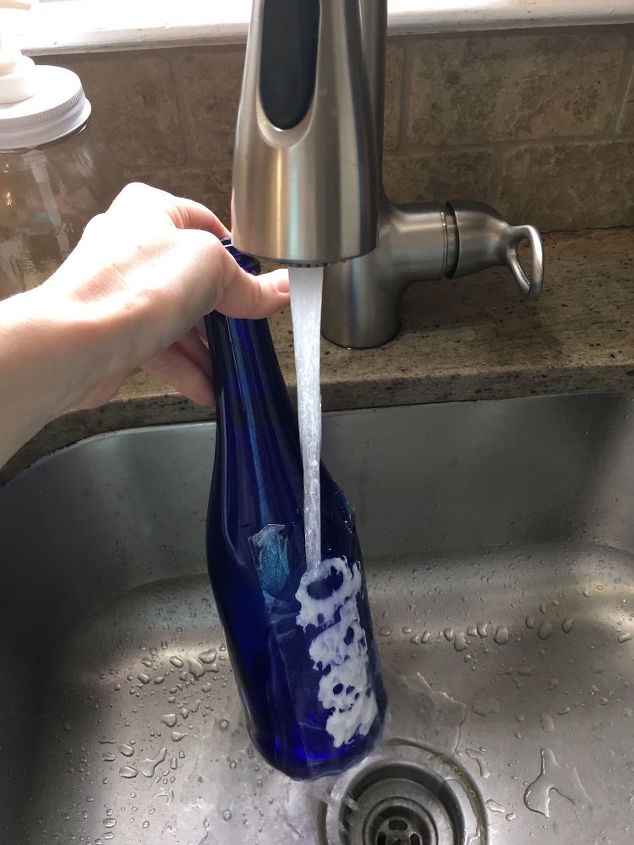
After 5 minutes, carefully take the bottle by the neck and hold it under running water - I had my water temp between cold and lukewarm - let the water rinse all of the cream off before removing the adhesive stencil.
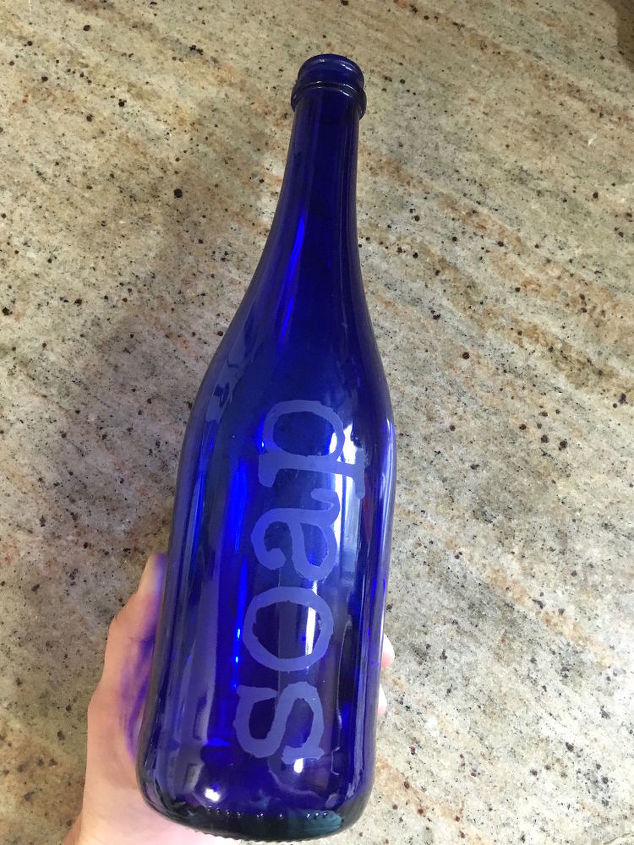
Once you've removed the stencil, dry the bottle with a towel (the etching cream instructions suggest cleaning the surface with glass cleaner but I did not do that here).
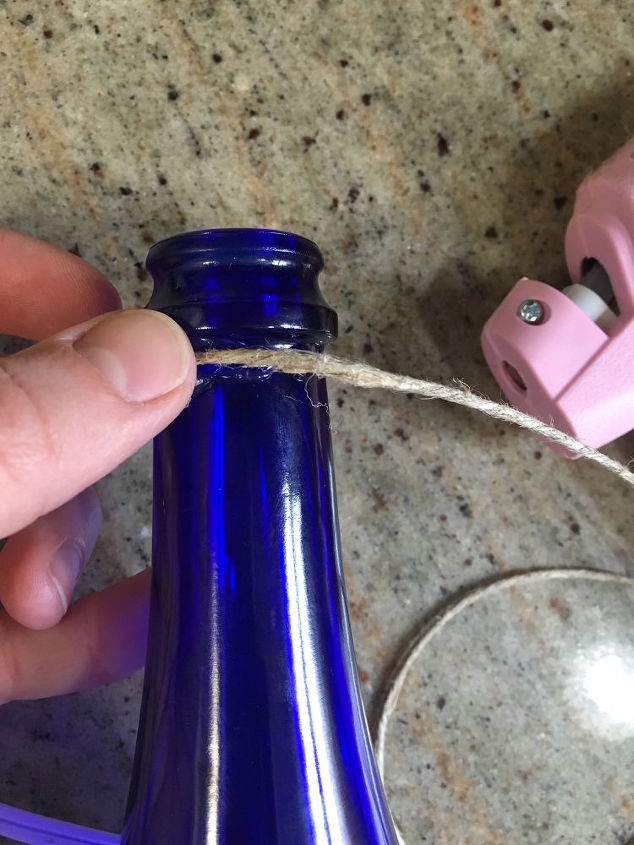
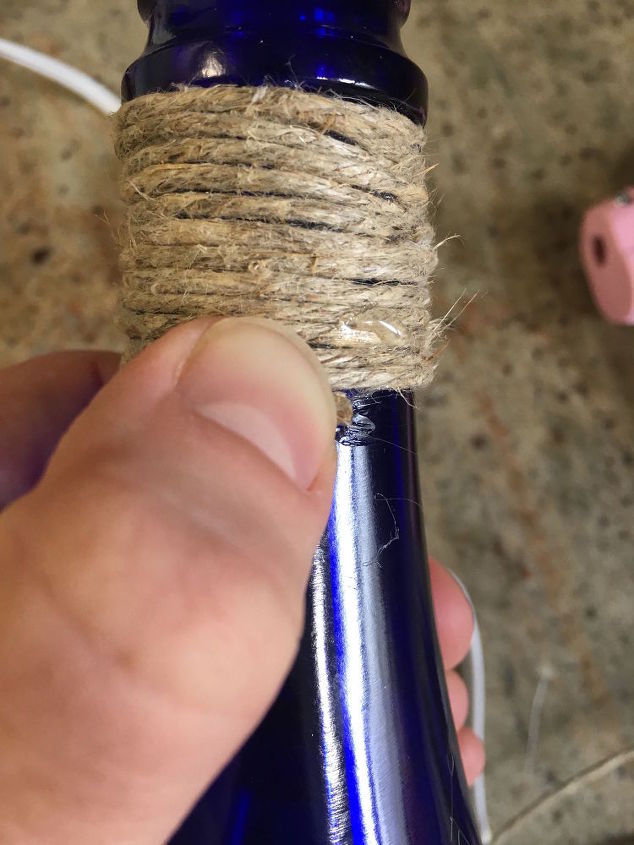
Next, take your glue gun and apply a line of glue, laying the twine on top of the glue and adding a little pressure so that the twine sticks to the glue (be careful, you may want to wear gloves or something on your finger tips because you will burn them with the glue), continue applying strips of glue and laying the twine, gently wiping off any clumps of glue (or picking it off once it dries) that collect between the layers of twine.
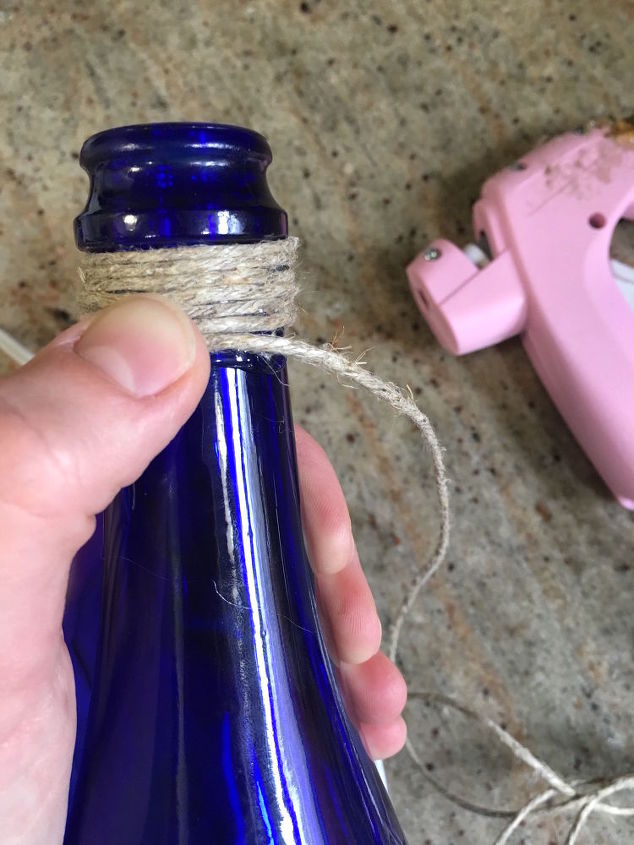
Repeat until you've gone around the neck of the bottle to your desired ending spot.
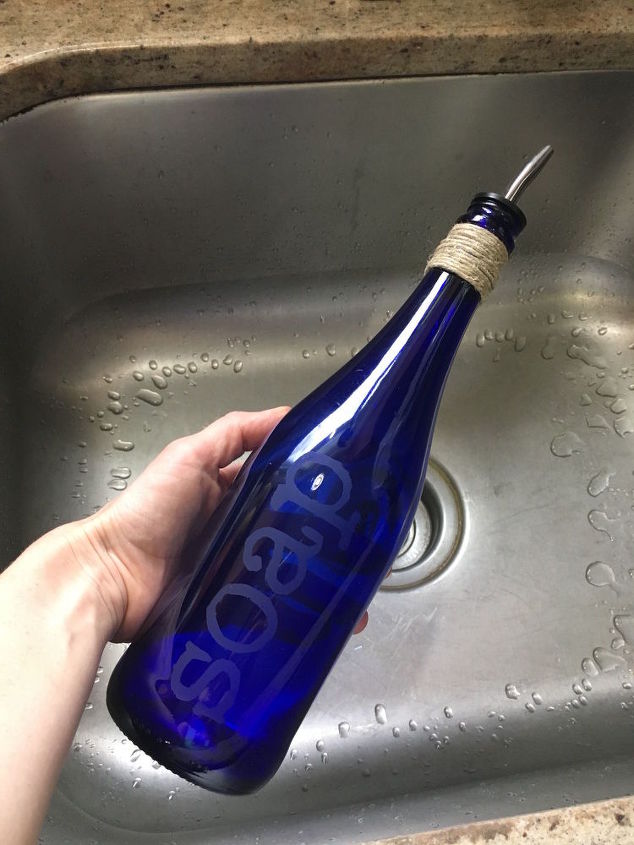
Finally, place a pour spout inside the mouth of the bottle and VOILA! you've got yourself a chic and simple way to display your soap, oil or vinegar!
Comments
Join the conversation
3 of 29 comments
-
Love it, Courtney! I will definitely try it and let you know how it works out. It's a great idea- especially for those of us who buy large bottles of dish soap. Thanks!
-
Totally agree! Please keep sharing your projects. Thanks.


Frequently asked questions
Have a question about this project?