


Create a Rustic Log and Pallet Wood Planter

by
Clint
5 Materials
{
"id": "3545509",
"alt": "",
"title": "",
"video_link": "https://www.youtube.com/embed/y0ixnnkzEYQ",
"youtube_video_id": "y0ixnnkzEYQ"
}
{
"width": 634,
"height": 357,
"showRelated": true
}
Cutting the logs to size:
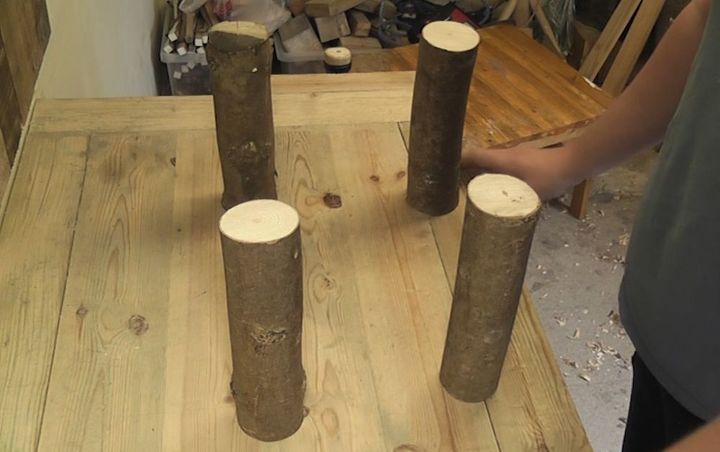
Cut 4 logs to the same length, the length you pick is really dependent on how high and deep you want your planter to be. Mine were cut at around 25cm (approx. 9 7/8"), which means the soil in my planter is around 20cm deep
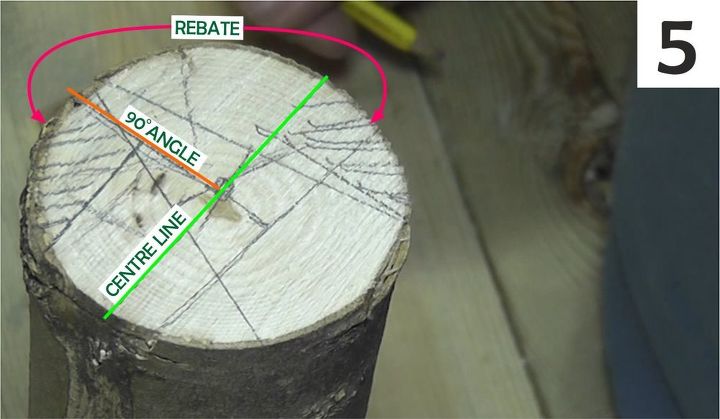
Measuring the rebate:
The pallet wood will sit inside a rebate or rabbet on each log to the next, this proves a rather tricky measurement as no log is the same. It is also rather difficult to cut a square rabbet down the length of a circular log! With good marking and measurement though, this is made much easier.
Start by finding the centre point at the end of the log (this can be achieved with a centre finder or using the method detailed in the YouTube tutorial) and drawing a straight line right through it.
Use a Set Square to draw a line at a 90 degree angle to the centre line you've just drawn.
Measure the thickness of the pallet wood in from the edge of the line you've just drawn, in my case it was 15mm (approx. 5/8"). This ensures that the pallet wood will fit flush to the log inside the rebate when fully constructed.
Use a Set Square to draw a line at a 90 degree angle from the mark you just made to the edge of the log.
Make sure to mark the area to be cut from the wood and then repeat the process at a right angle to the first marked rebate.
The rebate then has to be marked along the length of the log, again the length of this mark is entirely up to your taste and what kind of wood you have available. My mark is around 20cm. I did this by eye as the log was so uneven.
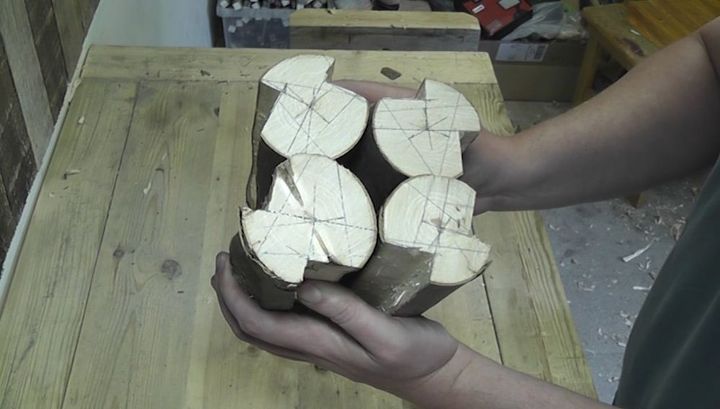
Chisel out the rebate:
Use a sharp chisel to carve out all 8 of the rebates in your logs. The logs will need to be fully secured in order to ensure accuracy, a vice is ideal but a clamp can also be used on a firm table.
When finished, the legs should make a rough square when their rebates align.
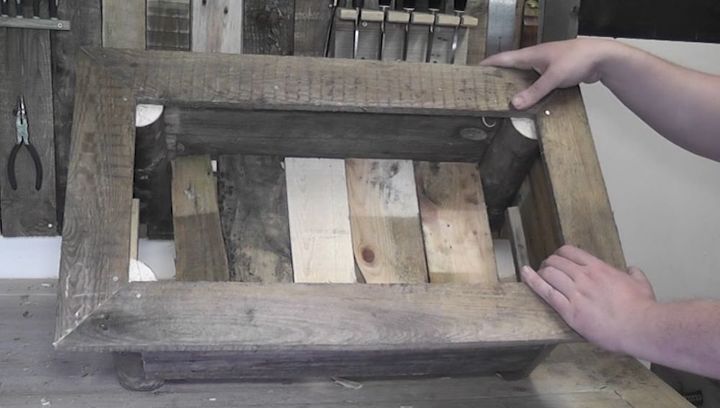
Cutting the sides to length and nailing to the logs:
The length of the sides of your planter is once again down to your personal taste and what you wish to use it for. Your planter could be more square than mine or even longer than mine. The long sides of my planter are around 50cm (approx. 19 2/3") and the short sides are around 25cm (approx. 9 7/8").
After you've cut the sides to length you'll need to attach thin strips of wood to go along the length of the inside of the lower board. Make sure to leave a little space at each side so they don't come into contact with the logs.
You can then proceed to nail your sides into the logs. Make sure that the sides you've attached the thin strips to are at the bottom of each face of your planter and also with the strip facing inwards. I used small outdoor nails, 4 nails in each plank.

Cutting and attaching the trim and bottom boards:
Measure the length of your planter from centre point to centre point of the logs. This length will be the inside length of your trim. You can then use that inside length to cut a board with 45 degree angles cuts at either end.
To do this you can take a length of pallet wood, use a combination square to draw a line 45 degrees from one edge. Then at the end of the line you've drawn, measure your inside length and draw another 45 degree line at the other end.
Make the trim for the 2 longer sides first, then you can nail those in. After you've attached them, place another piece of pallet wood to act as the trim for the shorter sides over the top. Simply use a pencil to scribe underneath the wood you have placed on top to show where the other angles are. Cut the wood and nail onto the planter.
You can then measure the inside width of your planter and cut a few pieces of scrap wood to that length. Place them inside your planter so that they sit on the strips of wood we attached earlier, no need to nail these.
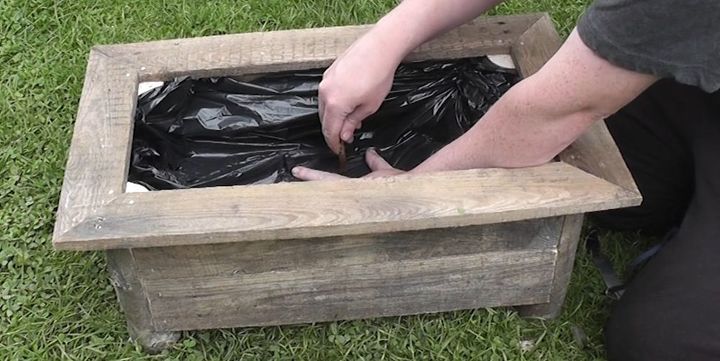
Line with plastic and fill with plants!
For the inner lining you'll want to use some garden refuse sacks, simply place them inside the planter and then staple along the sides. Find a small stick or pencil and use it to poke several holes through the bottom of the plastic. This is to ensure that water doesn't sit inside the planter which could mean death for your plants!
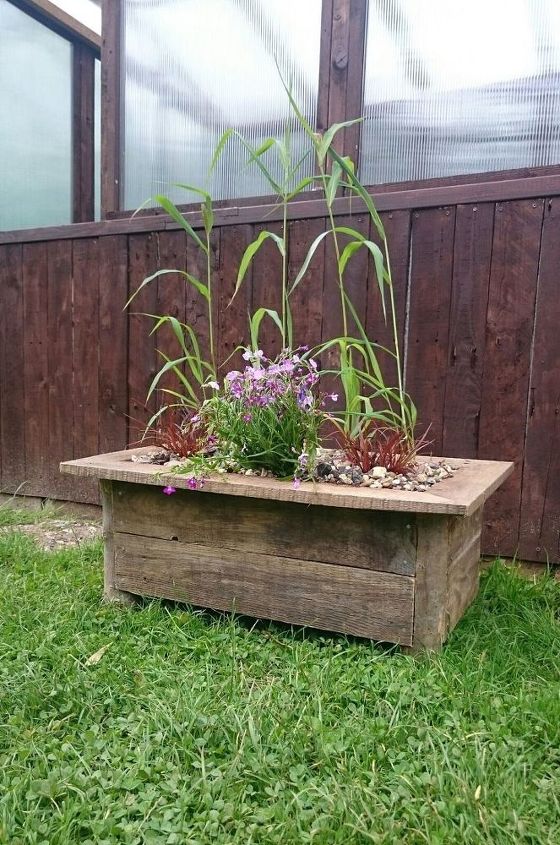
Fill with your preferred medium and plants, maybe spread some gravel or bark on top, place in the garden and enjoy!
Want more details about this and other DIY projects? Check out my blog post!
Comments
Join the conversation
4 of 41 comments
-
Love this planter!
-
Great job... looks awesome!!


Frequently asked questions
Have a question about this project?