


Wood Kitchen Conversion
3 Materials
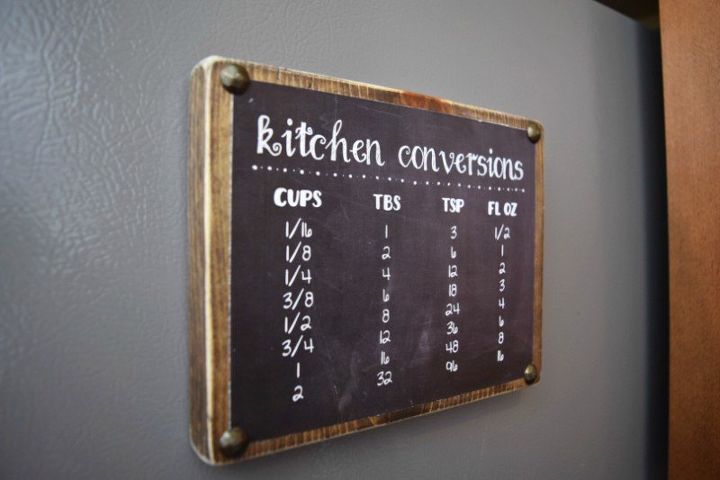
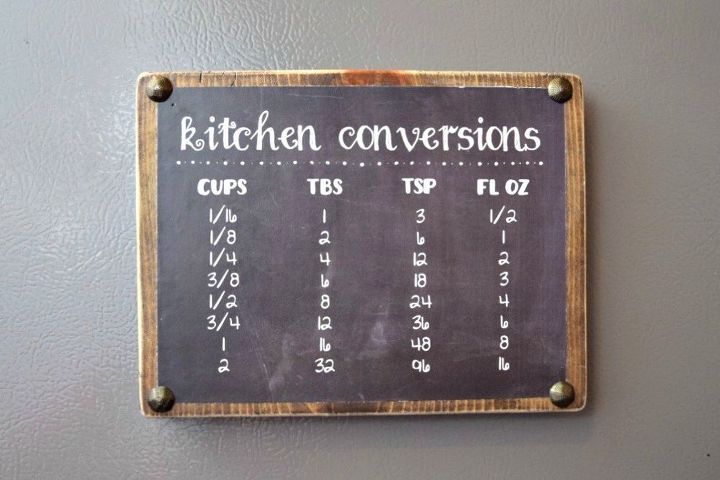
Do you struggle in the kitchen with converting measurements? Do you find yourself spending WAY TOO MUCH TIME with Chef Google figuring out how to cut measurements in half or quarters?
Then I have the perfect solution for you!
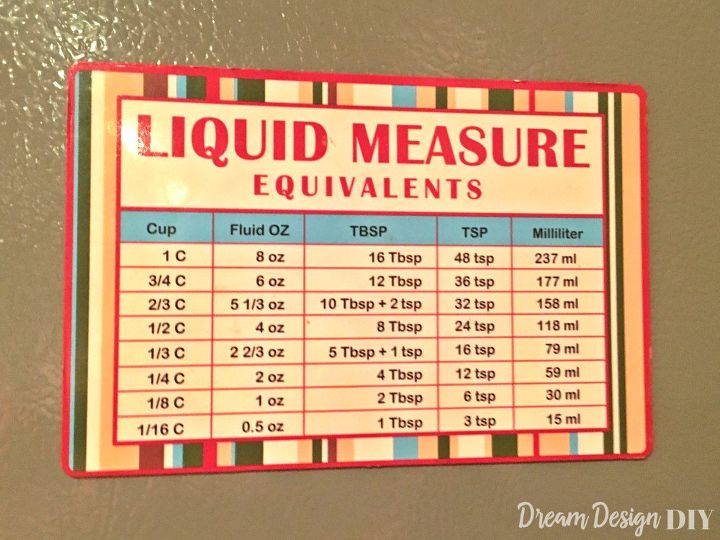
This is what I started out with...a magnet from the dollar spot at Target. Although it did the job it just didn't fit in with my decor.
Then I have the perfect solution for you!
This is what I started out with...a magnet from the dollar spot at Target. Although it did the job it just didn't fit in with my decor.
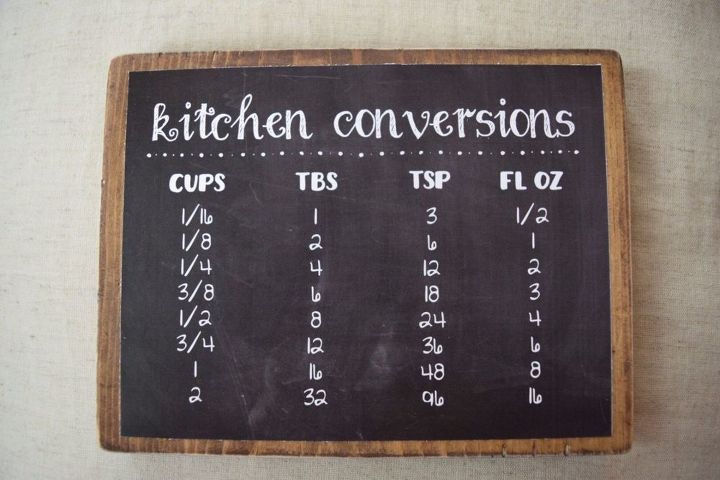
This is what I made to replace it!

I am going to show you how to make a Wood Kitchen Conversion that is not only super resourceful, but it is so cute and easy to make.
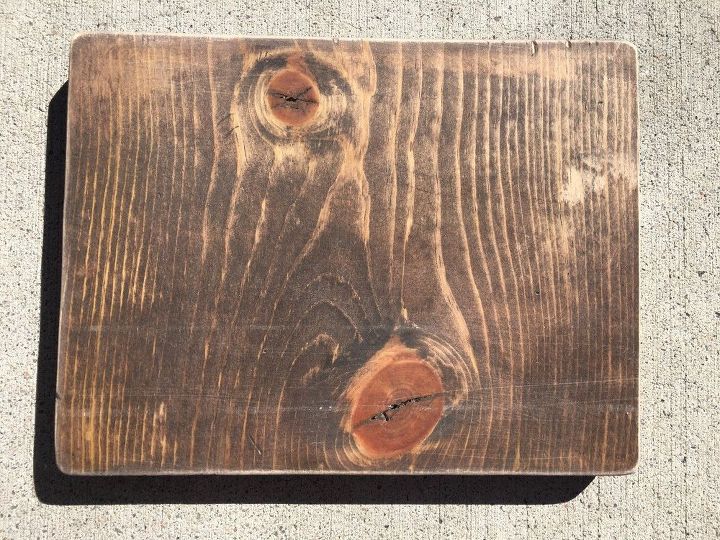
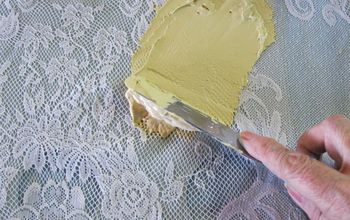
I then sanded the wood one last time to give it a rustic look. Making sure to focus on the edges.
Next I printed, cut and applied the printable with spray adhesive.
I allowed the glue to to dry and applied several coats of a spray sealer.
This makes a great gift and it really helps out in the kitchen. It will become your new favorite kitchen tool!

Want more details about this and other DIY projects? Check out my blog post!


Frequently asked questions
Have a question about this project?