


Scrap Wood Table With Leather Sling

8 Materials
$35
2 Days
Advanced
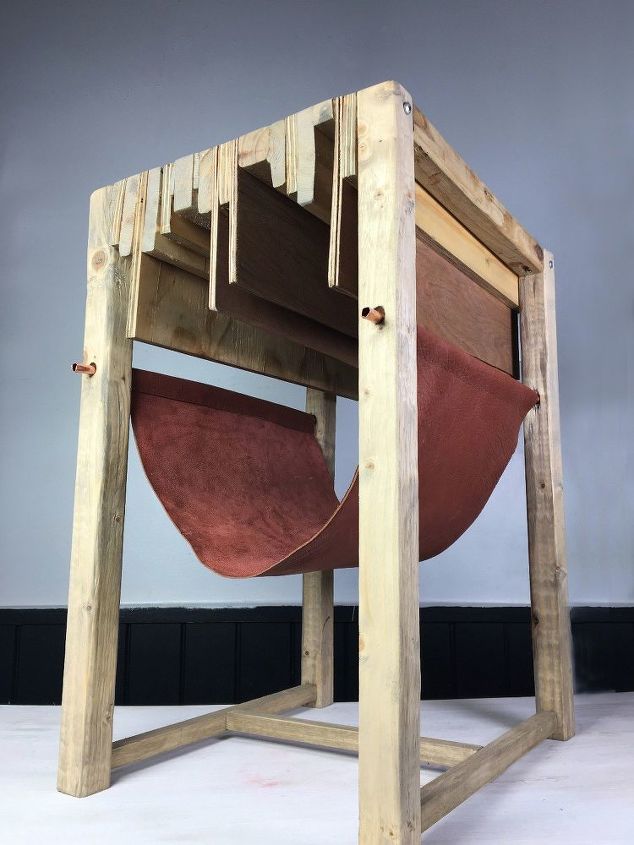
I had a bunch of scrap pieces of wood lying around from past projects that I wanted to put to good use, so I came up with this side table idea. This project is a time consumer, but it is a great way to put your scraps to use! It's also great storage for your magazines, vinyl, or books with the added leather sling! If you have a bunch of scrap pieces of wood lying around all you have to do is glue them together, and add some legs and the leather sling for this little gem!
By the way, be sure to check out other awesome DIY woodworking projects for some really cool wooden building projects!
I have to be honest, I did end up buying some extra wood, but mostly so the legs would be the same. If you don't have the right wood to cover the span of the legs all you need is a 1.5"x1.5"x8' beam.
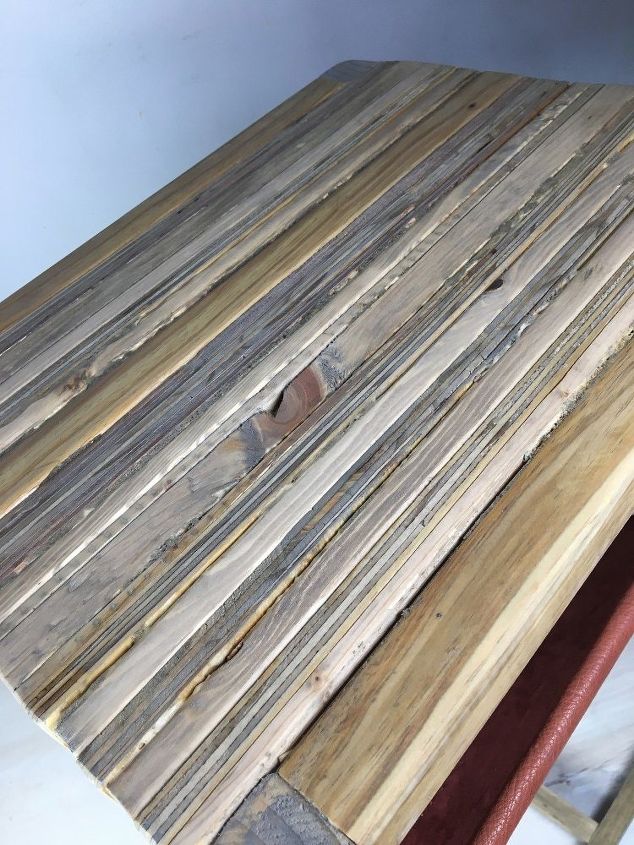
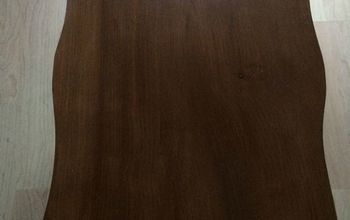
Just look at all those different wood types and grains! I love how they all took so differently with the stain!
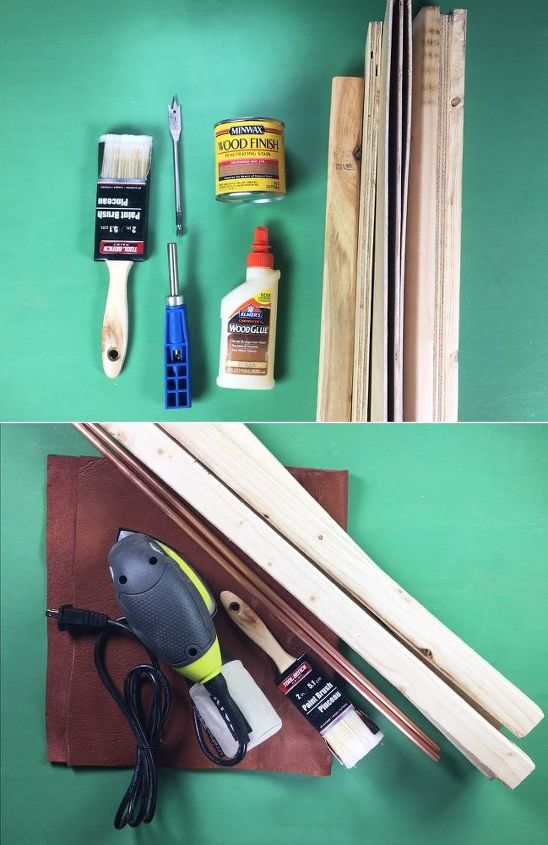
SUPPLIES: -Scrap Wood (All cut to the same length... Mine was 18") -Wood Glue -Kreg Jig -Paint Brush -Wood Stain -1/2" Spade Bit -4 Wood Legs at 1.5"x1.5"x24" -2 3/8" Copper Pipes -Sander -Piece of Leather (26"x14" or larger) -Support Beam Wood Pieces (2- 1/2"x1/2"x15" / 1- 1/2"x1/2"x12.25") -Clamp (not pictured)
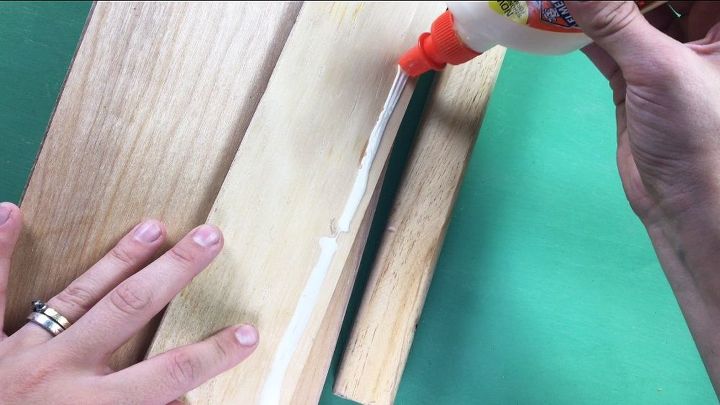
STEP 1: Glue Wood Pieces Together After cutting all your table top pieces to the same length you can glue them together with a strong hold wood glue. I cut all my pieces to 18" and 2 pieces at 15 for the ends. (Because your legs rest on the side of the top they eat up the other 3" *See the finished product for reference)
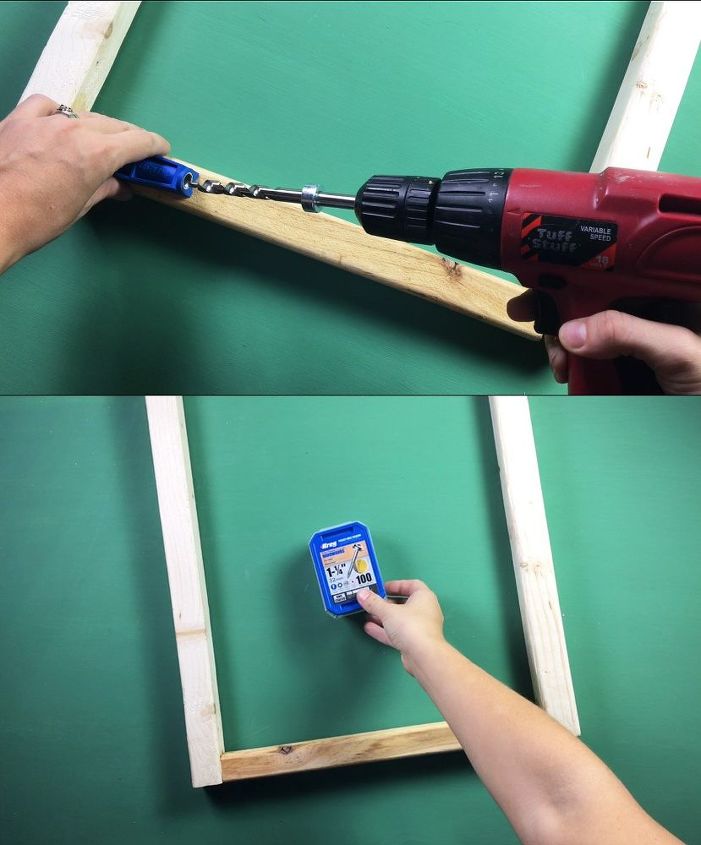
STEP 2: Screw the Legs Together For the legs you will take two of your 24"x1.5"x1.5" and your 15" top pieces and screw them together with a kreg jig and hidden screw. You will use your kreg jig to place holes on both ends of the 15" piece and then drill it into the 2 legs. Repeat this process with the remaining 24"x1.5"x1.5" legs.
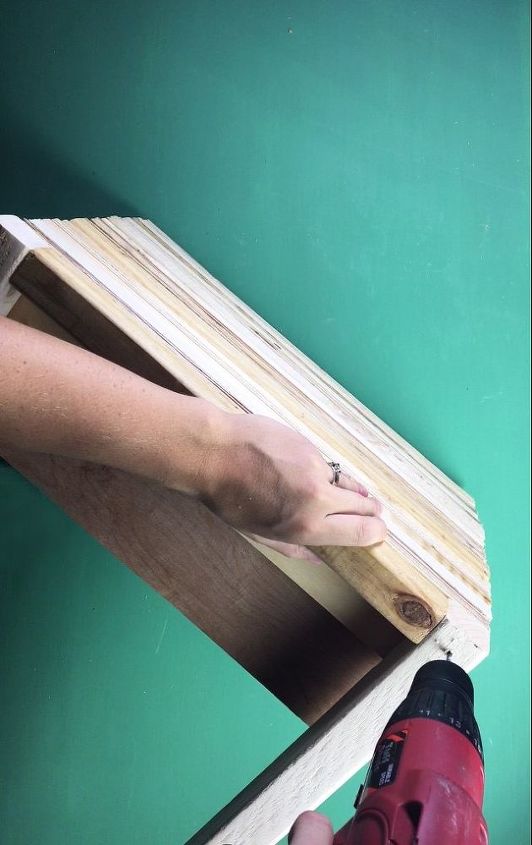
STEP 3: Attach the Legs to the Tabletop Use wood glue and screws to attach the legs to each side of the table top.
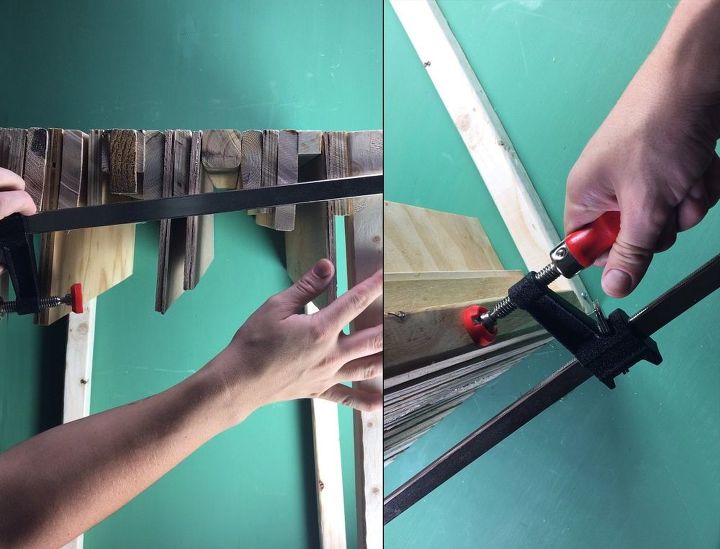
STEP 4: Clamp and Let Dry Overnight At this point the wood glue should still be drying, but you want it to set nicely and make sure no wood pieces are bowing. Clamp the entire top tightly together and allow to dry overnight.
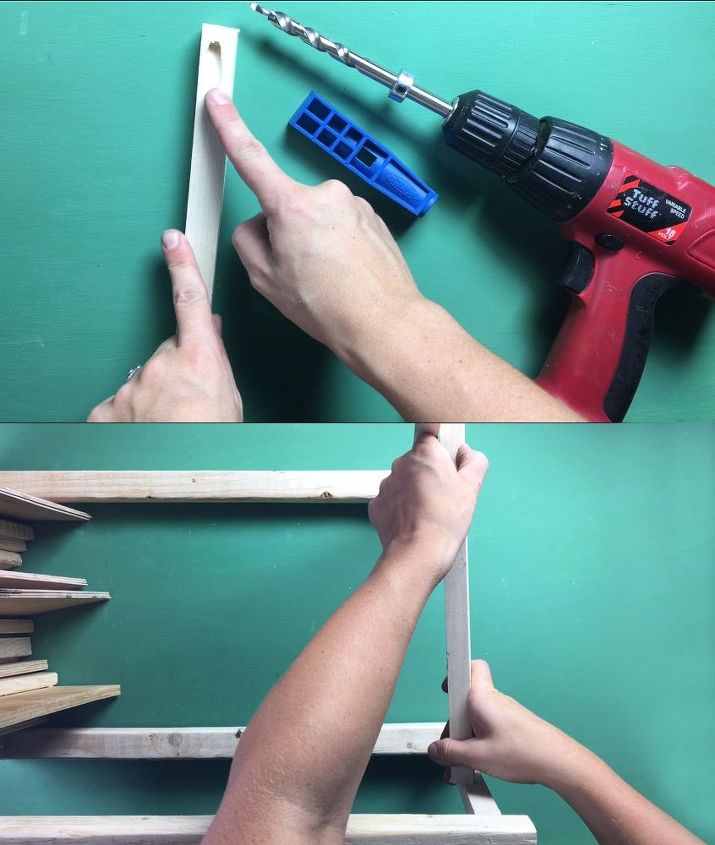
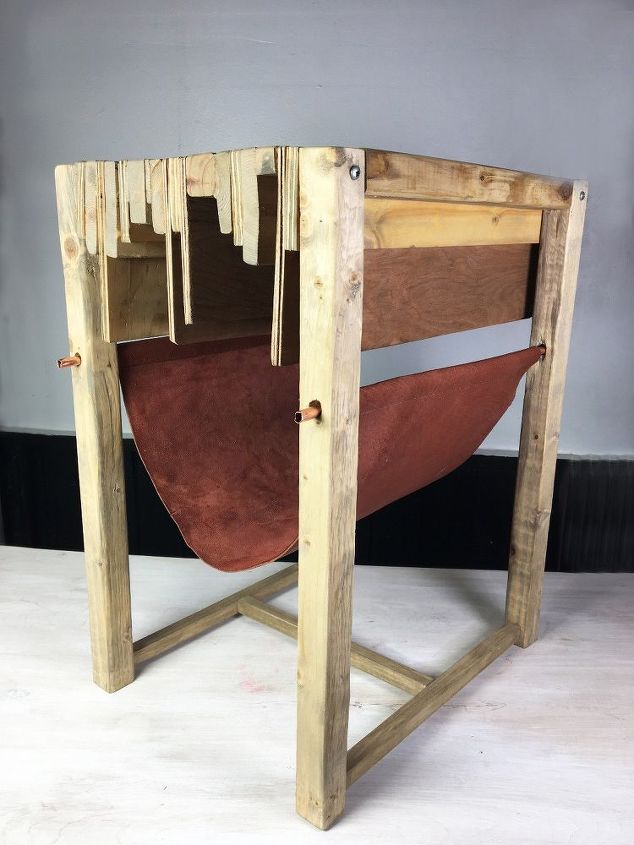
STEP 5: Add Support Beams Before you let your glue dry overnight you will want to add the support beams at the bottom of the table between the legs. You will need 2 15" long pieces to rest on the outside from front to back and one 12.25" for the middle resting side to side. First add hidden holes on each end of each piece with a kreg jig. Then simply screw these beams in place. Each 15" piece on either side and the 12.25" piece between the two of them. Make sure to keep it all even.
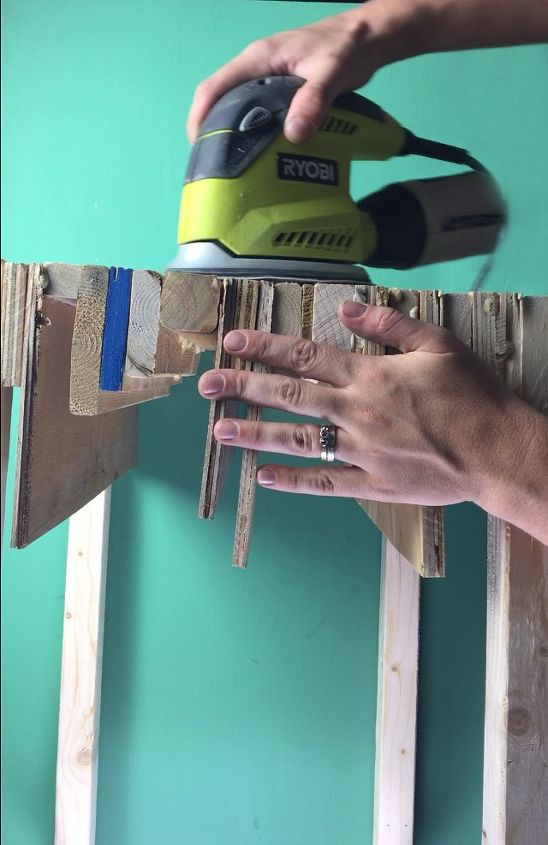
STEP 6: Sand Down Your Piece Once your wood glue has dried overnight it is time to sand down all the wood and also any glue that has seeped through the cracks.
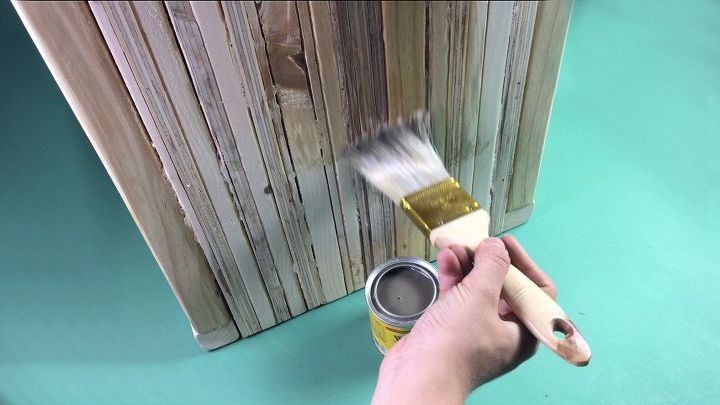
STEP 7: Dust it Off and Stain It Once it is nice and smooth dust it off and stain it if you wish!
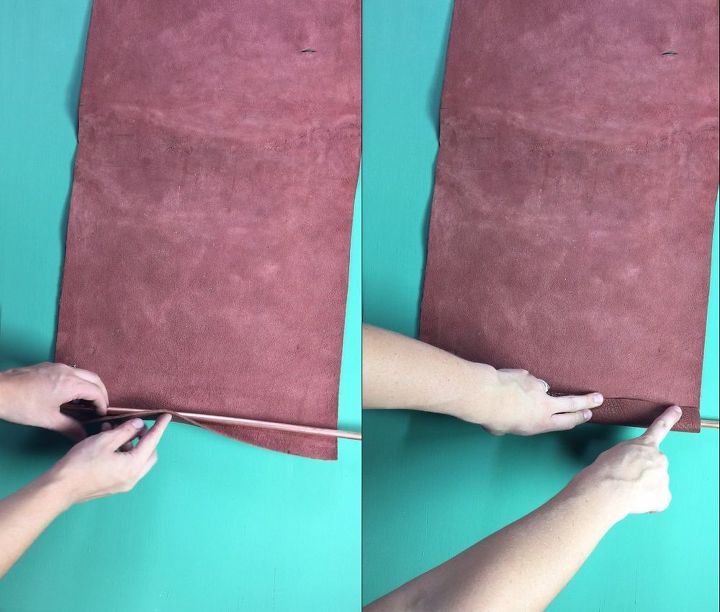
STEP 8: Prepare the Leather Sling Now it is time to prepare the leather sling. Take your piece of leather. (Mine measured 26x14) and wrap it around the copper pipe. Sew a seam to create a loop for the copper pipe to be fed through.
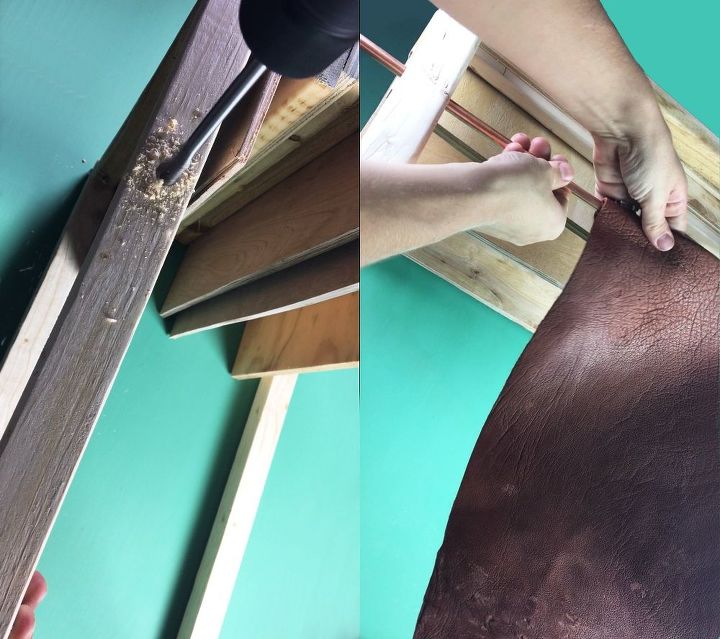
STEP 9: Attach the Copper Pipe Using a spade bit drill a 1/2" hole on each of the legs for the copper pipe to go through. Make sure they are all the same distance from the top of the table so the sling sits evenly. Now all you have to do is feed the copper pipe through one hole, through the leather loop and through the other hole. Repeat this on both sides.
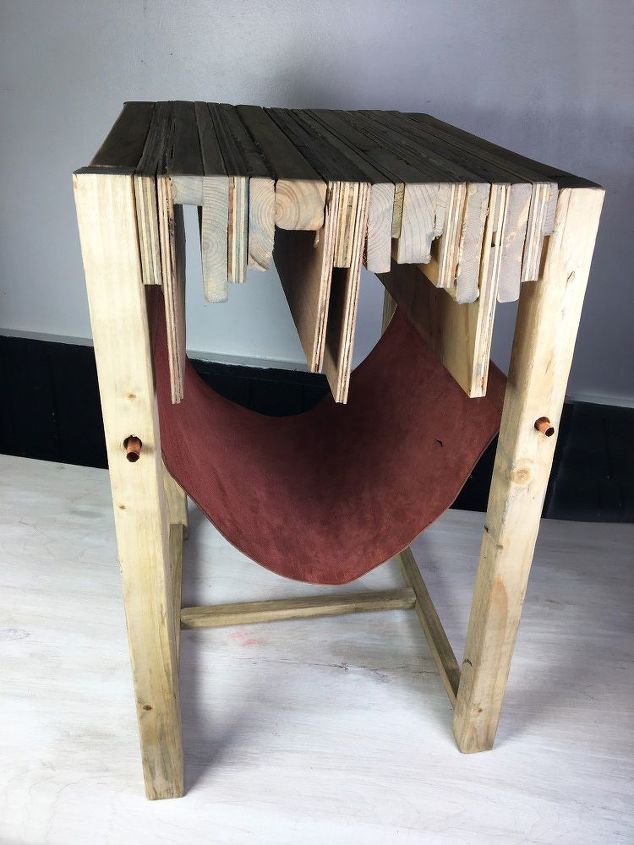
I love how all the pieces sort of drip down in various lengths! It adds so much character!
How great is it that this beauty serves as storage as well?!?!
Comments
Join the conversation
2 of 20 comments
-
Love it. You have vision!
-
I think the cat would love this :)


Frequently asked questions
Have a question about this project?