


How to Grow Garlic
Fall is the time to plant garlic. Garlic is ridiculously easy to plant and care for. It tastes great, looks beautiful, and takes up so little space that even people with very small gardens or containers can grow enough to be well-stocked in garlic for most of the year.
Selecting Garlic
If you look in any good garden catalog, you'll usually find many varieties of garlic listed. While different catalogs break them into different specialties and flavors, for general purposes, the most important difference in types of garlic is between softneck and hardneck.
Softneck garlics are called "soft" because the whole green plant dies back, leaving nothing but the bulb and flexible stems that are easy to braid.In contrast, hardneck garlics have a stiff stem in the center that ends in a beautiful flower, followed by a cluster of little bulbs, which then dries to a rigid stick that makes braiding impossible.
Softnecks are the easiest to grow in regions where the weather is mild. They keep longer than hardnecks, but they are less hardy and more likely to produce small, very strong-flavored cloves. Hardneck garlics grow best where there is a real winter, and are more vulnerable to splitting—or simply refusing to produce—when grown in warm climates.
Gardeners in most of the U.S. can try some of both. Southerners should probably stick to softnecks and northerners to the hardnecks, but microclimates in your yard do matter.Specialty catalogs will suggest your best bets based on your climate and tastes, but it's also a good idea to get some bulbs for planting from your local farmers' market, because whatever variety they are selling is growing where you are.
Planting Garlic
Garlic Topsets - Cook or replant for "scallions."
Growing garlic starts with knowing when to plant it. But planting itself is incredibly easy:In mid-fall (October in most temperate parts of the U.S.), plant garlic cloves in loose, very fertile, weed-free soil. Insert cloves root side down about 8 inches apart in all directions and two inches deep.
If space is limited, you can get by with 6 inches apart. You can also plant garlic cloves between and around other plants in your garden, where they can help with pest control.
Green shoots will come up, so mulch around them with straw. A hard freeze will kill the shoots, but don't worry; just pull the straw mulch over the whole bed for the winter.In spring, pull the mulch back a bit when the new shoots emerge. Give them a shot of fish emulsion mixed with liquid seaweed every month or two. Keep them weeded. Garlic does not like weeds!
Water only if the soil is dry two or more inches down. Avoid pouring water into the crowns of the plants.
Cutting Garlic Scapes
Garlic Scapes - Cut when very small and sautée for delicious, mild garlic flavor
When the scapes grow up out of the bulb, you can choose to cut them or leave them on. Tender young garlic scapes are delicious chopped and sauteed for garlic flavor. Older scapes that have made pretty curls look wonderful in a vase with cut flowers.If you are going to cut them for eating, cut them when they are about 4-6 inches long, or they will be too tough to enjoy.
If you wait until the scapes are well developed you'll get, depending on the variety, either a head of tiny garlic grains that can be used whole and unpeeled in place of minced garlic (for a week or two, after which the skins toughen), or you'll get a clump of small round bulbs, called topsets, that can be stored and then planted in early spring to produce garlic "scallions."
Harvesting Garlic
The type of garlic you grow will determine when it should be harvested. Garlic varieties are divided into early, midseason and late, but what that means depends not only on your climate zone, but also on your weather during that particular growing year. The warmer the year, the faster they will grow. If you want to ensure maximum storage life, you'll want to be sure to harvest them on time.
Garlic bulbs are ready when most of the lower leaves have browned. The upper ones will still be green. Garlic is NOT like onions, so you should NOT wait until all the leaves have fallen over, or you will ruin your crop.
Garlic bulbs are more delicate than they seem and any cut or bruise will shorten their storage life. Try to harvest them on an overcast day when the soil is dry. Gently loosen the soil with a digging fork, making sure to keep it well away from the heads, then lift them out of the soil and place them in your basket.
Curing Garlic
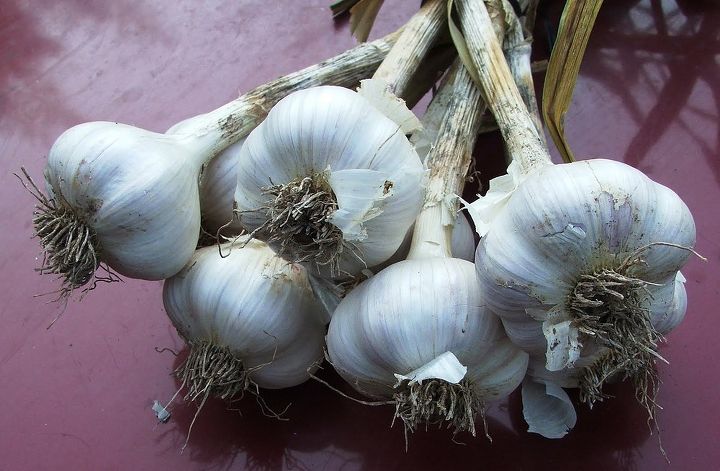
Cure your garlic bulbs by laying or hanging them to dry in a warm, dry, shaded place for 3-6 weeks.Do not clean your newly harvested garlic bulbs. Instead, lay or hang the whole plants out to dry in a warm, dry, shady place, like a porch. Don't let them get wet.
When the outer skin is papery (3-6 weeks), brush off as much dirt as possible and clip the roots and stems. If you're planning to braid your garlic stems; check them often and don't wait until they're completely dry, or the stems will crack and break.
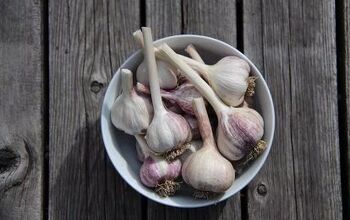
Your cured garlic bulbs will still be on the dirty side compared to what you might buy at the store. Leave them that way until you want to use them because further cleaning will shorten their storage life.If you just can't tolerate the way your garlic looks, try removing one outer layer of wrapper. Washing you bulbs with water will shorten their storage life, and might introduce fungus rot.
Storing Garlic
The ideal temperature range for storing garlic is between 55 and 70 degrees F, with moderate humidity and good air circulation, in the light but out of the sun. Just don't store them in the fridge or in plastic bags, where they could sprout or rot.
If you grew softneck garlic, you can braid the stems into lovely bundles for your kitchen wall, or for gift-giving. Just pull off a bulb for cooking when you need one!
Selecting Garlic
If you look in any good garden catalog, you'll usually find many varieties of garlic listed. While different catalogs break them into different specialties and flavors, for general purposes, the most important difference in types of garlic is between softneck and hardneck.
Softneck garlics are called "soft" because the whole green plant dies back, leaving nothing but the bulb and flexible stems that are easy to braid.In contrast, hardneck garlics have a stiff stem in the center that ends in a beautiful flower, followed by a cluster of little bulbs, which then dries to a rigid stick that makes braiding impossible.
Softnecks are the easiest to grow in regions where the weather is mild. They keep longer than hardnecks, but they are less hardy and more likely to produce small, very strong-flavored cloves. Hardneck garlics grow best where there is a real winter, and are more vulnerable to splitting—or simply refusing to produce—when grown in warm climates.
Gardeners in most of the U.S. can try some of both. Southerners should probably stick to softnecks and northerners to the hardnecks, but microclimates in your yard do matter.Specialty catalogs will suggest your best bets based on your climate and tastes, but it's also a good idea to get some bulbs for planting from your local farmers' market, because whatever variety they are selling is growing where you are.
Planting Garlic
Garlic Topsets - Cook or replant for "scallions."
Growing garlic starts with knowing when to plant it. But planting itself is incredibly easy:In mid-fall (October in most temperate parts of the U.S.), plant garlic cloves in loose, very fertile, weed-free soil. Insert cloves root side down about 8 inches apart in all directions and two inches deep.
If space is limited, you can get by with 6 inches apart. You can also plant garlic cloves between and around other plants in your garden, where they can help with pest control.
Green shoots will come up, so mulch around them with straw. A hard freeze will kill the shoots, but don't worry; just pull the straw mulch over the whole bed for the winter.In spring, pull the mulch back a bit when the new shoots emerge. Give them a shot of fish emulsion mixed with liquid seaweed every month or two. Keep them weeded. Garlic does not like weeds!
Water only if the soil is dry two or more inches down. Avoid pouring water into the crowns of the plants.
Cutting Garlic Scapes
Garlic Scapes - Cut when very small and sautée for delicious, mild garlic flavor
When the scapes grow up out of the bulb, you can choose to cut them or leave them on. Tender young garlic scapes are delicious chopped and sauteed for garlic flavor. Older scapes that have made pretty curls look wonderful in a vase with cut flowers.If you are going to cut them for eating, cut them when they are about 4-6 inches long, or they will be too tough to enjoy.
If you wait until the scapes are well developed you'll get, depending on the variety, either a head of tiny garlic grains that can be used whole and unpeeled in place of minced garlic (for a week or two, after which the skins toughen), or you'll get a clump of small round bulbs, called topsets, that can be stored and then planted in early spring to produce garlic "scallions."
Harvesting Garlic
The type of garlic you grow will determine when it should be harvested. Garlic varieties are divided into early, midseason and late, but what that means depends not only on your climate zone, but also on your weather during that particular growing year. The warmer the year, the faster they will grow. If you want to ensure maximum storage life, you'll want to be sure to harvest them on time.
Garlic bulbs are ready when most of the lower leaves have browned. The upper ones will still be green. Garlic is NOT like onions, so you should NOT wait until all the leaves have fallen over, or you will ruin your crop.
Garlic bulbs are more delicate than they seem and any cut or bruise will shorten their storage life. Try to harvest them on an overcast day when the soil is dry. Gently loosen the soil with a digging fork, making sure to keep it well away from the heads, then lift them out of the soil and place them in your basket.
Curing Garlic
Cure your garlic bulbs by laying or hanging them to dry in a warm, dry, shaded place for 3-6 weeks.Do not clean your newly harvested garlic bulbs. Instead, lay or hang the whole plants out to dry in a warm, dry, shady place, like a porch. Don't let them get wet.
When the outer skin is papery (3-6 weeks), brush off as much dirt as possible and clip the roots and stems. If you're planning to braid your garlic stems; check them often and don't wait until they're completely dry, or the stems will crack and break.
Your cured garlic bulbs will still be on the dirty side compared to what you might buy at the store. Leave them that way until you want to use them because further cleaning will shorten their storage life.If you just can't tolerate the way your garlic looks, try removing one outer layer of wrapper. Washing you bulbs with water will shorten their storage life, and might introduce fungus rot.
Storing Garlic
The ideal temperature range for storing garlic is between 55 and 70 degrees F, with moderate humidity and good air circulation, in the light but out of the sun. Just don't store them in the fridge or in plastic bags, where they could sprout or rot.
If you grew softneck garlic, you can braid the stems into lovely bundles for your kitchen wall, or for gift-giving. Just pull off a bulb for cooking when you need one!

Want more details about this and other DIY projects? Check out my blog post!
Comments
Join the conversation
2 of 3 comments
-
YW! :)
-
Hi


Frequently asked questions
Have a question about this project?