


How to make a Gallery Wall
$50
4 Hours
Medium
Want to see how I made our Gallery Wall for under $50??? There are so many fantastic Gallery Walls and they are such a great way to share and feature all your great pictures of your family, kids and pets along with adding some interest and punch to your walls. I just love ours and I have found ways to change it up for the seasons too. Here’s how I did our wall for under $50.
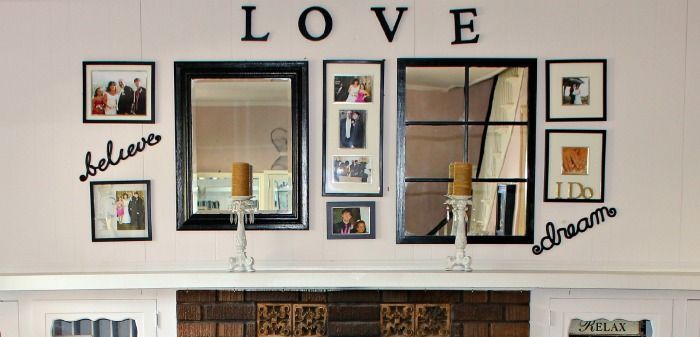
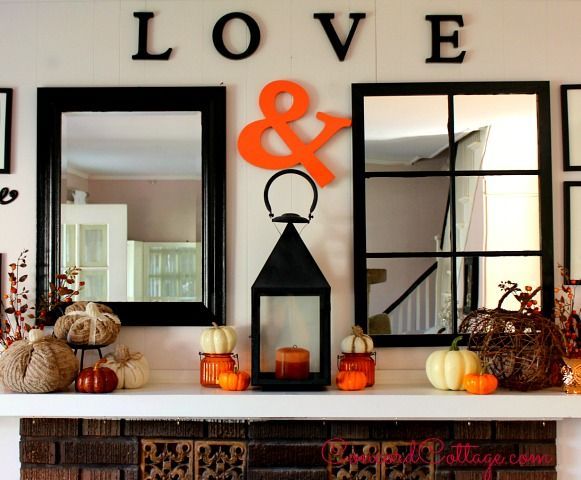
Our Living Room Gallery Wall
First, we received this great smaller Gallery Wall Wedding Theme Photo Frame Set as a wedding gift that I wanted to use. It was $39.99 at Bed Bath & Beyond and you can use a coupon there too.
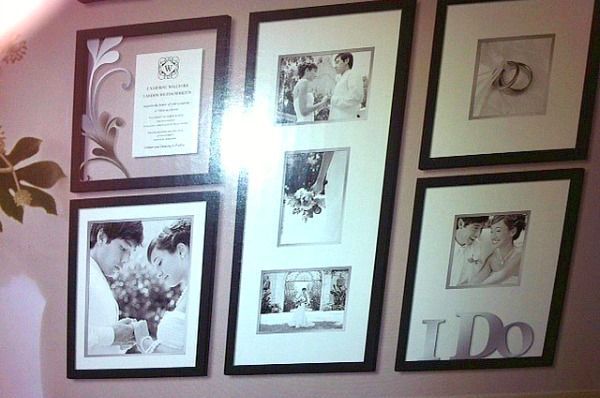
This was a wedding gift with boxed frames that I wanted to add to.
Being newly married I thought it would be a great way to share our wedding pictures of us and our kids. It was small for our large fireplace mantle, so I shopped our house for items I could use to add some drama. I found two larger mirrors that were in two different sage greens. I had found them a while back at thrift stores for under $10 each. I knew I could paint them black.
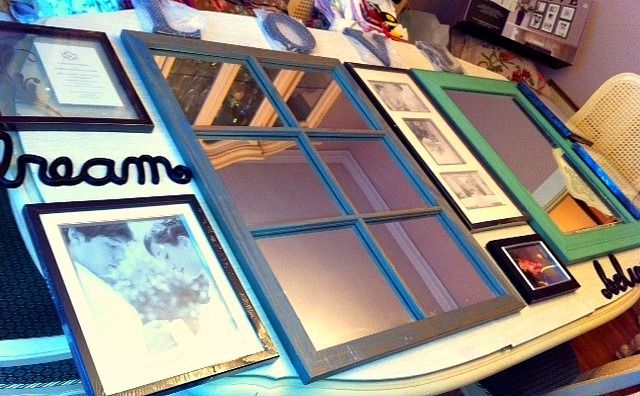
I laid them out on my dining room table to come up with the layout I wanted
I had found these words dream and believe (both were under $2 each) and wanted to hang them so I figured I could incorporate them into the gallery. I laid everything out on my dining room table to see how it would look and played around to get the look I wanted. I then took the frames outside and taped the mirrors off and painted them with some left over black paint I had. Now you could very easily spray paint yours, but I happened to have regular paint and it went really fast. I like to pull my tape off before it’s dry so it doesn’t pull off some of the paint. That’s a trick my dad taught me.
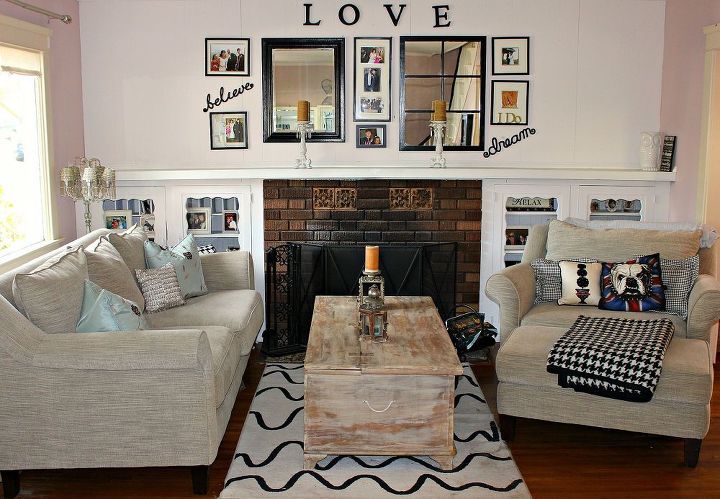
Here is our living room Gallery Wall for under $50
While paint was drying, I went to Walgreens to print my pictures. I made a little list ahead of time of what sizes I needed. I wanted to not only include pictures of Us, but also our kids too. He has a son and I have a daughter and now it’s our new family. I went ahead and started adding in my pictures to the frames. By then my large mirrors were dry too. Then I cut out some old wrapping paper I had to make these shapes and taped them on my wall to make sure I would love the scale of it. Now to be honest, normally I don’t do that, I just get the hammer and nails and sort of eyeball, but with this many I wanted to do it right, measure and make sure they were lined up. I’m glad I did. It’s an extra step but then when you go to hang them, it makes it so much easier.
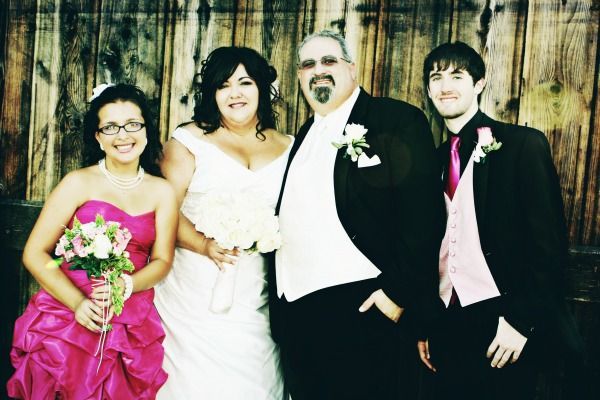
Here's a closeup of our Wedding photo with our kids. Juls Megill Photography is amazing.
And this is how it looks now. I also included the last pic with our Fall Décor where I made a few changes and most recently I made a Reindeer Garland and changed it up in a Christmas themed mantel and Gallery Wall so peek at that too. Thanks for stopping by have a great day, Lisa.
Our Fall Gallery Wall
Sharing how it looked during Fall!
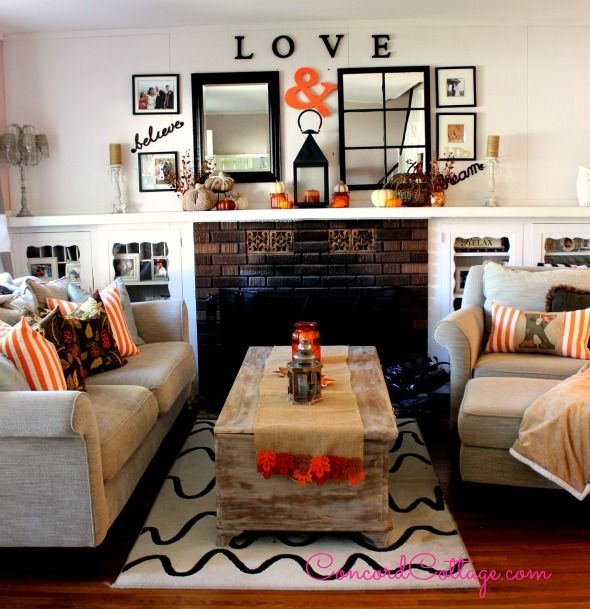
Here's our living room and Gallery wall with a few pops of color for Fall.
Here's our Fall Living Room!
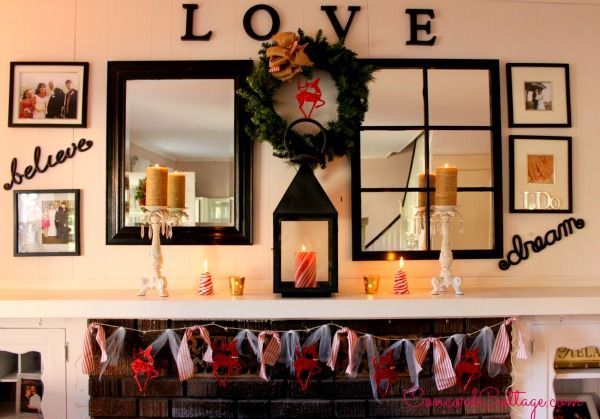
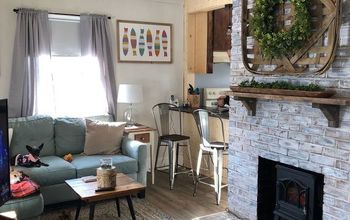
Here's is our Christmas Holiday Mantel and Gallery Wall
Here it was at Christmas time!

Want more details about this and other DIY projects? Check out my blog post!
Comments
Join the conversation
3 of 6 comments
-
Love it!
-
Lisa, a pretty idea. I like your living room, it looks cozy with a lot of furniture grouped together, like mine. Marcy


Frequently asked questions
Have a question about this project?