


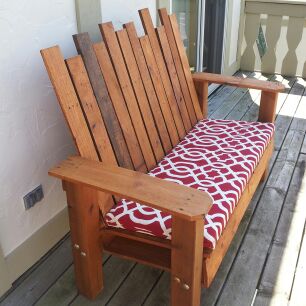
Repurposed Pallet Into a Do-It-Yourself Bench

This was an awesome project. We ship our gutter guards from the plant to the main warehouse on pallets, so we had a few laying around and decided to make something out of them. After looking around a while here on HomeTalk.com we decided to combine a few of the ideas to make our own repurposed pallet bench.
We used about 4 pallets (free) and bought one 10ft cedar 4×4 post, eight 10in bolts, some washers & nuts. We had some deck screws laying around and also some leftover paint/stain to finish it off. All in all, we spent under $20-30. Sizes and prices may vary depending on your material sizes and desired bench.
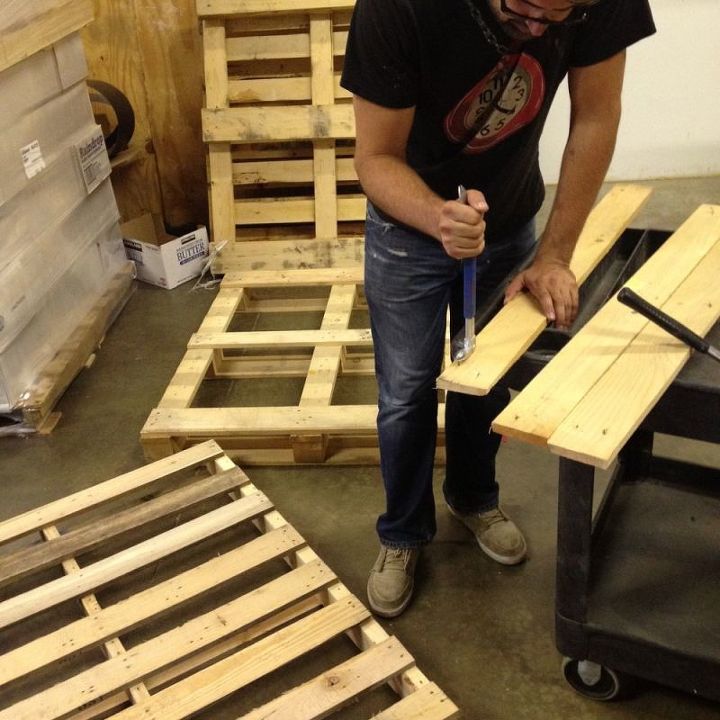
1. Breakdown all the pallets into individual boards.
This is probably the most time consuming and difficult part. There were many methods being used here. It kind of seemed like, whatever works best for you… use it! Sometimes use a pry-bar. Sometimes whack it with a hammer. Put it on a table and use a 2×4 to spread out the impact across the nailed area, and whack that. Stomp on it. Twist it. Kick it. This is an opportunity to get out your anger and stress. Look at it in a positive way.
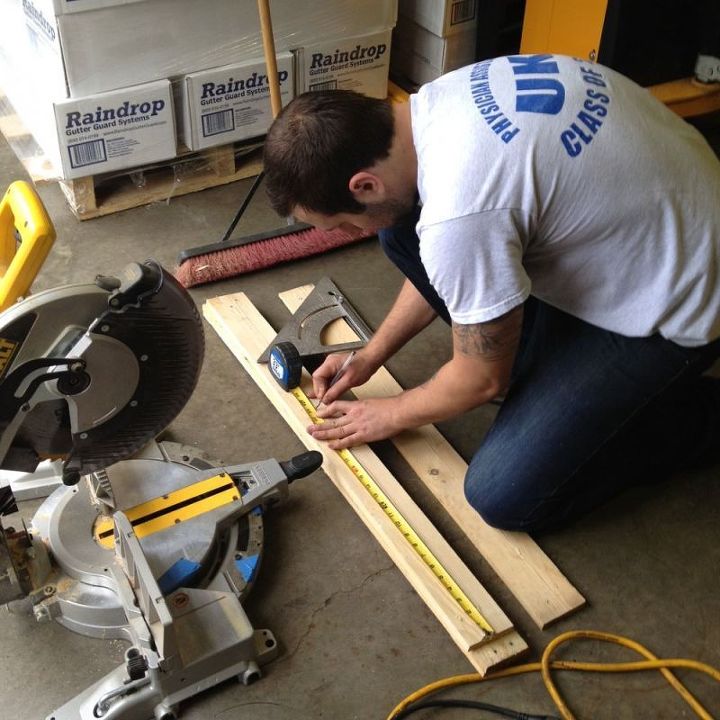
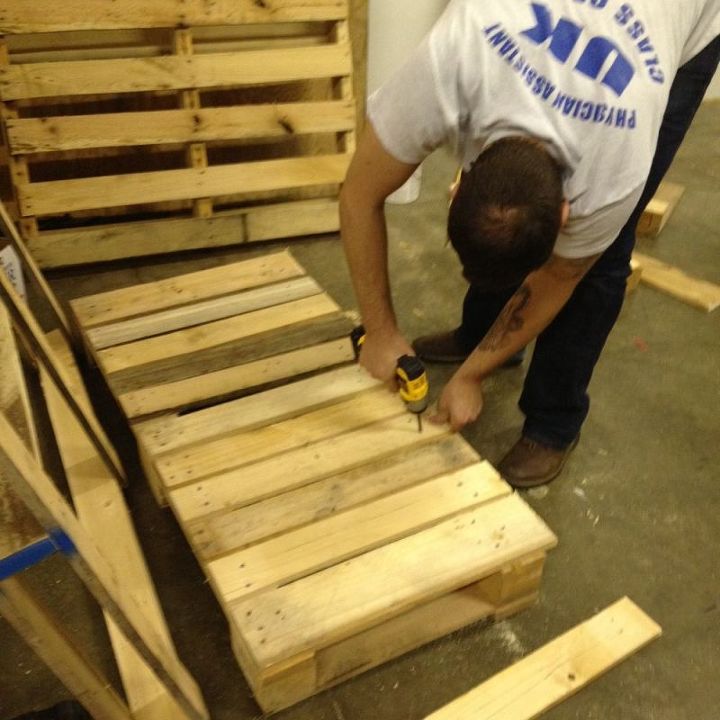
2. Measure and cut boards for the seat.
We took one of the pallets, cut it in half (almost) and used that for the seat base. It was about 24×48 inches. So we cut the boards at 24inches for this part of the bench.When attaching the boards, it is probably best to pre-drill the holes, otherwise you risk splitting the boards.
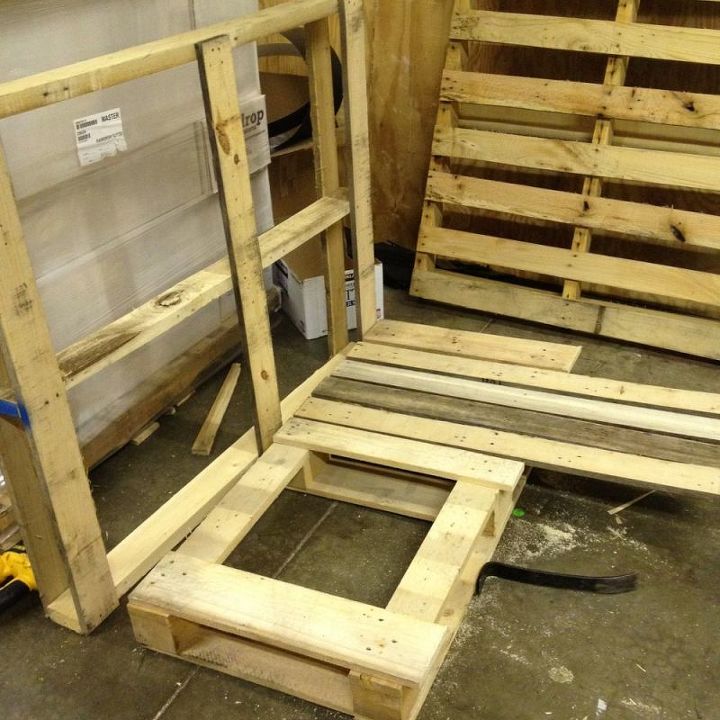
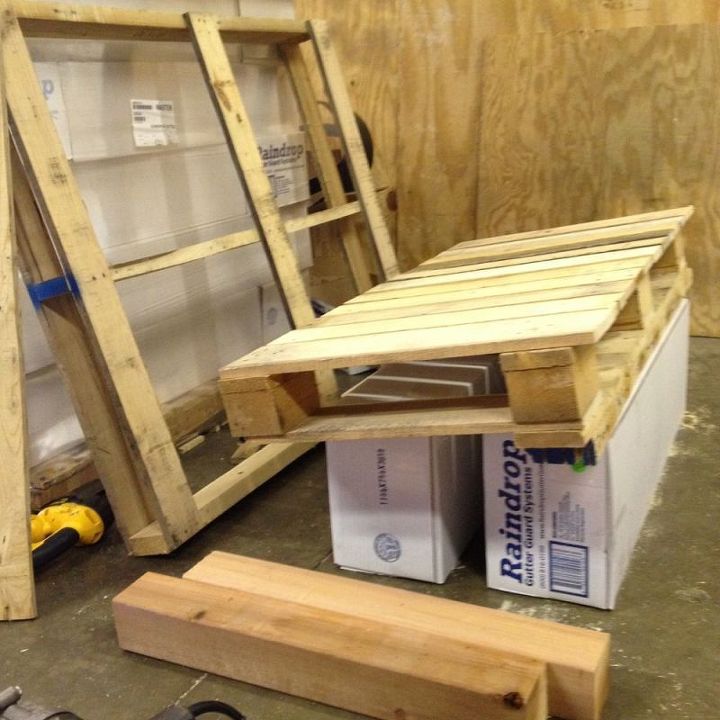
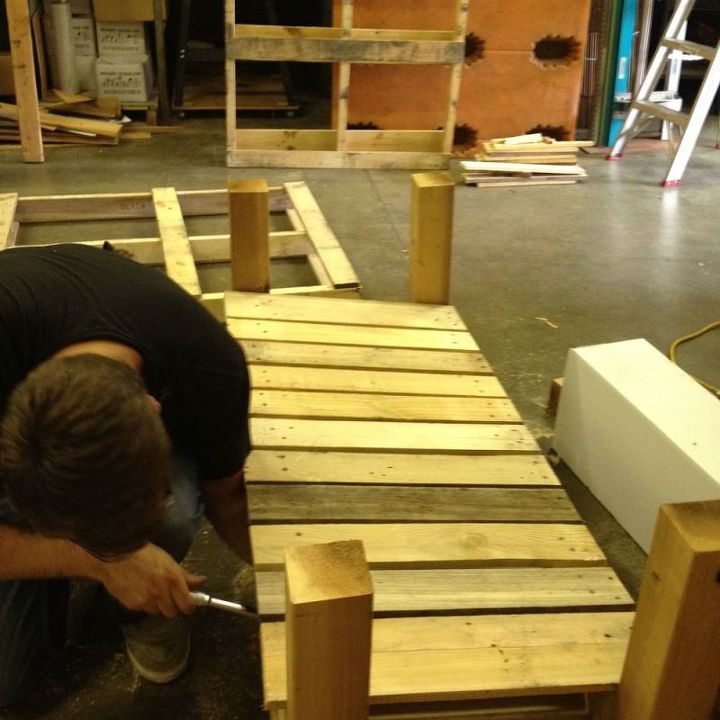
3. Choose your angle & secure the legs.
This may be a little unconventional, but we used some boxes of material and a 2×4 to decide our height and positioning of our bench seat.Next, the 10 foot post was cut into four equal parts, just under 2 and a half feet each.Drill 2 holes through each post and use the bolts to secure them to the bench seat.
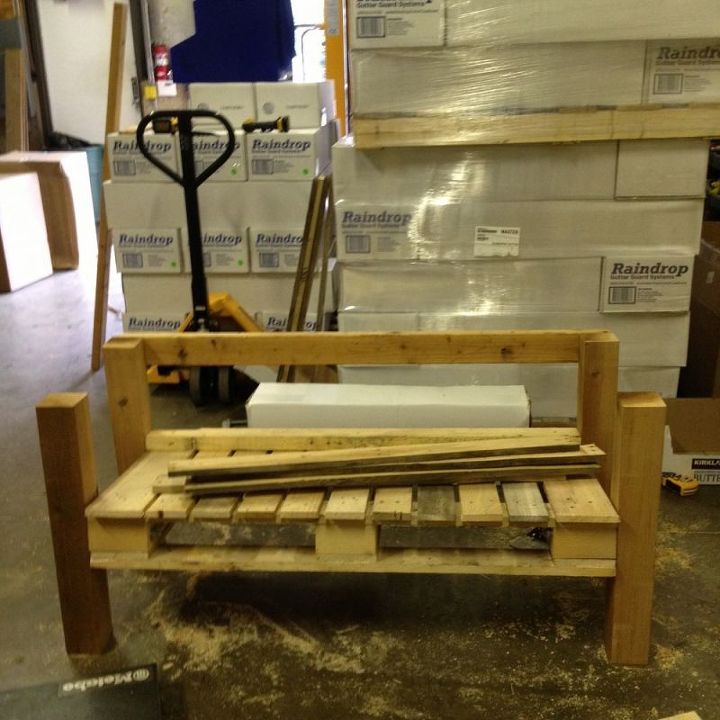
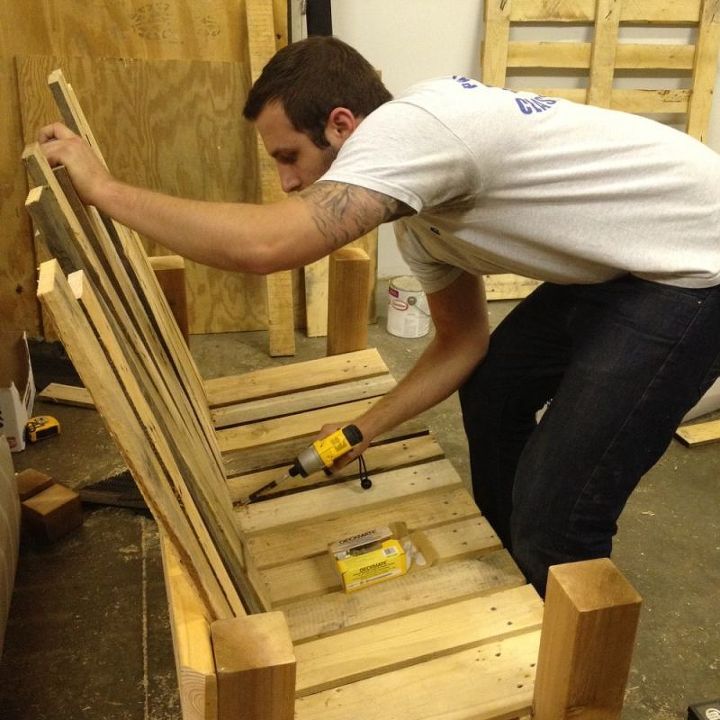
4. Measure, cut & secure the backrest.
Instead of a more traditional straight or rounded top for the backrest, we went with a staggered look. Whatever way you go, choose comfort first.The backrest boards are secured to a base board (that is fastened to the bench seat part towards the back), and then again to a crossbar (that is where the middle of your back would rest). That base board also doubles as extra support.The armrests were cut from the 2 widest boards we got from the pallets. Figured it would be better to rest our coffee on.
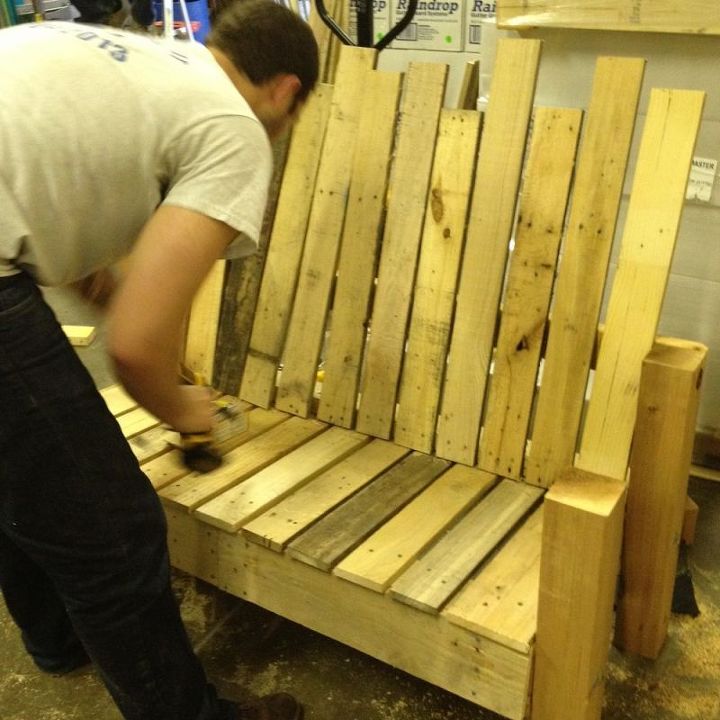
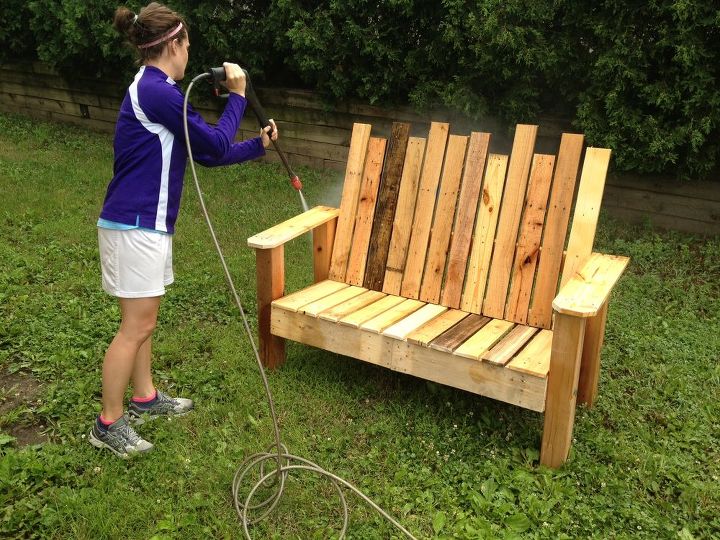
5. Power-wash & stain.
Most pallets are going to be dirty so power-washing them is a good idea. Plus, it is a good rule of thumb to do that before staining or putting a new finish on wood.
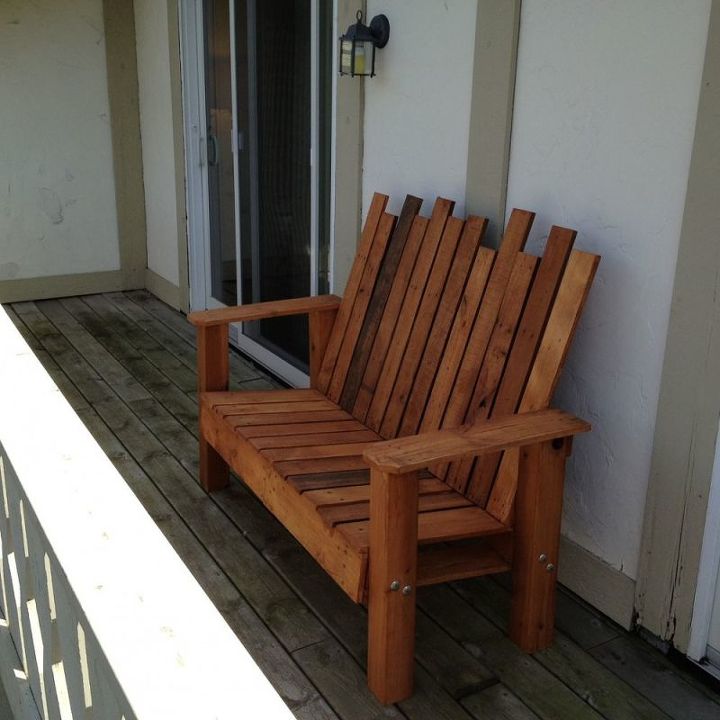
6. Pick your view.
We added a decorative outdoor cushion too! Let us know if you have any questions! Enjoy!
We used about 4 pallets (free) and bought one 10ft cedar 4×4 post, eight 10in bolts, some washers & nuts. We had some deck screws laying around and also some leftover paint/stain to finish it off. All in all, we spent under $20-30. Sizes and prices may vary depending on your material sizes and desired bench.
1. Breakdown all the pallets into individual boards.
This is probably the most time consuming and difficult part. There were many methods being used here. It kind of seemed like, whatever works best for you… use it! Sometimes use a pry-bar. Sometimes whack it with a hammer. Put it on a table and use a 2×4 to spread out the impact across the nailed area, and whack that. Stomp on it. Twist it. Kick it. This is an opportunity to get out your anger and stress. Look at it in a positive way.
2. Measure and cut boards for the seat.
We took one of the pallets, cut it in half (almost) and used that for the seat base. It was about 24×48 inches. So we cut the boards at 24inches for this part of the bench.When attaching the boards, it is probably best to pre-drill the holes, otherwise you risk splitting the boards.
3. Choose your angle & secure the legs.
This may be a little unconventional, but we used some boxes of material and a 2×4 to decide our height and positioning of our bench seat.Next, the 10 foot post was cut into four equal parts, just under 2 and a half feet each.Drill 2 holes through each post and use the bolts to secure them to the bench seat.
4. Measure, cut & secure the backrest.
Instead of a more traditional straight or rounded top for the backrest, we went with a staggered look. Whatever way you go, choose comfort first.The backrest boards are secured to a base board (that is fastened to the bench seat part towards the back), and then again to a crossbar (that is where the middle of your back would rest). That base board also doubles as extra support.The armrests were cut from the 2 widest boards we got from the pallets. Figured it would be better to rest our coffee on.
5. Power-wash & stain.
Most pallets are going to be dirty so power-washing them is a good idea. Plus, it is a good rule of thumb to do that before staining or putting a new finish on wood.
6. Pick your view.
We added a decorative outdoor cushion too! Let us know if you have any questions! Enjoy!
Repurposed Pallet into a Do-It-Yourself Bench.
1. Breakdown all the pallets into individual boards.
Repurposed Pallet into a Do-It-Yourself Bench.
2. Measure and cut boards for the seat.
Repurposed Pallet into a Do-It-Yourself Bench.
2. Measure and cut boards for the seat.
Repurposed Pallet into a Do-It-Yourself Bench.
2. Measure and cut boards for the seat.
Repurposed Pallet into a Do-It-Yourself Bench.
3. Choose your angle & secure the legs.
Repurposed Pallet into a Do-It-Yourself Bench.
3. Choose your angle & secure the legs.
Repurposed Pallet into a Do-It-Yourself Bench.
3. Choose your angle & secure the legs.
Repurposed Pallet into a Do-It-Yourself Bench.
4. Measure, cut & secure the backrest.
Repurposed Pallet into a Do-It-Yourself Bench.
4. Measure, cut & secure the backrest.
Repurposed Pallet into a Do-It-Yourself Bench.
5. Power-wash & stain.
Repurposed Pallet into a Do-It-Yourself Bench.

5. Power-wash & stain.
Repurposed Pallet into a Do-It-Yourself Bench.
6. Pick your view.
Repurposed Pallet into a Do-It-Yourself Bench.
Comments
Join the conversation
2 of 15 comments
-
very nice, good job.
-
Beautiful!


Frequently asked questions
Have a question about this project?
Does he post any measurements anywhere?
How were the legs attached? Are they bolts?