


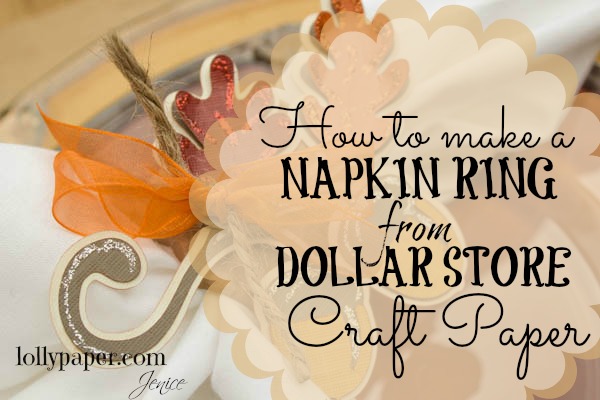
How to Make a Napkin Ring With Dollar Store Craft Paper – Tutorial

by
Lollypaper
Full post at www.lollypaper.com
Who doesn’t love their local dollar store? If you are a DIY’er or crafter, it can easily become your second home. One of my favorite staples at the dollar store is the rolls of craft paper. Not only do you get a good quantity of paper per roll, but it’s a good quality as well. It’s fairly thick and has a nice weight to it. I always have a roll or two around for photo backdrops, painting drop cloths, party tablecloths, finger painting for my 5 year old…you name it!Since I will be hosting a Thanksgiving dinner this year, I decided to use my trusty craft paper to decorate my table. Since spending a ton of money on new linens, place card holders, and napkin rings, wasn’t an option, I decided to get creative with my rolls of craft paper. I started with napkin rings.Here is what the roll looks like….can you see how much you get? It’s a serious jackpot for only a dollar!First, I cut off about 2 feet of paper. Now if you are just making napkin rings, you will only need about 8-10 inches. But since I’m working on another project at the same time, I started with a larger piece.Here’s where the fun begins. Squish it, smash it, crunch it, roll it in a ball. The idea is to get as many wrinkles in it as you can (without tearing it, of course). I find it helps to crunch it up once, then flatten it out, and do it again. The more you do this, the more pliable the paper will become. Flatten it again, then crunch again…Once you work your paper enough, it will be soft and fairly wrinkly, like this…Next you are going to iron it….that’s right, like you are ironing a shirt. Set your iron for a low setting and pass the iron over the paper quickly. I sprayed mine with spray starch. This is not completely necessary, but it does gives the paper a bit of its crispness back.Once you are done ironing, your paper with be almost flat again, but it will have a nice texture to it. You can iron it as much or as little as you want, until the texture is to your likeness. I prefer a heavier texture, so I went a little lighter with my iron.Next, I cut my paper into 2 inch wide, by 6 inch long strips.I then took a piece of felt I picked up at the fabric store. I bought 1/4 of a yard to make 10 napkin rings, and I have plenty left!Then with a hot glue gun, glue the felt onto the paper, and glue the paper into a ring.Here’s what the finished product looks like. On this one, I simply inked the edges with distress ink. Here is the best part….these litterally cost pennies to make! How awesome is that?Although I think this looks fine, I had to take it one step further and embellish it. I pulled out my Silhouette Cameo and went to town.I have all sorts of ideas on how you can elaborate these napkin rings, even without a die cutting machine. I went through my “stash” in my craft room, and challenged myself to come up with as many different ideas as I could. Stay tuned for more ideas soon.How would you decorate your napkin rings?
Who doesn’t love their local dollar store? If you are a DIY’er or crafter, it can easily become your second home. One of my favorite staples at the dollar store is the rolls of craft paper. Not only do you get a good quantity of paper per roll, but it’s a good quality as well. It’s fairly thick and has a nice weight to it. I always have a roll or two around for photo backdrops, painting drop cloths, party tablecloths, finger painting for my 5 year old…you name it!Since I will be hosting a Thanksgiving dinner this year, I decided to use my trusty craft paper to decorate my table. Since spending a ton of money on new linens, place card holders, and napkin rings, wasn’t an option, I decided to get creative with my rolls of craft paper. I started with napkin rings.Here is what the roll looks like….can you see how much you get? It’s a serious jackpot for only a dollar!First, I cut off about 2 feet of paper. Now if you are just making napkin rings, you will only need about 8-10 inches. But since I’m working on another project at the same time, I started with a larger piece.Here’s where the fun begins. Squish it, smash it, crunch it, roll it in a ball. The idea is to get as many wrinkles in it as you can (without tearing it, of course). I find it helps to crunch it up once, then flatten it out, and do it again. The more you do this, the more pliable the paper will become. Flatten it again, then crunch again…Once you work your paper enough, it will be soft and fairly wrinkly, like this…Next you are going to iron it….that’s right, like you are ironing a shirt. Set your iron for a low setting and pass the iron over the paper quickly. I sprayed mine with spray starch. This is not completely necessary, but it does gives the paper a bit of its crispness back.Once you are done ironing, your paper with be almost flat again, but it will have a nice texture to it. You can iron it as much or as little as you want, until the texture is to your likeness. I prefer a heavier texture, so I went a little lighter with my iron.Next, I cut my paper into 2 inch wide, by 6 inch long strips.I then took a piece of felt I picked up at the fabric store. I bought 1/4 of a yard to make 10 napkin rings, and I have plenty left!Then with a hot glue gun, glue the felt onto the paper, and glue the paper into a ring.Here’s what the finished product looks like. On this one, I simply inked the edges with distress ink. Here is the best part….these litterally cost pennies to make! How awesome is that?Although I think this looks fine, I had to take it one step further and embellish it. I pulled out my Silhouette Cameo and went to town.I have all sorts of ideas on how you can elaborate these napkin rings, even without a die cutting machine. I went through my “stash” in my craft room, and challenged myself to come up with as many different ideas as I could. Stay tuned for more ideas soon.How would you decorate your napkin rings?
Want more details about this and other DIY projects? Check out my blog post!


Frequently asked questions
Have a question about this project?