


DIY Painted and Stenciled Linoleum Floor
5 Materials
We've put so much work into making our kitchen a space we can really enjoy but there was one major eyesore killing the vibe: the ugly linoleum floors. Since we were saving up to replace the floors throughout our home eventually, I wanted to try something fun to make them pretty for the time being. Head over to the blog for a complete tutorial from start to finish.

Our standard builder grade linoleum sheet flooring before starting the painting process.
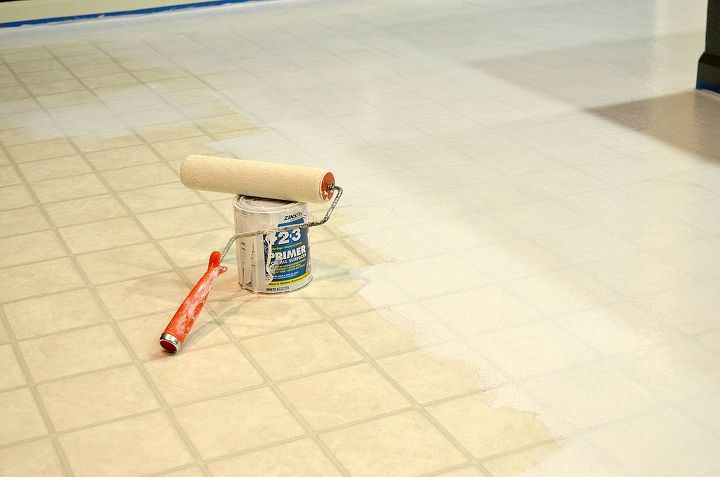
After cleaning the floors with TSP, I rolled on a coat of a good high adhesion primer.
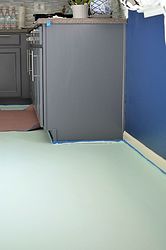
I then painted on 2 coats of Glidden Porch and Floor in a soft mint color.
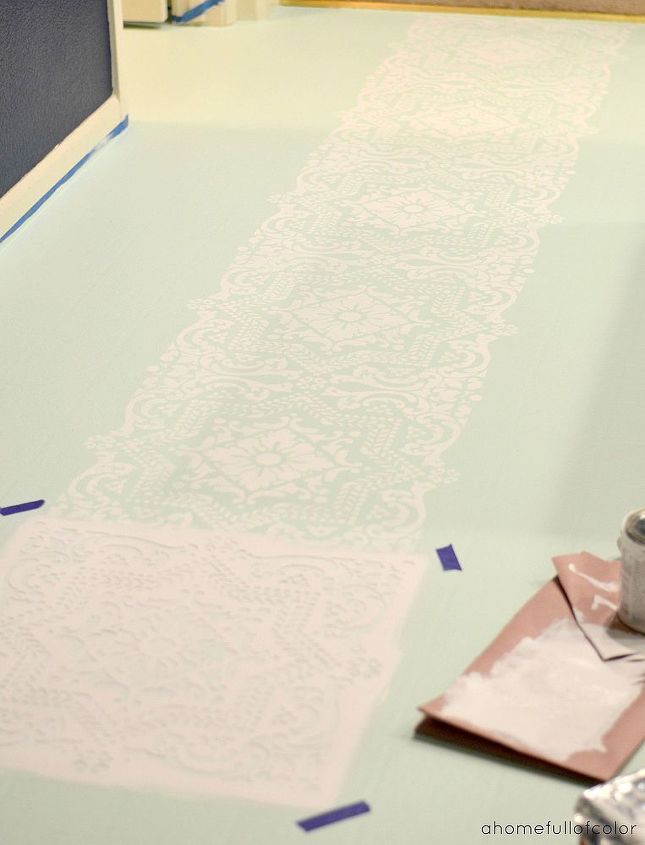
Then began the stencil process. It was tedious and long but well worth it in the end!
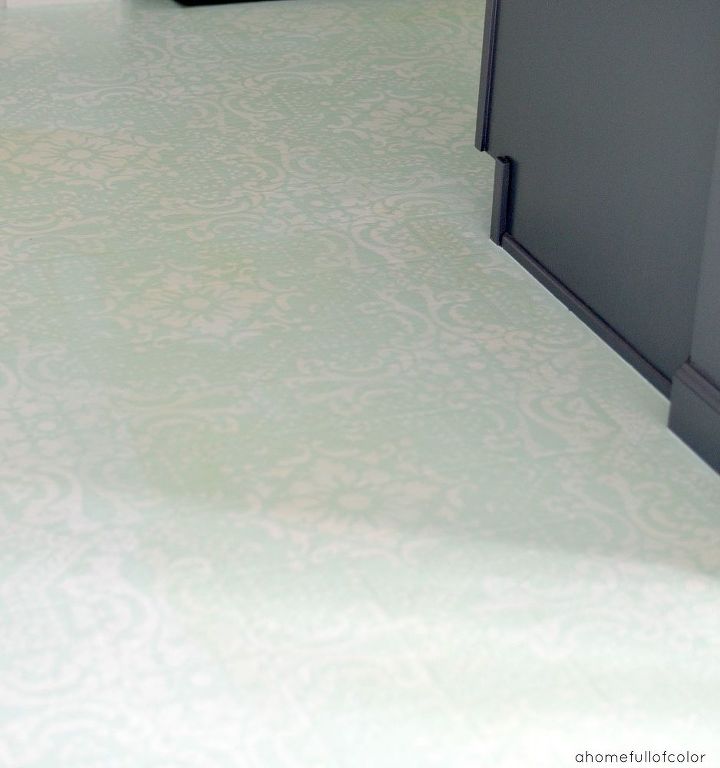
After completing the stencil I laid down 2 coats of poly to protect all my hard work. I made the mistake of using an oil-modified poly, which caused some yellowing once dried. If you try this project make sure to use WATER BASED poly.
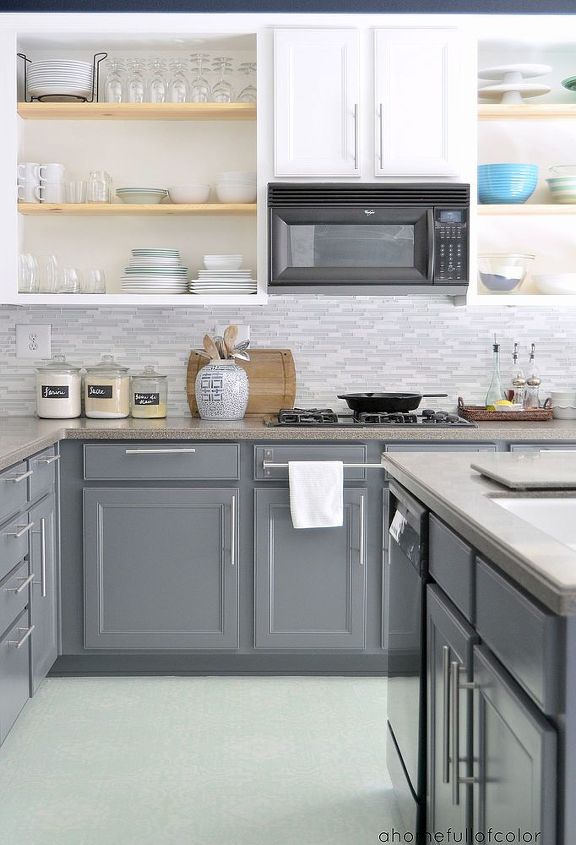
I love how it turned out! I love that it adds a soft, whimsical element to the otherwise modern space.

Want more details about this and other DIY projects? Check out my blog post!
Comments
Join the conversation
2 of 193 comments
-
LOVE IT!!!
-
No, as she doesn't answer any of the questions.


Frequently asked questions
Have a question about this project?
I have a question about the cabinets; Were they standard cabinets with the doors removed? Or did they come open faced like that? I want to try that with ours and your cabinets look awesome!
How long is the drying time in between coats of primer, paint, and poly? I'd like to get an idea of how long I'd have to stay off my floor. Also, do you have to clean the stencil off every time you move it to avoid having the paint smear?
Did you use a special roller to apply the stencil?