


DIY Hand Made LED Concrete Lamp

by
Glen
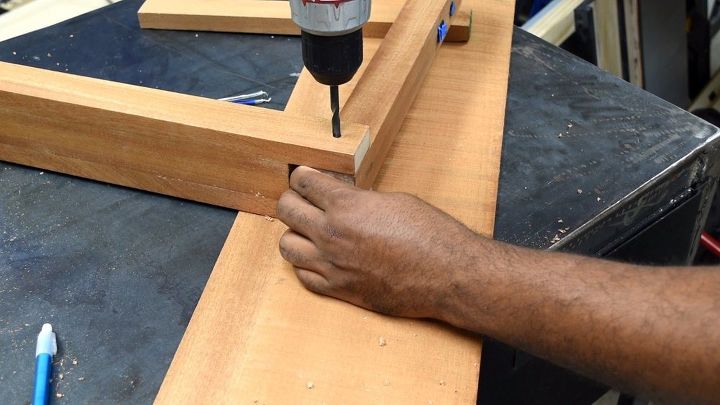
I'm excited to share the possibilities that can come from simple hand tools. I made this lamp by hand and no power tools except a drill. I did it as a challenge. I was glad I took the challenge on, because this was a learning curve for me as well. It was a very slow and tedious process. If you have power tools and wish to make this lamp then you'll know which power tools to use. For viewers with less tools be sure to watch the video to get more info on the build. Find all the material used at the end.
Overview of the lamp
- 9 inch concrete base
- Mahogany wood
- Removable power plug
- Or / Off power switch
- Adjustable light head
- Removable plexi-glass light cover
Overview of the lamp
- 9 inch concrete base
- Mahogany wood
- Removable power plug
- Or / Off power switch
- Adjustable light head
- Removable plexi-glass light cover
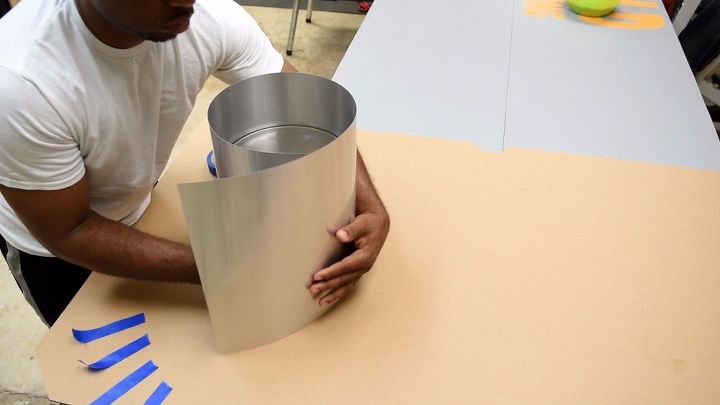
To make the form I used a large 9 inch vase. I took a piece of metal flashing wrapped it around the the vase and add tape to hold it in place. Then I placed plastic over the vase to keep the cement mix from making contact with the glass.
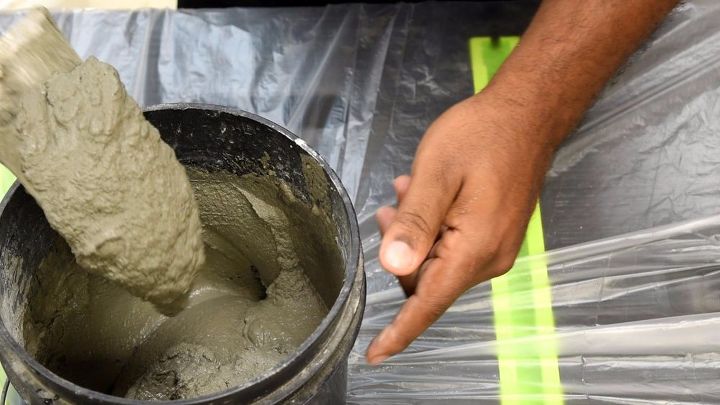
Any concrete mix will work for this base. To make this mix im going to a two to one ratio (1 cup of cement mix and 2 cup of sand) then add water. I put construction mesh in the mix to strengthen the form.
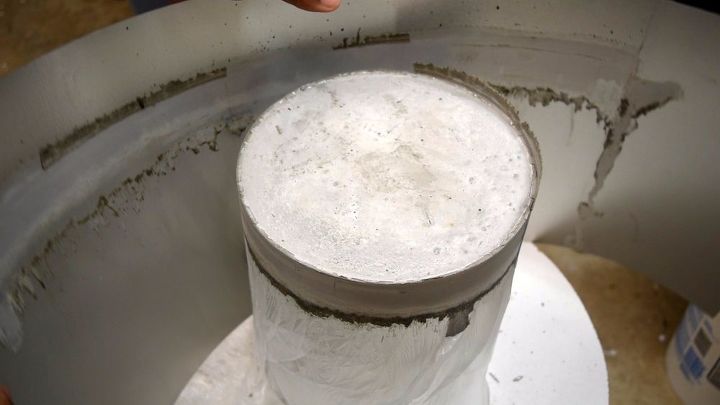
Let the mix sit for three days. This should be enough time to cure. Next sand down the base to remove the sharp edges.
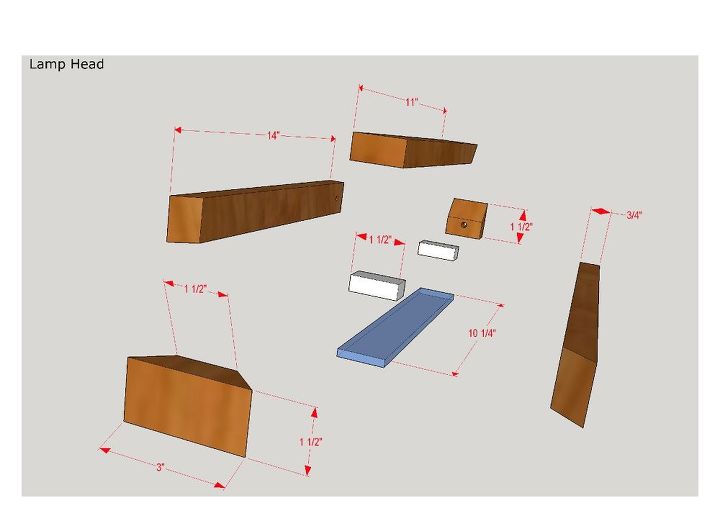
Dimensions for the Lamp head
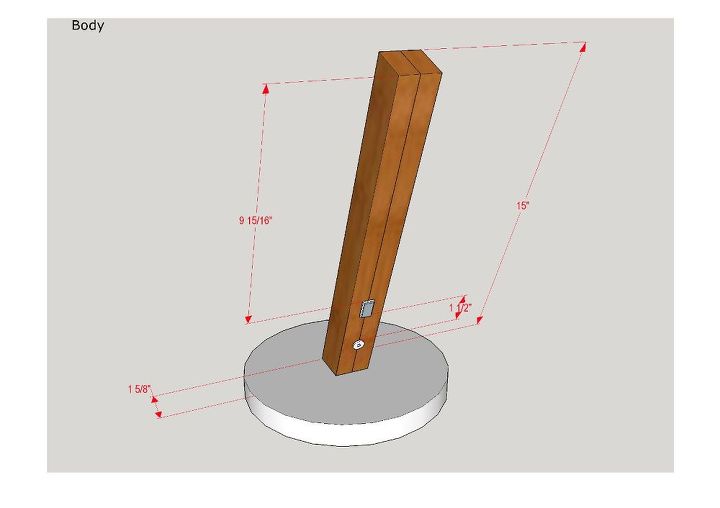
Dimensions for the Lamp body
All the cuts were made by hand on a miter box . The body of the lamp is made of two 1in by 2in lumber. The 1in by 2 in lumber is cut to a 22 degree angle where the wood meets the concrete base. See photos for all the measurements.
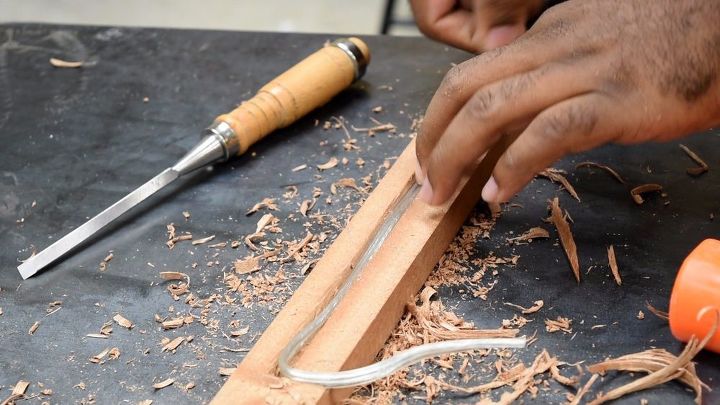
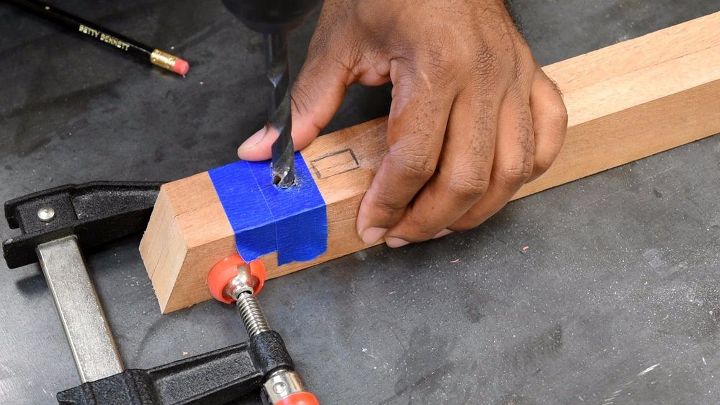
Use a razor/ utility knife to score the wood. Then use to a chisel to remove the unwanted section. I make the slow big enough for the wire to housed.
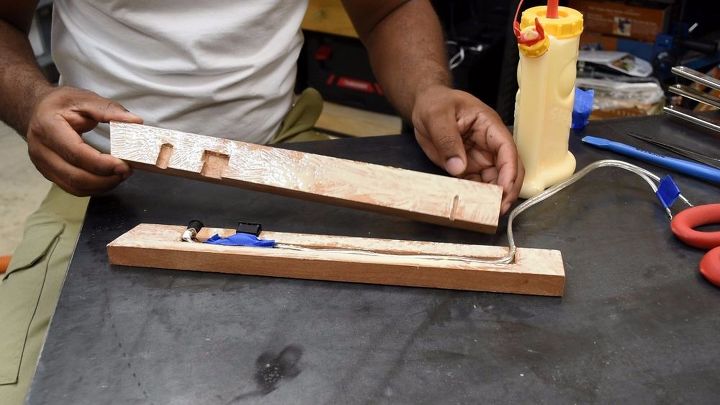
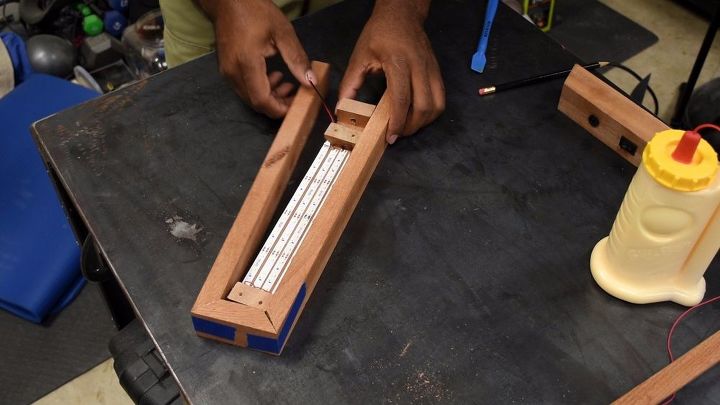
Refer to the video for more info on the wiring circuit. Cover the connections using painters tape. Then add wood glue and clamps.
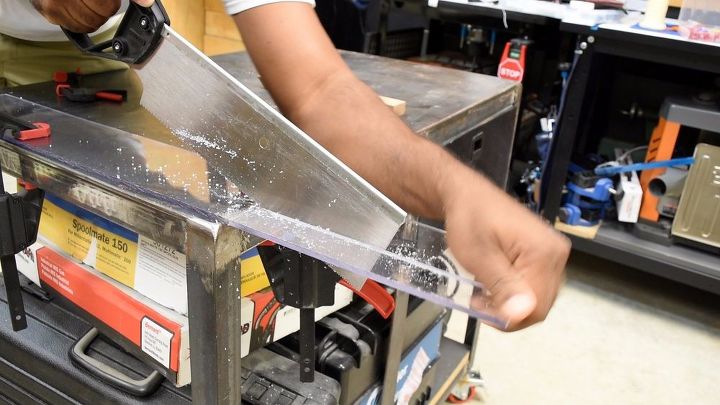
used a 1/4 piece of plexi-glass cut it to fit the opening of then counter sink the screw holes.
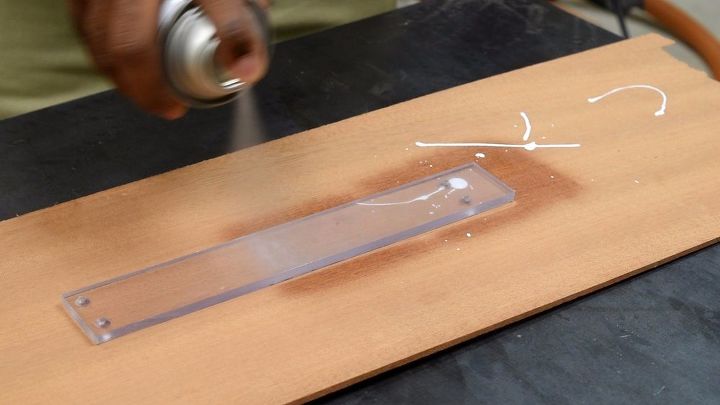
Spray the plexi from the inside using spry frost. This will help hide the LED light strips. I also sprayed the ends black to hide the wire connections.
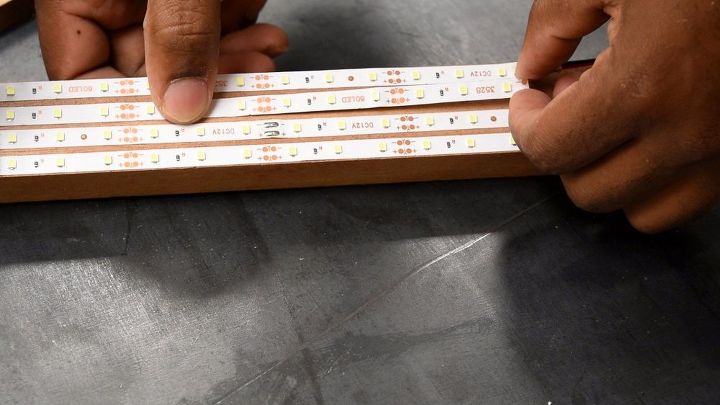
Cut each strips to length at the connection point. Peal and stick each strips side by side. Solder the strip to each other connect all the reds on one end and all the blacks on the opposite end.
Glue and clamp. After the glue is dried sand all pieces. Use wood filler if needed.

Drill a hole in the center of the concrete using a masonry bit. Insert the bolt then transfer the angler over to the wood. Drill a hole in the middle of the wood. Since im using hard wood the bolt im using will create threads in the hole. This will be enough to hold. If your using pine I would suggest using a threaded insert in place.
Apply your favorite stain. I didn't stain because I like the color of the lumber. I applied a three coats of wipe on poly as a protective layer.
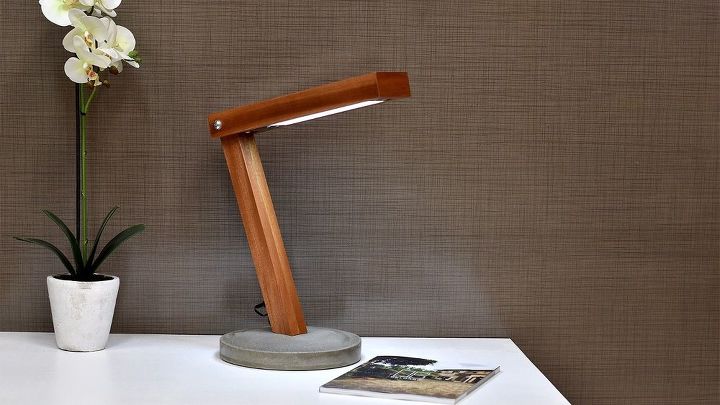
Here is the finish product. Be sure to watch the video to get more info.
Comments
Join the conversation
2 of 103 comments
-
NEAT
-
Very nice looking!


Frequently asked questions
Have a question about this project?
Great lamp!
How was the vase used? It looks like the concrete was made into a flat disc.