


DIY Farmhouse Cotton Stems
If you love this project, grab your quick start DIY guide & subscribe to our blog!
Happy New Year!!! I love changing the house over to winter from Christmas. All of the fun and festive Christmas decorations are so fun, but usually by the time NYE rolls around I’m more than ready to get the house cleaned up. I love keeping things simple, but special in the winter. I like to have some special decorations so the house doesn’t feel too bare after the Christmas spirit gets packed up.
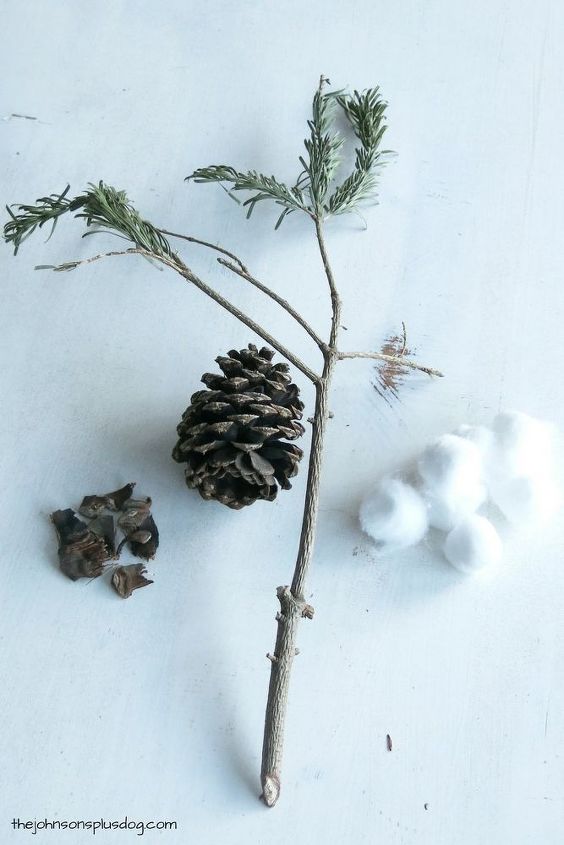
I’m so excited to share this fun DIY craft with you today! DIY Farmhouse Cotton Stems are perfect for your farmhouse style winter decor and really can be used all year round! These DIY Farmhouse Cotton Stems can be made for seriously less than $2…aaaaand I’m rounding up there… I paid $1.18 for a bag of cotton balls and the rest of the supplies came straight from the good ol’ outdoors (minus hot glue… but, who doesn’t have a hot glue gun?!). These are a steal and couldn’t be easier to DIY. Even from discount craft stores, these trendy cotton stems sell for about $5 – $10 a piece. Supplies: Cotton balls Hot glue gun and hot glue sticks Twigs (or Christmas tree clippings if you still have any of those laying around) A pine cone or two
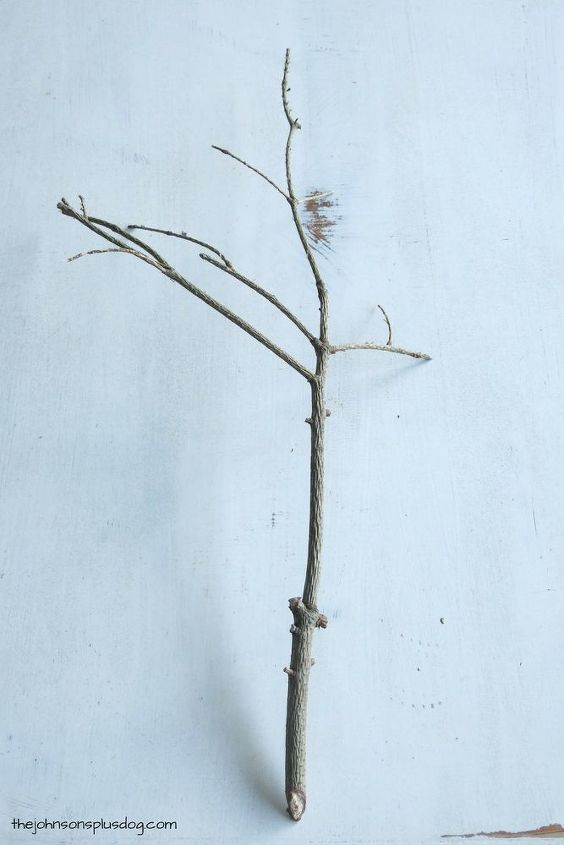
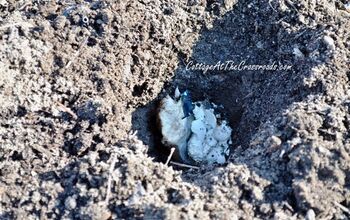
First you need to take all the greenery off of the Christmas tree clipping (if you’re using that and not a twig from outside….all of the twigs outside are covered in a ton of snow right now, so I opted for taking some clippings from our Christmas tree before we threw it out). The greenery should peel off pretty easy, especially if your tree is REALLY dead like mine was, haha. Next you’ll need to gently pull the pine cone pieces off the cone. Some pine cones will work better than others. Mine were really dried out because they had been inside for over a year used as decor. I think it may work easier if you take one fresh from outside. If your pine cone is really tough, you could always try ripping them off using some pliers. To clean the pine cones from outside, I usually run them under really hot water for about 30 seconds and then let them dry out for a day or two. You can also pop them in a pot of boiling water. You’ll be using 3-4 pine cone pieces for each cotton ball you use. I attached a cotton ball to the end of every point on my twigs, so for the above twig I would be attaching about 9 cottons balls and would use about 36 pine cone pieces.
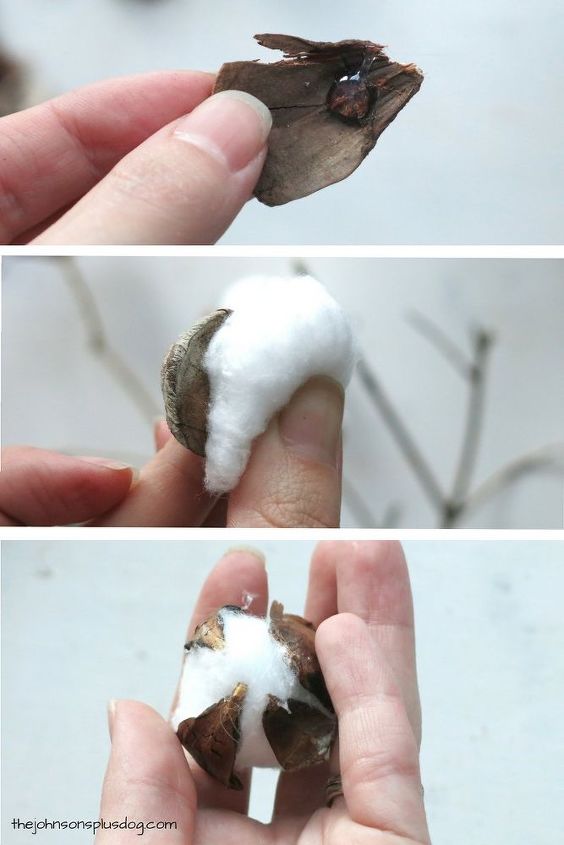
Before I started gluing the pine cone pieces to the cotton ball, I rolled the cotton ball around in my hand a bit and pulled at it to make it look a little more natural. Next you’ll take your handy hot glue gun and put a small dab on the pine cone piece and press together on the cotton ball. You’ll attach between 3-4 pine cone pieces to the cotton ball, with all the points meeting in the middle with a little wiggle room. That’s where you’ll be gluing it on to the twig.
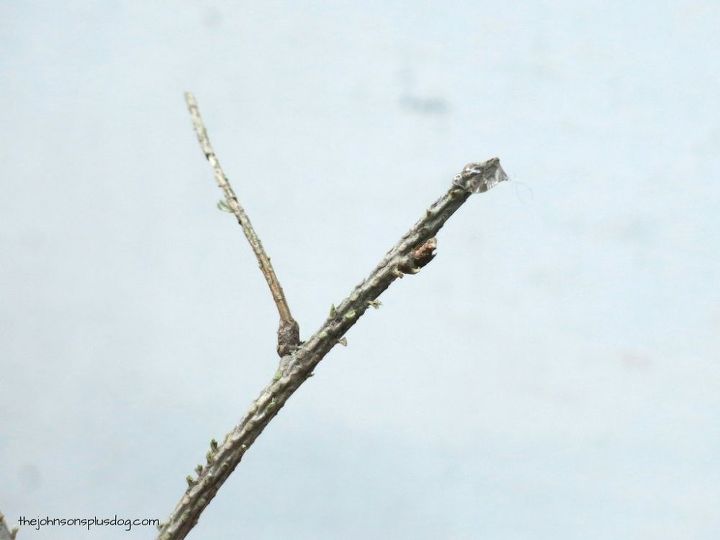
To attach the cotton to the twig, I just put a dag of hot glue on to the end of the twig and pressed the cotton ball on. Repeat until all the of the ends on your twig are complete. I told you that was easy! I can’t wait to share the rest of my wintery crafts with you over the next couple of weeks. Hopefully I can help spark some inspiration to you as you change your homes over from Christmas decorations to winter. Don’t forget to tune in to see these DIY Farmhouse Cotton Stems and other fun winter crafts demonstrated LIVE on Hometalk’s Facebook page on Thursday, January 12th, 2017 at 4pm Pacific Time. Hop on over to the blog post to see how these DIY Farmhouse Cotton Stems turned out!!


Frequently asked questions
Have a question about this project?