


1965 Bathroom Vanity Into Modern Shaker Style
14 Materials
I needed to remodel my downstairs bathroom since it is the most used by guests (even more than the powder room) and the old 1965 look was just not acceptable anymore. While the bathroom took about 3 weeks (just me working) the vanity only took me two days only because the paint needed to dry properly. I chose to keep the original vanity because it was in great shape and it fit the area perfectly. Plus my budget was blown because of a mold issue that took all my project budget and then some. So I had to get creative.
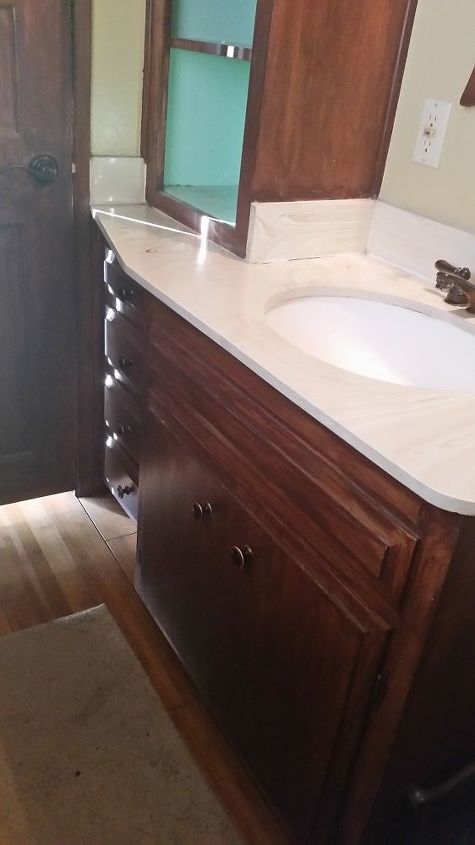
The eye sore from the 60s
I removed all doors and chopped off the base of the cabinet since it was warped and moldy.
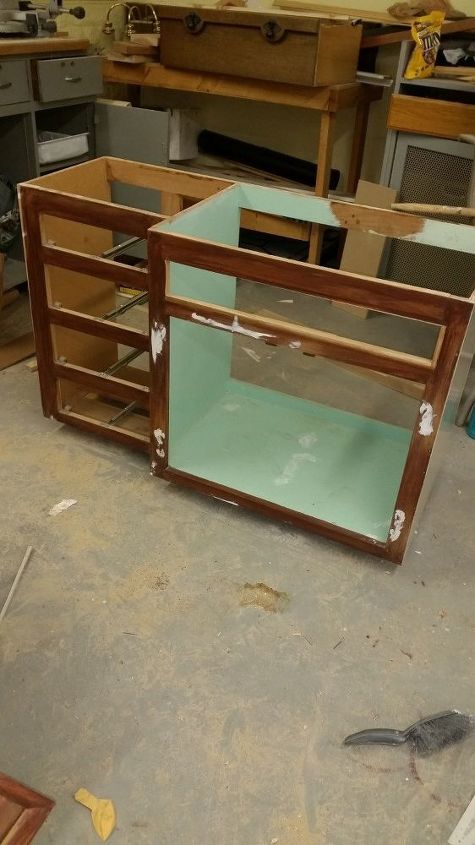
here's the old shell with putty
Prep before paint involved wood putty to cover holes and dings of 40+years of use. Don't forget to sand the surface to even out things. I added modern legs to the base.
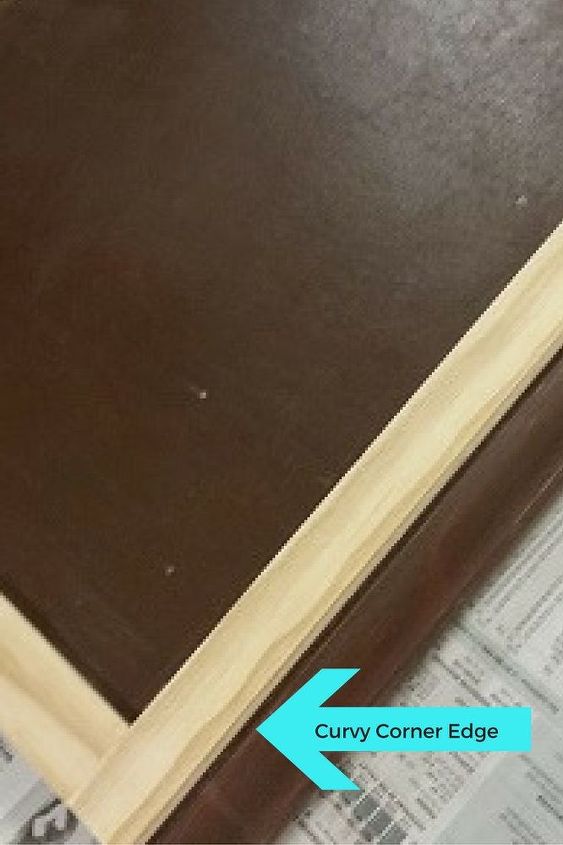
framing the door fronts
Next step was to apply 1in x 1/4 in strips onto the door fronts. Simply glue them with liquid nails. Don't forget to sand them for a smooth finish and add wood putty to cover gaps before painting
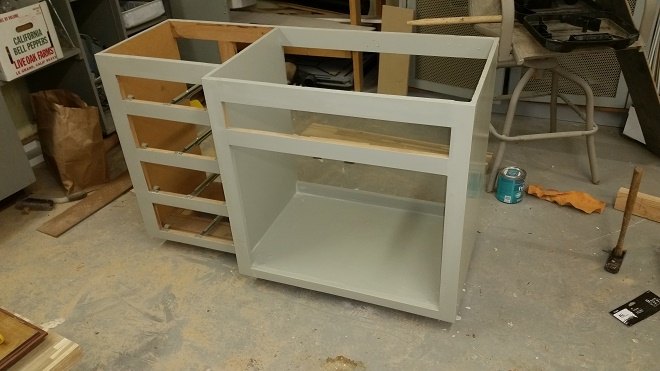
vanity after paint
Here's the painted frame. Looks better already.
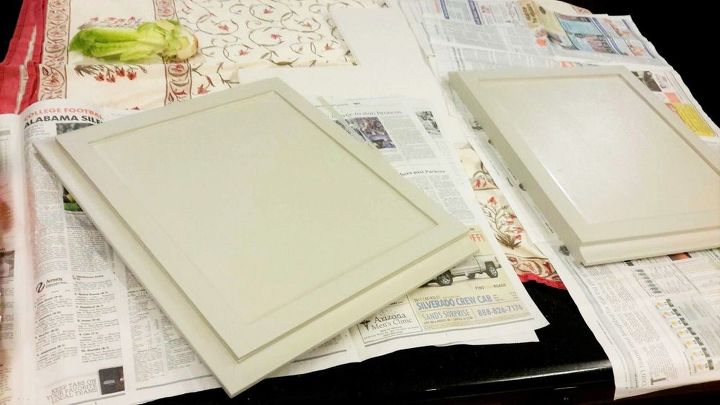
door fronts after paint
Then I painted the doors. Be sure to cover any holes from the old door pulls unless you are keeping it the same.
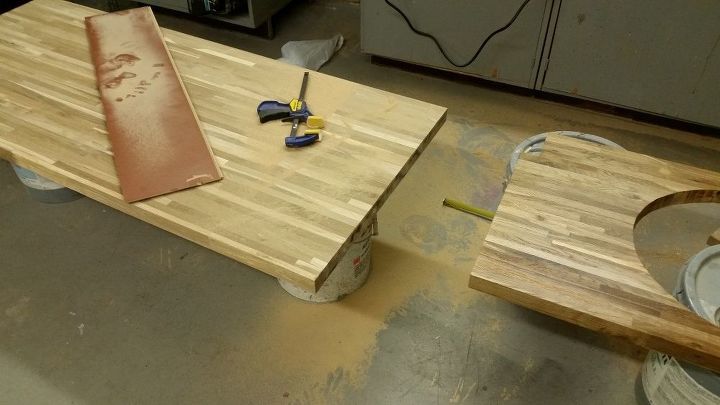
I chose butcher block as the surface for the countertop because of cost and because I wanted a farmhouse style. Be sure to stain it and seal it with several coats of waterproof sealant to avoid water damage. Be careful when choosing the sealer because some can "yellow" the wood finish.
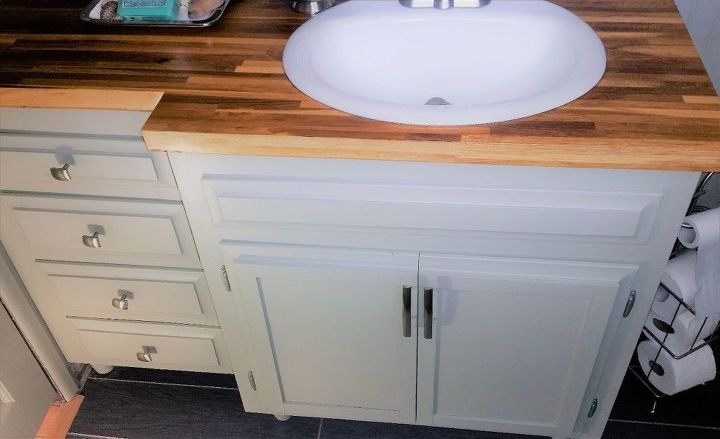
Here's the final product after I installed the butcher block ($120 only because of the color), new sink (only $30 bucks), door pulls (about $20). Paint (less than 1 qt of semigloss paint-$15). Note: I already had the paint from a previous project.
from another angle
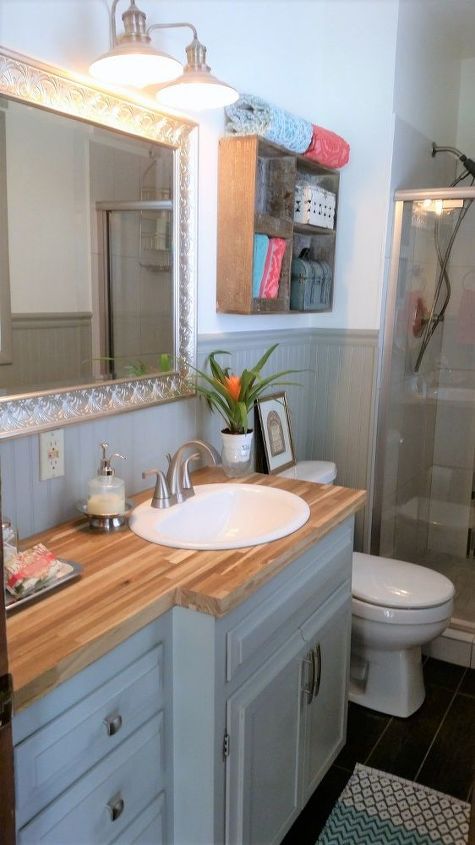
Here's another angle. The new faucets were my little splurge ($99) but there are some great faucets out there for about 25 bucks if budget is an issue. I hope you liked this project. It was a lot of fun to see the final product.
Resources for this project:
See all materials


Any price and availability information displayed on [relevant Amazon Site(s), as applicable] at the time of purchase will apply to the purchase of this product.
Hometalk may collect a small share of sales from the links on this page.More info

Want more details about this and other DIY projects? Check out my blog post!
Comments
Join the conversation
2 of 133 comments
-
Beautiful! I love the update!
-
I love how you removed that tall cabinet to make it appear so much roomier! You may miss the storage a little, but aesthetics makes up for it!
Making the counter straight gives you a clean line for symmetry and visually lengthening the room. Awesome makeover!! 💖


Frequently asked questions
Have a question about this project?
did you install new door hinges?
Did you do anything with the other part of the "cabinet" that was on the left side of the sink? Did you re-purpose it for something else?
Hi, you have the same ugly cabinets I do, love your outcome, I was wondering why you didn't do the drawers, is possible to do the drawers the same way, I want to do my kitchen cabinets which are the same ugly cabinets but I want to do the drawers too.