


Cat Banyo . . .

$60.00
10 Hours
Medium
Our daughter asked for a piece of furniture to hide her cat’s litter box. Several options were considered, but decided to take the easiest route – after all it was for a cat.
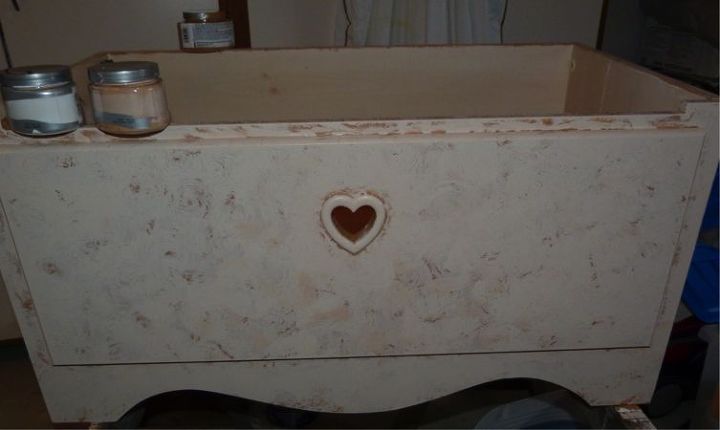
Photo 2 - Found and bought a small toy box on Craig’s list for $35. Exterior dimensions were 35”W x18”H x 20”D. Interior dimensions were33”W x 12”H x 18”D, 33” long and 12” tall.
Bought a “large” 2-piece litter box that was 15”W x 11”H x18.75”D for $12 at Fred Meyers. The upper piece will keep the litter in the box and not on the floor. Also bought a 20” x 30” rubber mat designed to put under throw rugs to keep them from sliding (about $4).
Didn’t figure much paint was needed, so bought some 8 oz.Val Spar paint samples at Lowe’s – two were about $3 each (Rustic Oak and Desert Travels) and one was on the clearance table for 50¢ (a Base A white). Probably could have squeaked by with 16 oz., but it would have been close, and wouldn’t have gotten the color variations.
Here’s the tools that were used (Photo 3):
Zip saw (could use a jig saw) – used to cut the hole for the entry doorway
Rotary tool– used to shape/refine the entry doorway
Sand paper(until realized the paint was peeling off)
Painter’s scraper
Philips screwdriver (to remove the hinges and lid)
TSP-PF –clean the box prior to painting
Kilz – basecoat and sealant
Small paint roller & tray
3” sponge brush
Natural sponge
2 small paint brushes (#3 and
Craft paint(I used some that I had on hand - Napa Red and Metallic Inca Gold)
Took an 8 ½” x 11” sheet of paper, folded it in half the long way, then used a plate to draw half of an arc at the top to get the shape of the doorway. Cut the doorway from the paper and taped it to the center on one end of the box leaving wood above and below the opening for strength. Traced the form with a pencil and then used the zip saw to cut the rough opening. Finish-shaped the opening using a small orbital sander on the rotary tool, slightly rounding the edges on the inside and outside of the box. Photo 4.
The toy box owner stated that she’d painted the exterior of the toy box – it was hard to tell what was under the paint, so used TSP to degrease the surface. Surprise! It seems that the previous owner had not prepped the box before she had painted, and the paint began to lift off in sheets (it appeared that she had used spray paint on faux wood). After stripping the box (fortunately it came off fairly easily), reused the TSP and let the box dry. Since the inside of the box was still in good shape, put a coat of Kilz onto only the exterior with the sponge brush. Photo 5.
Photo 6. After letting the Kilz dry, poured the dark paint (Rustic Oak) into the paint tray and used a small paint roller and a sponge brush to put on a base coat of color; did not attempt to completely cover the Kilz. The sponge brush allowed to get in close around the trim on the front of the box.
After the base coat dried, poured the lighter paint (Desert Travel) and the white base paint into the paint tray; there was a bit of the darker paint left, and put that in as well. Lightly mixed the paint together, not trying to completely blend the colors, but to create multiple shades.
Photo 7. Using the sponge (and the sponge brush in the corners), dabbed a bit of paint from the tray, tapped off the excess on the sponge brush, and then applied the paint to the box in a random twisting motion. Again, did not try to completely cover the base coat. After letting this coat dry, repeated this step two more times (for a total of 3 layers of the swirly sponging). The finished look was cloud-like. Photo 8.
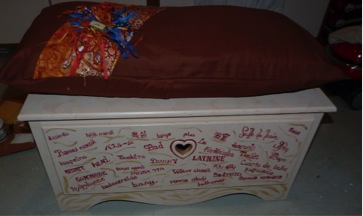
Decided that we didn’t know what language the cat spoke or read, so searched the Internet for the word “bathroom” in various languages. Used the #3 art brush and the red craft paint to write various versions of the word bathroom on the front of the box. Used the #5 brush to swirl on some gold craft paint for accents. Saved the leftover Val Spar paint and it will go with the box in the event they want to paint over the lettering.
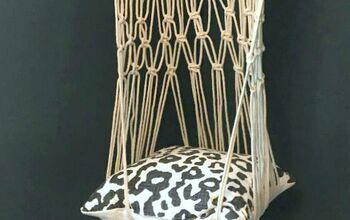
Thinking that they might like to at least get some personal use out of this, thought they could sit on it to get their shoes on/off. Using material on-hand, including a brown twin sheet, made a pillow sham and stuffed it with two king-sized pillows (they were thin, well used and no longer suitable for bed pillows). Photo 9.
Photo 10. The mat and litter box fit well and there's some extra room for supplies.
Photo 2 - Found and bought a small toy box on Craig’s list for $35. Exterior dimensions were 35”W x18”H x 20”D. Interior dimensions were33”W x 12”H x 18”D, 33” long and 12” tall.
Bought a “large” 2-piece litter box that was 15”W x 11”H x18.75”D for $12 at Fred Meyers. The upper piece will keep the litter in the box and not on the floor. Also bought a 20” x 30” rubber mat designed to put under throw rugs to keep them from sliding (about $4).
Didn’t figure much paint was needed, so bought some 8 oz.Val Spar paint samples at Lowe’s – two were about $3 each (Rustic Oak and Desert Travels) and one was on the clearance table for 50¢ (a Base A white). Probably could have squeaked by with 16 oz., but it would have been close, and wouldn’t have gotten the color variations.
Here’s the tools that were used (Photo 3):
Zip saw (could use a jig saw) – used to cut the hole for the entry doorway
Rotary tool– used to shape/refine the entry doorway
Sand paper(until realized the paint was peeling off)
Painter’s scraper
Philips screwdriver (to remove the hinges and lid)
TSP-PF –clean the box prior to painting
Kilz – basecoat and sealant
Small paint roller & tray
3” sponge brush
Natural sponge
2 small paint brushes (#3 and
Craft paint(I used some that I had on hand - Napa Red and Metallic Inca Gold)
Took an 8 ½” x 11” sheet of paper, folded it in half the long way, then used a plate to draw half of an arc at the top to get the shape of the doorway. Cut the doorway from the paper and taped it to the center on one end of the box leaving wood above and below the opening for strength. Traced the form with a pencil and then used the zip saw to cut the rough opening. Finish-shaped the opening using a small orbital sander on the rotary tool, slightly rounding the edges on the inside and outside of the box. Photo 4.
The toy box owner stated that she’d painted the exterior of the toy box – it was hard to tell what was under the paint, so used TSP to degrease the surface. Surprise! It seems that the previous owner had not prepped the box before she had painted, and the paint began to lift off in sheets (it appeared that she had used spray paint on faux wood). After stripping the box (fortunately it came off fairly easily), reused the TSP and let the box dry. Since the inside of the box was still in good shape, put a coat of Kilz onto only the exterior with the sponge brush. Photo 5.
Photo 6. After letting the Kilz dry, poured the dark paint (Rustic Oak) into the paint tray and used a small paint roller and a sponge brush to put on a base coat of color; did not attempt to completely cover the Kilz. The sponge brush allowed to get in close around the trim on the front of the box.
After the base coat dried, poured the lighter paint (Desert Travel) and the white base paint into the paint tray; there was a bit of the darker paint left, and put that in as well. Lightly mixed the paint together, not trying to completely blend the colors, but to create multiple shades.
Photo 7. Using the sponge (and the sponge brush in the corners), dabbed a bit of paint from the tray, tapped off the excess on the sponge brush, and then applied the paint to the box in a random twisting motion. Again, did not try to completely cover the base coat. After letting this coat dry, repeated this step two more times (for a total of 3 layers of the swirly sponging). The finished look was cloud-like. Photo 8.
Decided that we didn’t know what language the cat spoke or read, so searched the Internet for the word “bathroom” in various languages. Used the #3 art brush and the red craft paint to write various versions of the word bathroom on the front of the box. Used the #5 brush to swirl on some gold craft paint for accents. Saved the leftover Val Spar paint and it will go with the box in the event they want to paint over the lettering.
Thinking that they might like to at least get some personal use out of this, thought they could sit on it to get their shoes on/off. Using material on-hand, including a brown twin sheet, made a pillow sham and stuffed it with two king-sized pillows (they were thin, well used and no longer suitable for bed pillows). Photo 9.
Photo 10. The mat and litter box fit well and there's some extra room for supplies.
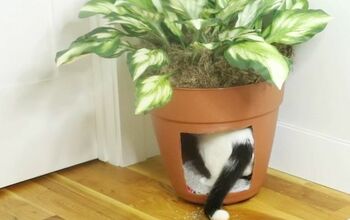
Cat litter box disguise
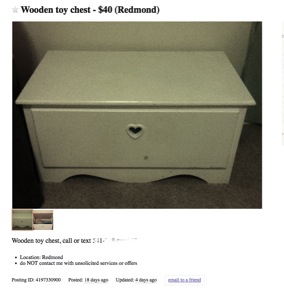
Craig's list toy box find - $35

Tools used in this project (zip saw not shown - items used for the cushion also not shown).
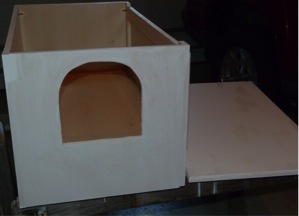
Cut the doorway on one end using a zip saw and a rotary tool.
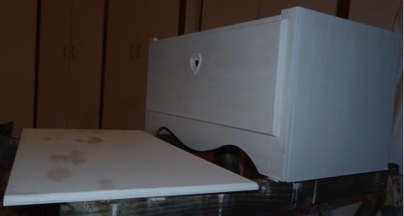
Lid removed, box stripped, wiped down with TSP, and undercoat of Kilz.
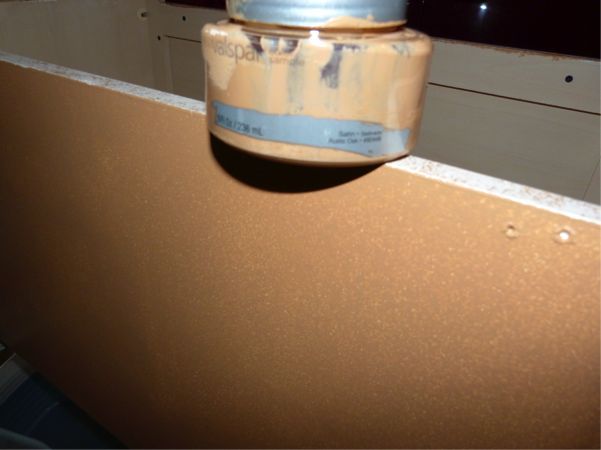
Base coat of Val Spar sample - note undercoat is visible.
First round of sponging completed.
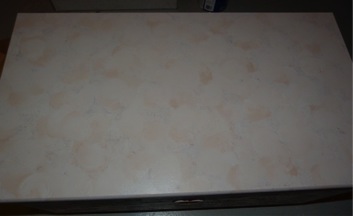
Finished look of the top - undercoat, base coat, and 3 layers of sponging.

Can you say "bathroom" in a different language? Cushion made from a twin bed sheet, leftover quilt materials, a couple of buttons, and two old king size pillows.
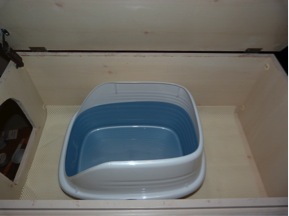
The cat "loo" from the inside - the mat keeps the litter box from sliding and there's room for supplies, too.
Comments
Join the conversation
2 comments
-
Betsy this is a wonderful project. Thank you for the detailed and comprehensive tutorial!
-
Might have to make something like this. Might put in a partition if there is space; could keep extra litter and scoops at end.


Frequently asked questions
Have a question about this project?