Ways to Re-Purpose Your Cabinet Doors

Kasey
by Kasey
1 Material
So it’s finally time to upgrade your old kitchen cabinets, and whether it’s during the installation of some long needed replacements or a stylish kitchen makeover, there’s always the question of what to do with the old doors afterward.
Since simply tossing them aside would be an unfortunate waste of wood, and even worse, a missed opportunity for some creative crafting, here are three cool ways to turn those discarded doors into delightful display pieces.
Chalkboard Bistro Stand
A DIY door classic, first up is this fantastic method to transform a pair of cabinet doors into a stylized sidewalk-sign.
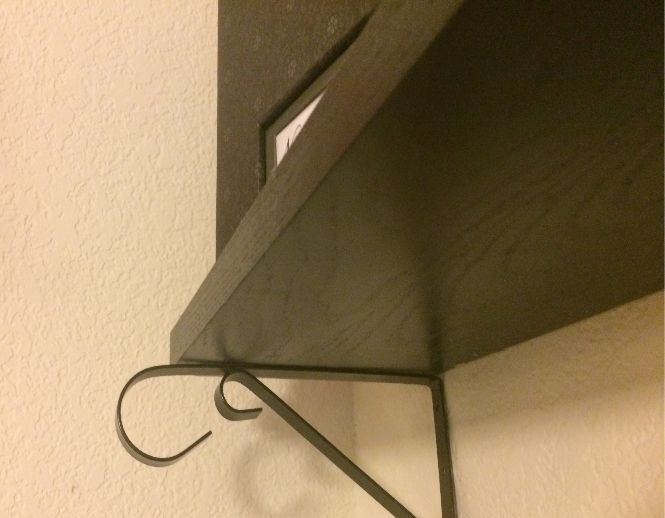

Start off by selecting two wide matching cabinet doors, then apply chalkboard paint over only one side of each. These are going to end up being your outward facing sides for a double direction display.


Once the paint dries, you can add a decorative trim for additional aesthetic flair, or keep the edges bare to encourage an original do-it-yourself vibe.


Now all that’s left to do is connect the doors together. If you still have them, check to see if the hinges that previously mounted your doors to the cabinet can be re-purposed to connect both newly painted doors in a fold-able A-frame. If not, you can quickly find new ones at any hardware store.


By the way, if a bistro style chalkboard isn’t quite your speed, you can use this same method to create a portable whiteboard (perfect for kid’s rooms and student apartments) by layering the outsides of the doors with dry-erase contact paper rather than chalkboard paint.
Stylized Shelving
For this easy yet efficient modification all you’ll need, aside from your cabinet doors, are some L-Brackets and screws.
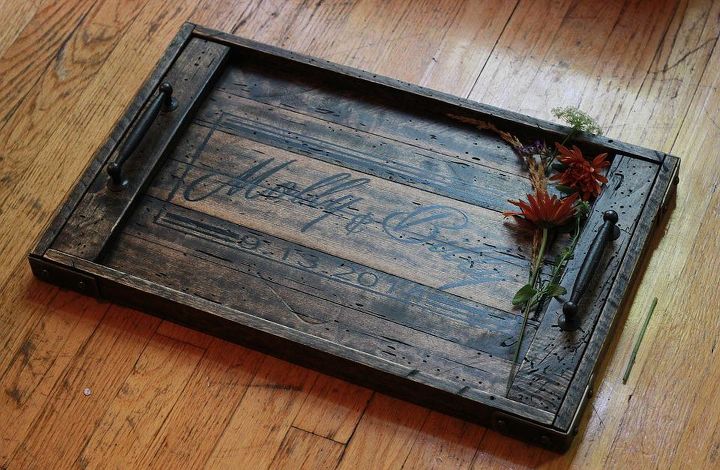

Long and narrow cabinet doors can be perfectly used to create extended shelving, not only in the kitchen, but throughout the entire household. Simply mount your door against the wall by screwing an L-bracket into place, and enjoy your new niche shelving style.


With the right tools, you can also cut wider doors in half to make two complementary shelves. Just make sure to hide the raw edge of the cut wood against the wall before securing the brackets.


Not to mention, if you’re cabinet doors came with handle bars, don’t be so quick to remove them before attaching your door-shelves to the wall. If you leave the handles on so that they face downward, you can create a natural rack for clothing or hanging displays.
Serving Tray
Great for entertaining, or enjoying the classic breakfast in bed, this cabinet style serving tray is a fun project that you can complete in a day.


Yank off one appropriately sized cabinet door, handles are a plus, and decorate it to your liking.


Then have a wooden frame measured and cut to serve as a small protective lip around the edge of the tray. This can be done for you at some hardware stores, and will keep your food and plates from accidentally spilling over the sides.


Wood glue and L-brackets will both do the trick when you attach the frame to the tray.


Next up are the handles. If your door already has one, you may need to relocate it toward the center of the side that it is on so it looks even.


Then you’ll need to remove a second handle from another matching door and attach it to the opposite end of your tray. However, if your doors do not already have handles, don’t despair! Any purchased two-pack of handles should work just fine.


If you do end up removing and relocating the original handle, consider attaching an extra strip of wood on both sides to cover the hole that may be left behind, and to maintain a symmetrical appearance.


Afterward, the only thing that remains is to enjoy an afternoon snack on your newest creation!
Get Creative!
These are just a few neat examples of the kinds of crafts that anyone can pull off with their retired cabinet doors. So stop before you dump those old cabinets, and try exploring some fun imaginative projects instead!
Suggested materials:
  • Cabinet Doors   (http://www.cabinetnow.com/)
Frequently asked questions
Have a question about this project?
Comments
Join the conversation
 1 comment
Next