


How To Build A Modern Floating Corner Desk

My son wanted a modern looking floating corner desk in his bedroom, but there was a window in a way that prevented us from buying a standard work table. So I decided to build one instead. It was a cheaper alternative, one I could customize and it only took me about a day for this DIY. If you’re looking for an inexpensive floating desk for your own space, follow along.
Supplies:
- Prelaminated Particle Board
- Edging
- Wooden Boards
- Wood Glue
- Hair Dryer
- Aluminum Foil
- Jigsaw
- Knife
- Hammer
- Small nails
- Saw
- Square
- Level
- Drill
- Screws
- Compass
- Spray Paint
- Goggles
- Gloves
- Mask
- Optional: Pipe Bender
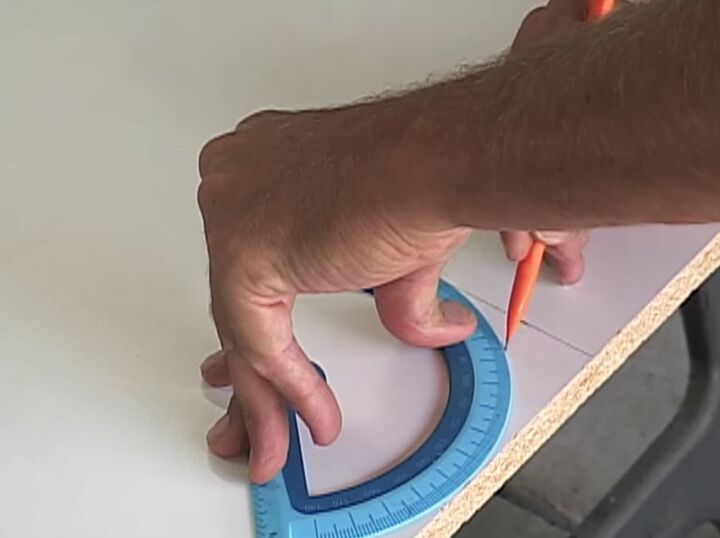
Step 1: Measure and Draw Out Your Design
To start, I measured my space and drew out the shape of my desk on the board with a pencil. Since I had to work around the window in the room, I made sure to add that extra cut into my plan. I also wanted to add rounded corners to soften the look a bit, so I used a compass to create the smaller bends and a larger DIY compass I made out of a yardstick for the larger arch. If you’re going to do the same, just make sure your bends are long and round. It will make applying the edging easier later on.

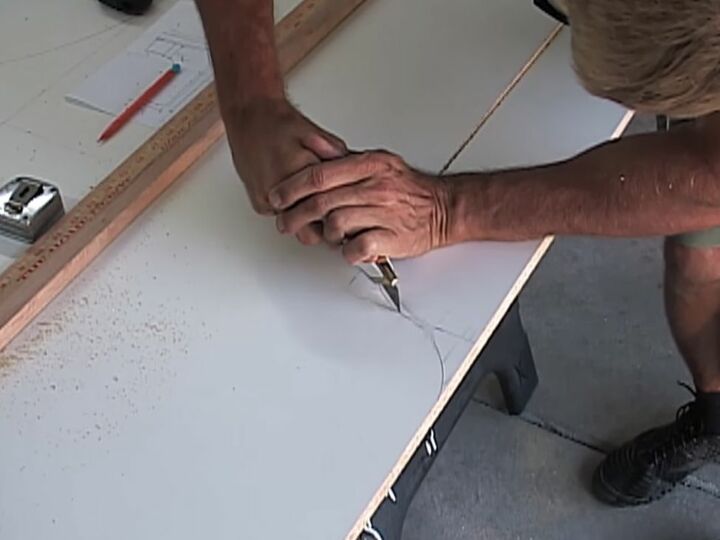
Step 2: Cut Out Your Shape
Cutting laminated boards can be tricky, since they can chip. In order to minimize this, I used a very fine, thin jigsaw blade. I put on my protective gear and clamped a piece of wood to my board to use as a guide to keep my lines straight. To cut down even more on chipping around the bends, I used a straight blade first and then went over the line with the jigsaw, cutting next to the marks not directly on them.
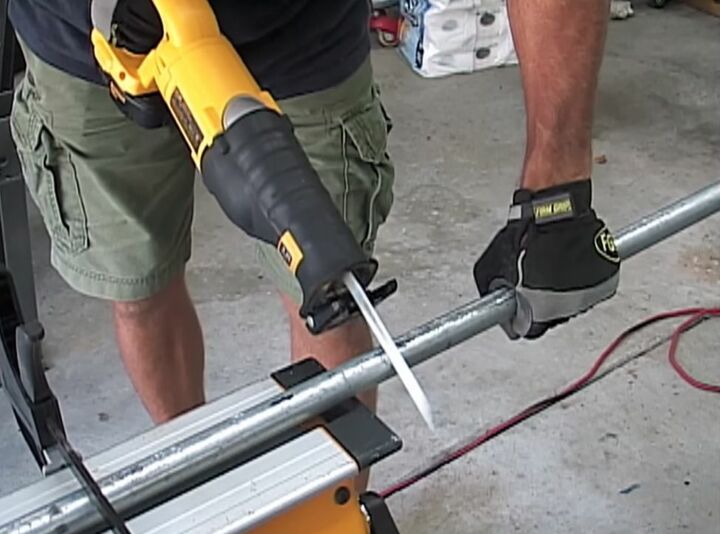
Step 3: Cut Your Pipes
Next up, I cut my pipes to the size I needed for my particular desk design. The pipes would be bent in half, with half of the support on the wall and the other half screwed into the bottom side of the desk. The length of your pipe will be based on your individual project. Once I knew how long I needed my pipes to be, I cut them to size using a saw. Any sharp blade will do.
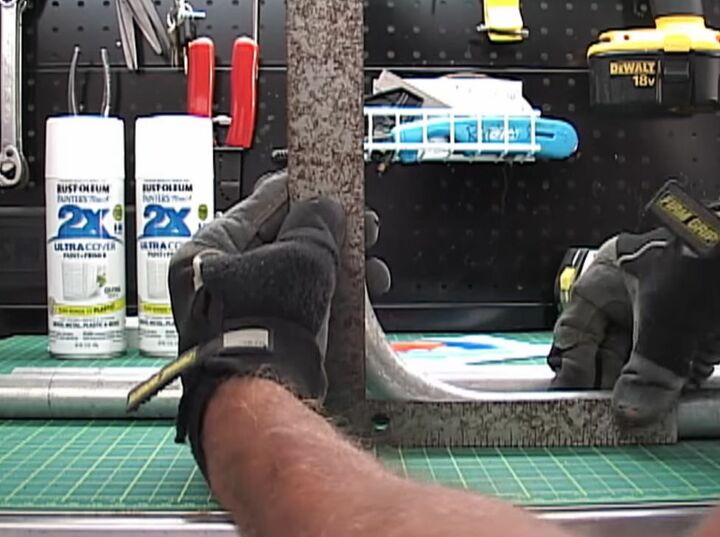
Step 4: Bend the Pipes
I bent my own pips with a pipe bender. However, if you don’t own one, you can have the pipes bent for you at a shop or buy pre-bent pipes. If you’re going to DIY it, divide the length of the pipe in half, mark it with a pencil and bend it at a 90-degree angle. Once bent, check the angle with a square. If the angle is not perfect, the desk will not sit right on top of it.
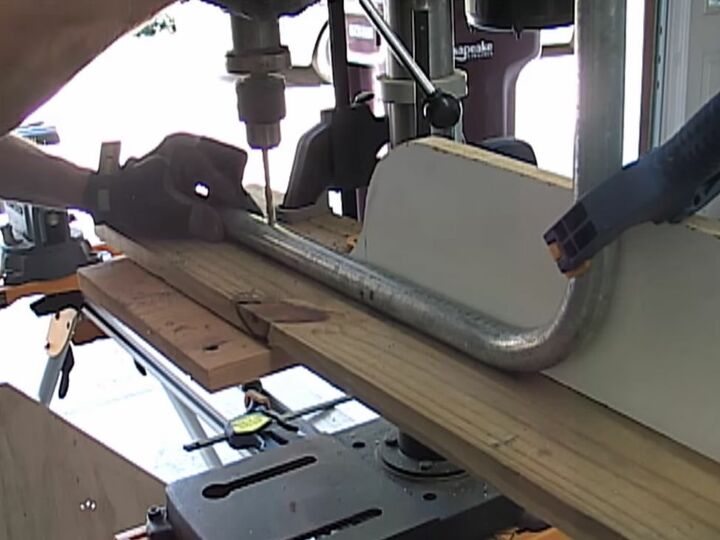
Step 5: Drill Holes in Pipes
I needed to drill holes in the pipes so I could screw them into the wall and into the desk itself. I clamped the pipes down to a board to stabilize them. I didn’t want them to move while I was working. Keep in mind that the screws from will go through the front of the pipe to the wall, but through the sides of the pipe to the desk.
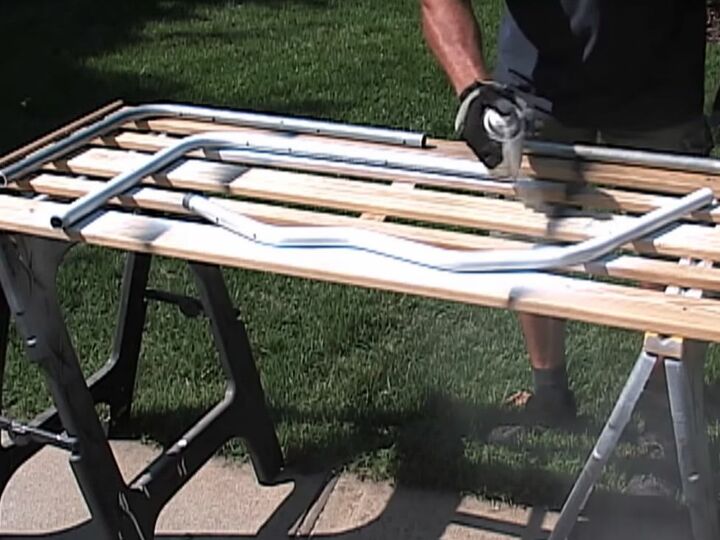
Step 6: Paint the Pipes
I placed them on a board outside and gave them a few quick, but even coats of spray paint. You want to be certain that the paint you’re using is made for metal and has a primer in it, so it adheres well to the surface of the pipes.
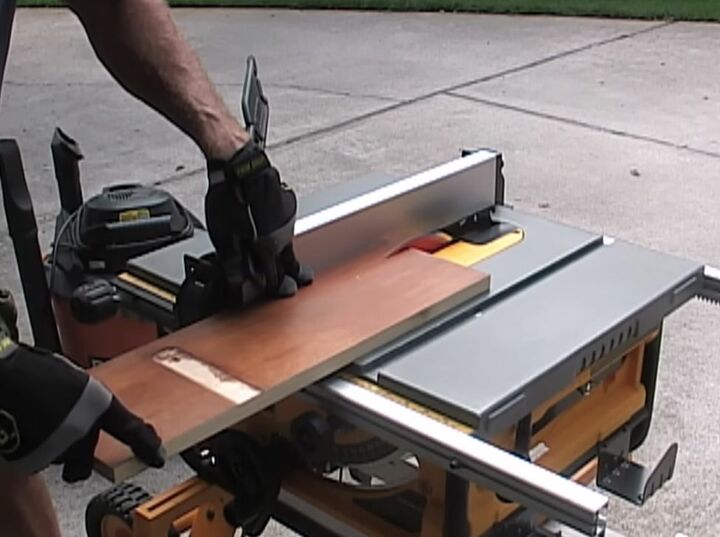
Step 7: Apply the Edging
I finished off the particle board sides with a roll of shelving edging and used scotch tape to tape it into position. Then I covered my iron with a piece of aluminum foil to protect the iron from getting sticky and to prevent it from burning the edging. I moved the iron slowly around the perimeter of the desk to melt the edging on to it.

Step 8: Add Brace Boards
From experience, I’ve learned that particle board doesn’t always hold screws well. So I cut boards and glued them underneath the desk. Later, I would screw my pipes into the boards, instead of directly into the desk. Cut the boards to the appropriate sizes for your desk depth and then glue them to the back of the desk. Then tack them into place with nails and allow the glue to dry.
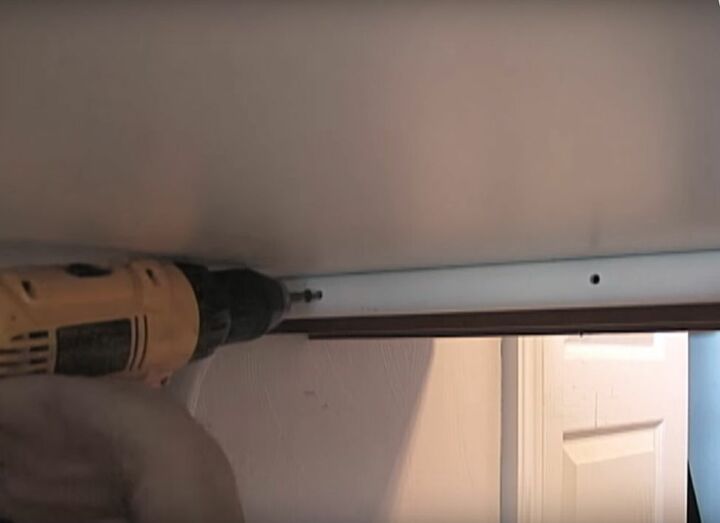
Step 9: Screw Desk to Wall
Measure the height for your desk, making sure the arm rests of your desk chair will fit underneath it. Then mount your pipes to the wall, using a level to ensure that they’re straight. If you will be mounting the pipes to studs, you can just use screws, if not, you’ll need an anchor bracket. To secure the desk in place, screw the pipes to the boards you glued under the desk. Be sure to use screws that won’t go all the way through the wood.
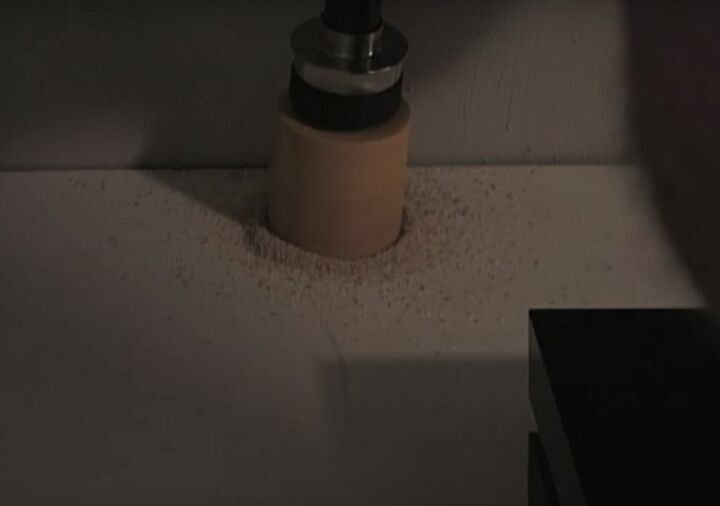
Step 10: Drill Out A Cord Hole
To keep the desk looking tidy, I used a hole saw bit to drill a hole in the top of the desk. I cut it in an inconspicuous spot. It would allow my son to feed any wires through it to the electrical outlet, rather than run them across the desk, creating a messy tangle.
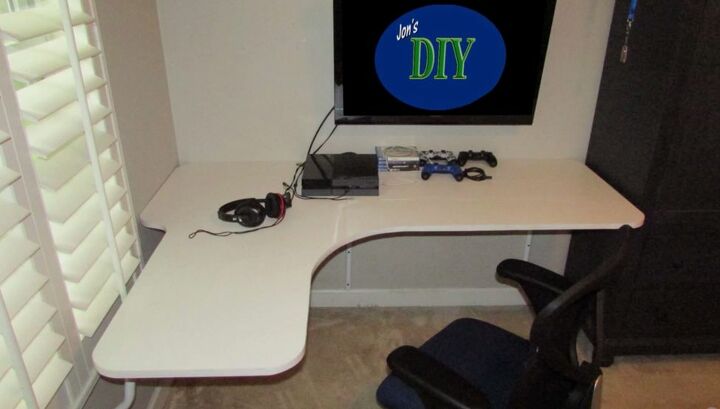
My son was thrilled with the finished project. We couldn’t have purchased a more perfect desk for his room. This DIY build was relatively easy to accomplish, much less expensive than anything we would’ve found in the stores and fit perfectly since it was custom made for his space. Now he has a modern, floating corner desk that looks great and functions well.
Let us know what room you might add this corner desk to in the comments.
Comments
Join the conversation
-
Great desk design! WTG Dad what a FANTASTIC thing to do for your Son!!! YAY DAD!!!
-
I really lik the sleek, modern lines. Nice job!


Frequently asked questions
Have a question about this project?