


How To Install A Faux Shiplap Wall
If you love this project, grab your quick start DIY guide & subscribe to our blog!
Oh my goodness…. it’s shiplap time. Today we’re going to walk you through the simple steps on how to install a faux shiplap wall on the cheap. You’ll be amazed by the crazy transformation the faux shiplap wall made in our bathroom. If you’re looking for a DIY update for your bathroom that you can start in and finish in one weekend (and I mean one weekend where you have normal life going on…not one weekend where the whole crew comes in and finishes a house in one weekend…seriously, how do they even do that!?) – this is it! I promise to keep this guide on how to install a faux shiplap wall super simple.
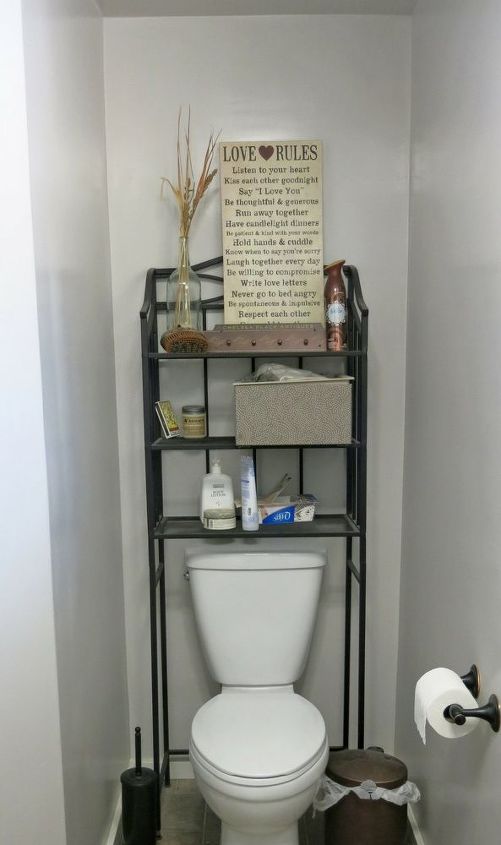
Scary…I know! Since then, we (by that I mean Logan…most of the hard work was done while I was pregnant so I had a good excuse for not being able to help a lot….if you see the size of this bathroom, there definitely wouldn’t have been room for him and me/my big ‘ol belly) have skim coated the walls…which is just a fancy word for making the texture smooth. The texture throughout the entire house was hideous. It looked like someone took dry wall mud and had a splatter paint party. After skim coating, we painted (Burnished Clay by Behr if you’re wondering), replaced the toilet and put our clunky storage shelves in place.
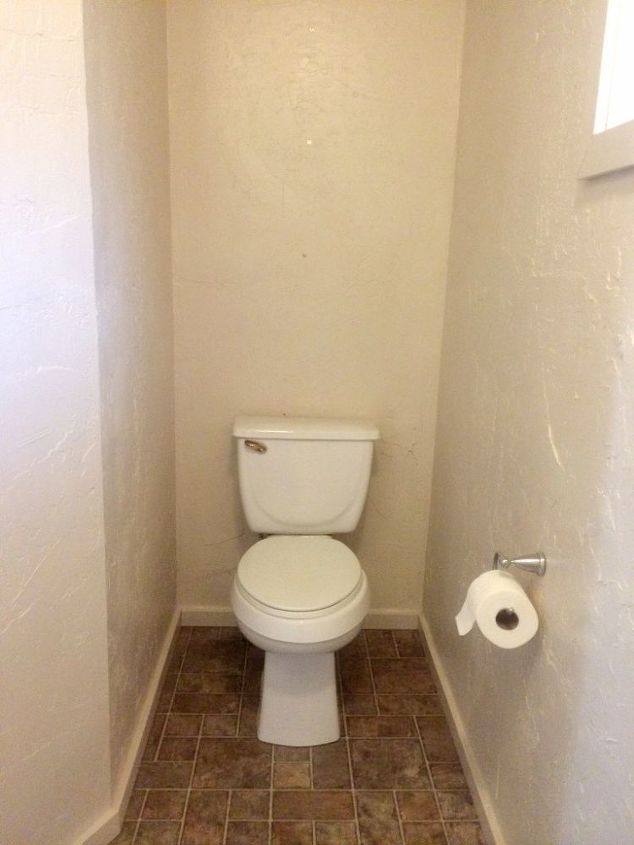
A few weeks ago we got a little DIY bug. Logan and I have both been going kind of stir crazy with the bad weather all winter (Spring, please hurry up already). We decided to tackle some super easy and budget-friendly transformations to our boring master bathroom and it all started with shiplap. I’ve been wanting to do something…really ANYTHING… to the wall behind our toilet that housed those ugly shelves.
We’ve had the shelves for years and…let’s just be honest, I’ve always kind of hated them, but we needed the extra storage in all three houses we’ve lived in since getting married. So there they stayed behind the toilet collecting dust and clutter. After getting Logan to sit down and watch some Fixer Upper with me , I finally convinced him that shiplap is a necessity.
The problem was real shiplap is EXPENSIVE!!! We’re talkin’ at least $60 for the wood to cover this small wall! We only spent $12 bucks on the wood for our faux version.
Ok, first things first…. what will you need? Here’s the supplies for the faux shiplap wall.
- Underlayment plywood – our wall was pretty small, we only needed one sheet
- Brad nailer (with air compressor) – check out our blog post (link at the bottom of this page) for a link to the one we have!
- If you don’t have a nailer and air compressor and can’t borrow one or rent one – you could use finish nails with a hammer and then finish them with a nail punch
- Brad nails
- Putty
- Fine grit sandpaper – we used 220-grit
- Paint – we used Behr’s Snowy Pine
- Paint brush
- Nickle…yep that’s right a nickle from your wallet. I promise I’ll explain!
- Level
- Caulk & caulking gun
- If you don’t have a caulking gun, you could use a squeezable tube of caulk instead
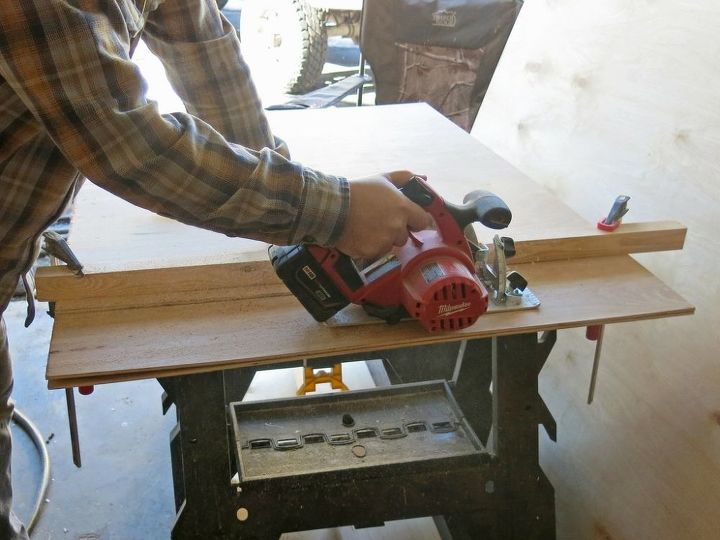
- Table saw
- If you don’t have a table saw (LIKE US), you can just a circular saw and some clamps…I’ll show you how you can rip wood without a table saw below
If you really don’t have access to any power tools, I think you can kindly ask the employees at Home Depot to cut the wood for you when you buy it.
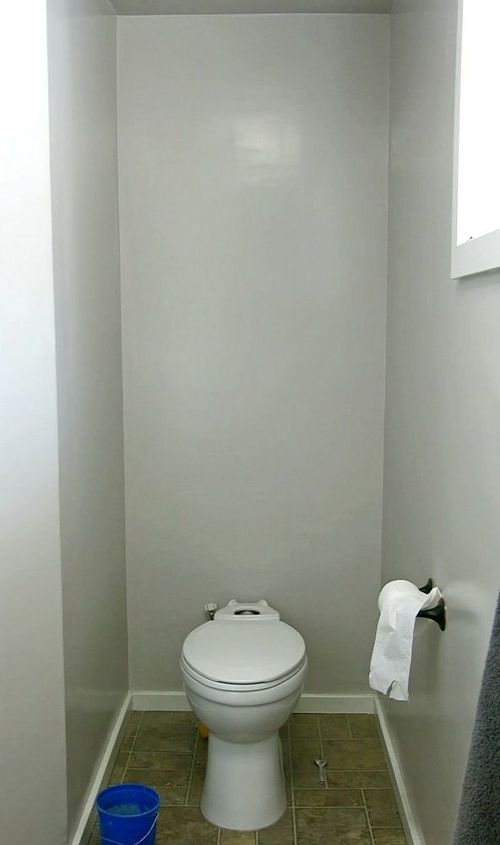
Step 1. Remove tank from toilet. By removing the tank from your toilet, you’ll be able to work on the wall MUCH easier. It’s worth the “extra” step, trust me.
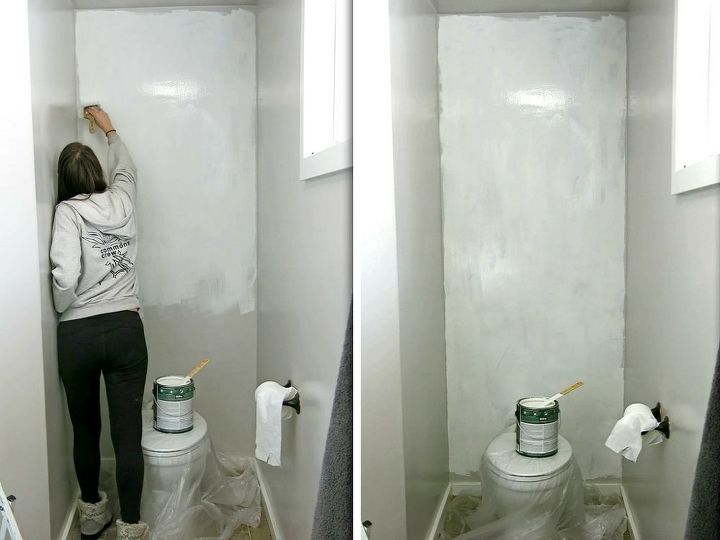
Step 2. Paint your wall. You definitely want to paint your wall with one light coat of whatever color is going to go on top of the shiplap. Don’t worry about the edges or getting it perfect. The only reason you’re painting this is for the gaps between the planks that will peek through. If your wall is a really dark color and you’re planning on doing a light shade on the shiplap, you’ll want to be more careful to get all the edges and you’ll probably want to do more than one coat.
Step 3. Cut wood to size. Next you want to get all of your wood cut down to size. Measure your wall’s width and start making the cuts. We cut our boards 6 inches tall.
You don’t have a table saw either?! No problem… take a look at how we make it work with the tools we do have.
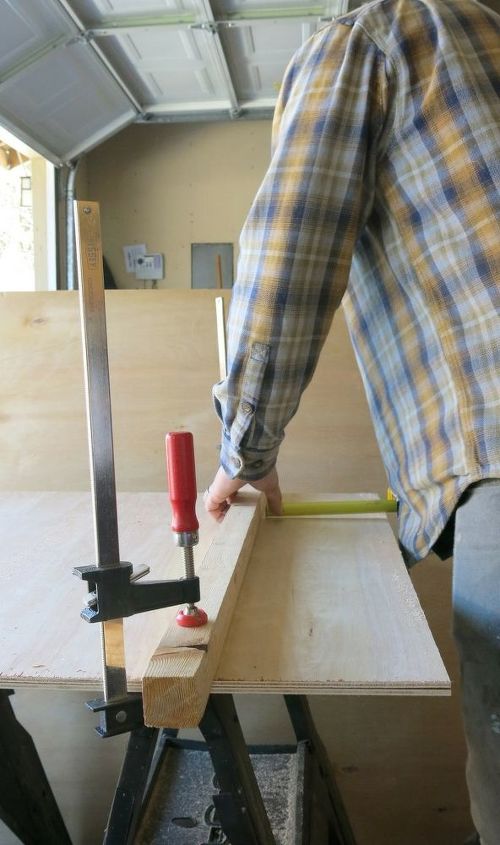
Logan sets up a guide board (1×1 that we had laying around the garage) and secures it to the boards he’s cutting with clamps. He measures the distance that the blade is from the left side of the circular saw and adjusts the guide accordingly. After making sure it’s straight, you just cut the wood using the guide on your left. Tada!
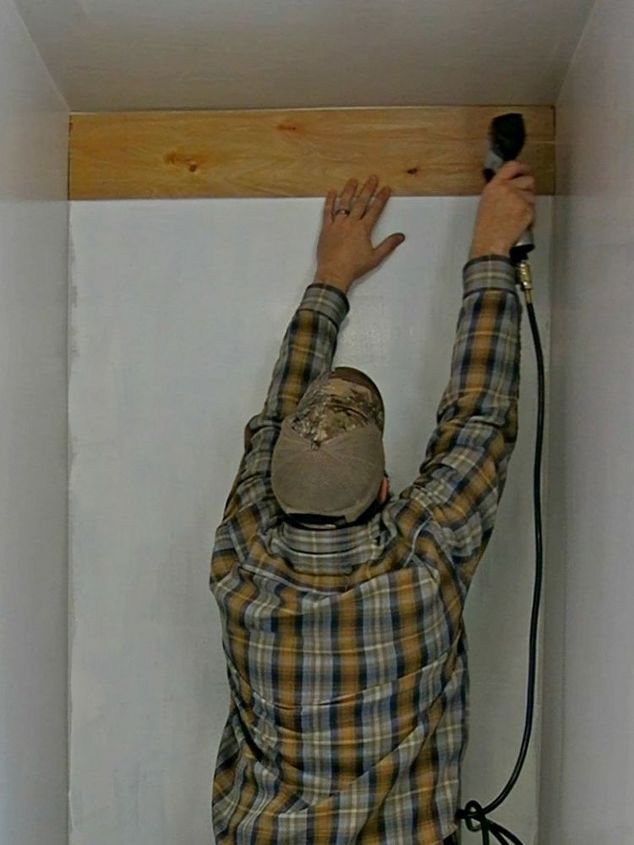
Step 4. Nail wood to wall. Be sure to start the top of the wall and work your way down. If you have a skinny piece, you want it to be at the bottom of the wall so it is less noticeable
Be sure to keep the planks level as you move your way down the wall by holding the level on the bottom of the planks as you attach them.
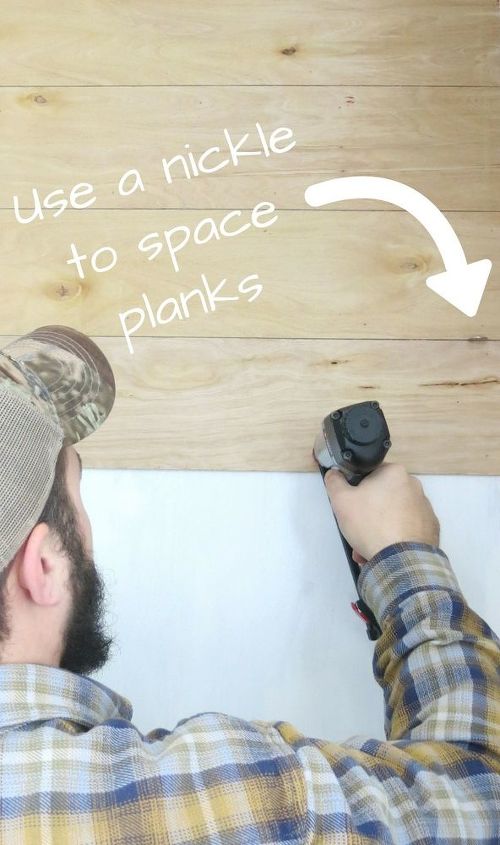
Ready for handy tip? Use a nickle to space your planks out! Put one on both the left and the right of the wall (and in the middle if your wall is larger).


Comments
Join the conversation
-
Underlayment!!! Darn spell check! ;P
-
I loved Laberry's misspelling, (LOL) and I adore Chelsea's bathroom.


Frequently asked questions
Have a question about this project?
Did you have to remove the baseboards?
I have a 1970's modular home, how do you find the points where you nail the boards in? It seems the studs in this house are just not right!! ;P
Oh jeez I missed this! Underpayment!! Did you use construction adhesive to attach this???