


DIY Bookend/Door Stopper From Old Sweater

by
Troom Troom
9 Materials
In this tutorial we will show how to make book stopper/bookend. You can use it as a door stopper as well. Door stopper in a form of pumpkin will be cool decoration for your home.
{
"id": "3782341",
"alt": "",
"title": "",
"video_link": "https://www.youtube.com/embed/2LLJ5USrkWE",
"youtube_video_id": "2LLJ5USrkWE"
}
{
"width": 634,
"height": 357,
"showRelated": true
}
We’re going to show one of the ways to upcycle junk around your home. This trash to treasure home craft proves practical solutions can and should be beautiful.
We will need:
- a cut of an old sweater;
- a large round plate;
- strong thread;
- a needle;
- scissors;
- and a tailor’s marker.
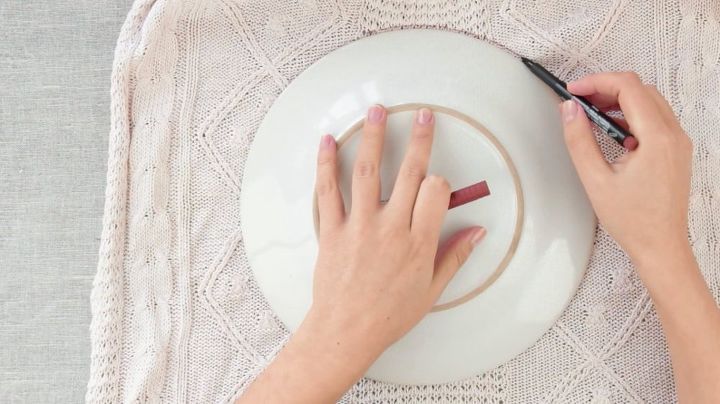
We’ve precut the back of the sweater. The size of the patch depends on how big a stopper you want.
To make a sewing pattern any round object will do. We’re going to use a large round platter.
Trace around the plate with the marker.
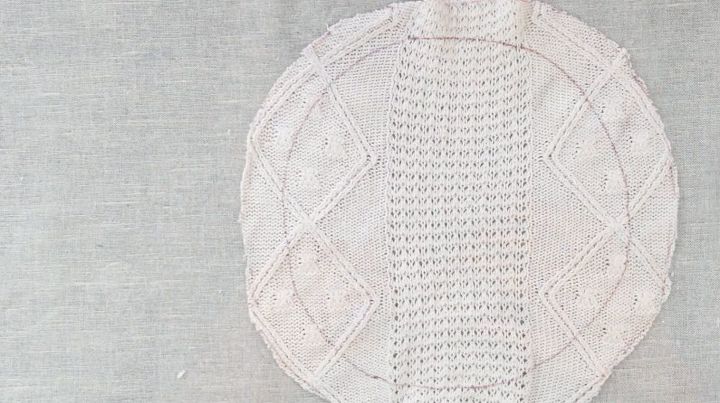
Add 3 cm seam allowance around the edge of the circle and draw a circle with short strokes and cut out the pattern.
If fabric sheds on cut edges, iron fusible web along. This handy item is available at any fabric and craft store.
PVA glue will also do – with a narrow brush glue all along the edge and wait till the glue dries out. So here’s the pattern.
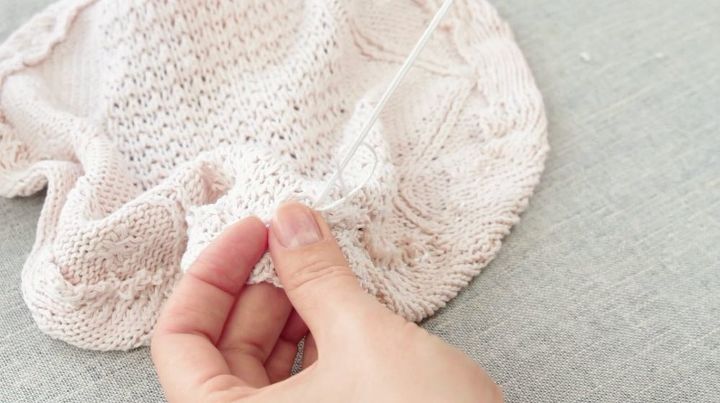
We’re going to use a strong nylon thread for sewing. Any kind of thread will do unless it’s firm enough, as it might break when gathering the fabric.
Cut a thread and thread a needle. A wide eye one works best.
Half fold seam allowance – the edge meets the pattern line.
Hand stitch. We’re using back stitch – it imitates machine stitching.
Secure with a few stitches. Make sure you leave around a centimeter opening to run the string through.
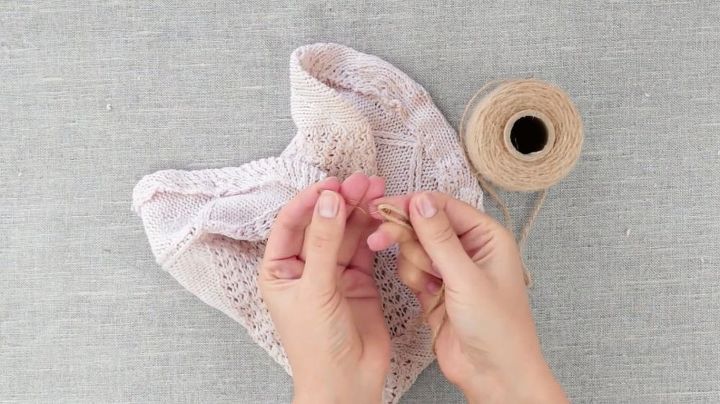
Thread any string or twine through the tube.
For that you might use a special needle, a safety pin or a hand-made one like this - just twist a piece of wire to form a loop.
Cut 2-3 lengths. Leave the loose end outside the tube.
Thread the twine through the tube pulling the pin ahead.
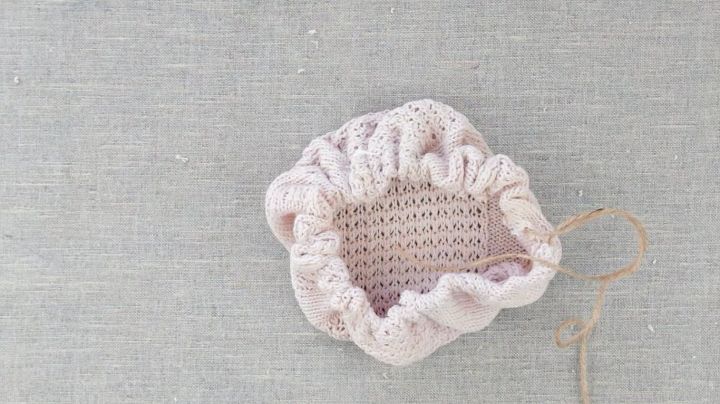
Remove the pin. Gather the pattern pulling both ends of the string.
We’re using a pile of stone as a weight. Fishing plummets will also do perfectly well.
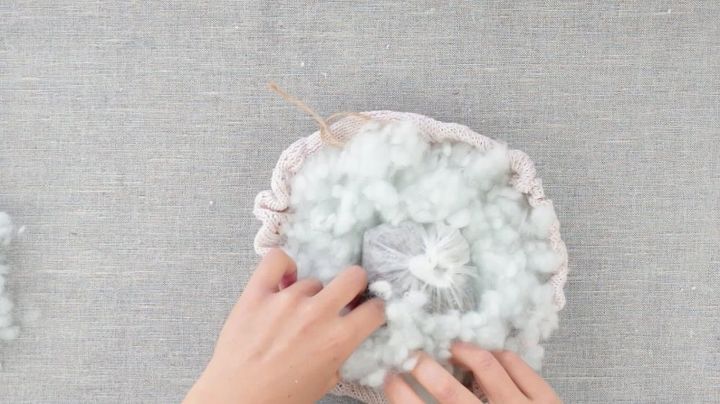
Fill the sack with the synthetic toy filler or patches of fabric.
Wrap the stones in a plastic bag you want a kind of a ball shape.
Now let us fill the pattern.

Put the weight and pull the string ends as tightly as possible.
Fix with a knot.
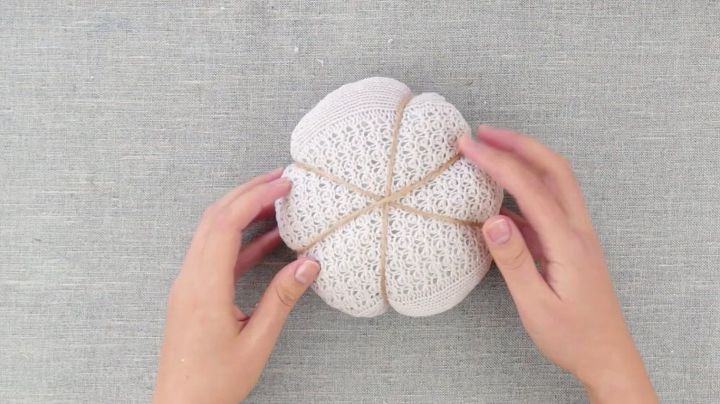
To give the sack a shape of a pumpkin, we’re just going to tie it crisscross with a twine.
Here we’ve got these nice ribs.
One turn. Fix with a knot. Trim the ends. And another one.
Puff the pumpkin cushion for the filler to take a new shape.
Let’s add some more ribs to give a pumpkin a natural look. That’s nice!
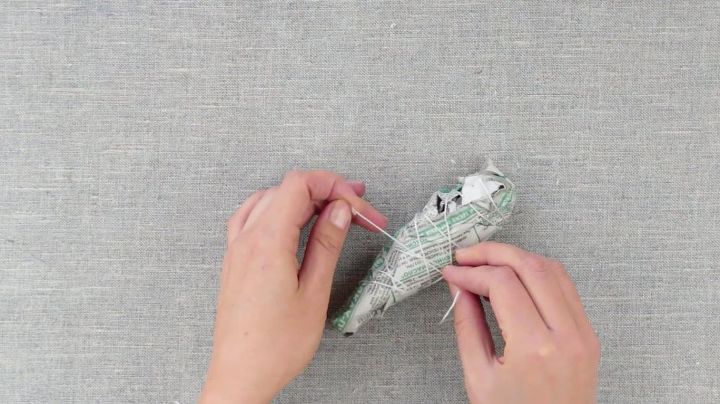
Now we need a pumpkin handle. We’ll need a short stick for a stem. The length depends on the size of the pumpkin. Wrap some newspaper around – it’s pliant and easy to shape.
Tie with a thread and fix.
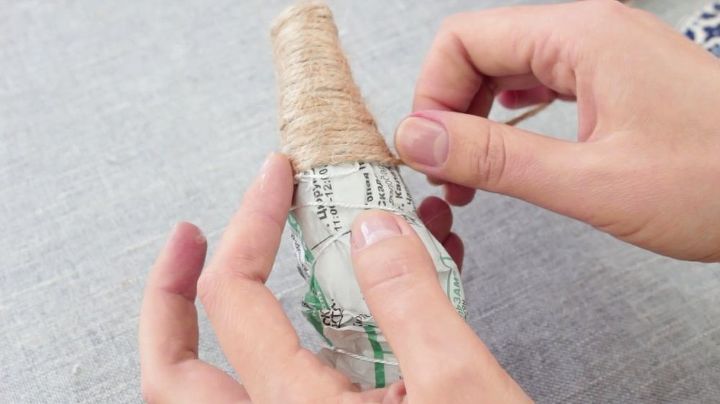
We’re going to decorate the pumpkin stem with twine. For that we will need a glue gun.
Fix the end of the twine on a drop of a glue and whirling the stem wrap the twine around it. Keep the rows tight to fully cover the newspaper.
Place a dot of glue. Fix the turn and spin tightly. You don’t want any gaps.
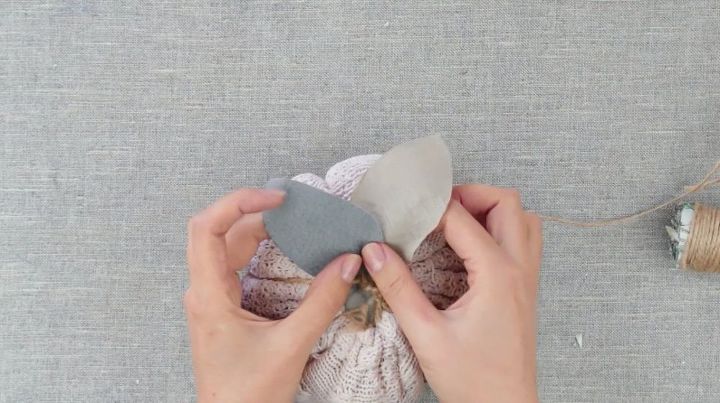
Now some decorative element – two leaves. Here we have a leather cut and a patch of linen of monochromatic colours and contrast texture.
You can use a ready-made template or draw the leave pattern. Cut out.
Arrange on the stem and hotglue.
Press with a finger for a better grip. The other leaf overlaps the fırst one.
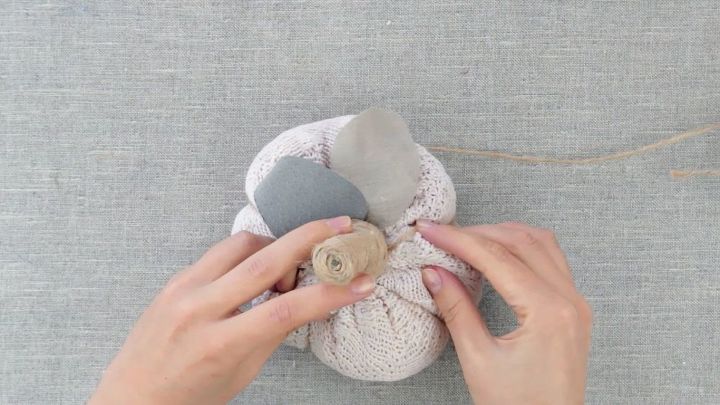
Apply glue abundantly all around the place you are going to fix the stem to.
Press the handle tightly, slightly pushing it inside the pumpkin.
Hold this way for a few seconds to let the glue cool. Then press the gathering to the pumpkin handle.
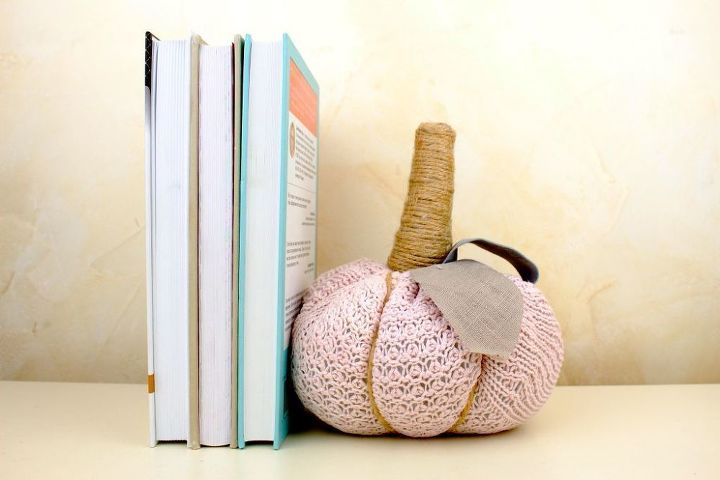
The pumpkin door stopper is ready!
This doable and fancy home decor item can also serve as a bookend.
If you're like this project, check out our youtube channel: https://www.youtube.com/troomtroom OR our super cool website: http://troomtroom.com
Thanks so much for reading/watching!!
Comments
Join the conversation
2 of 39 comments
-
Great idea that can also spin to a variation of sizes and fabric designs! Thank you for the share!

-
Nice!


Frequently asked questions
Have a question about this project?