


Faux Wood PVC Shelving Unit

I'm super excited to share this project! What started out as a vision and an adaptation of a photo I saw online turned into an actual functional piece, all thanks to Rob and his math/design skill. I'm loving the way this fairly easy shelving unit came out and even more so, how inexpensive it was to create!
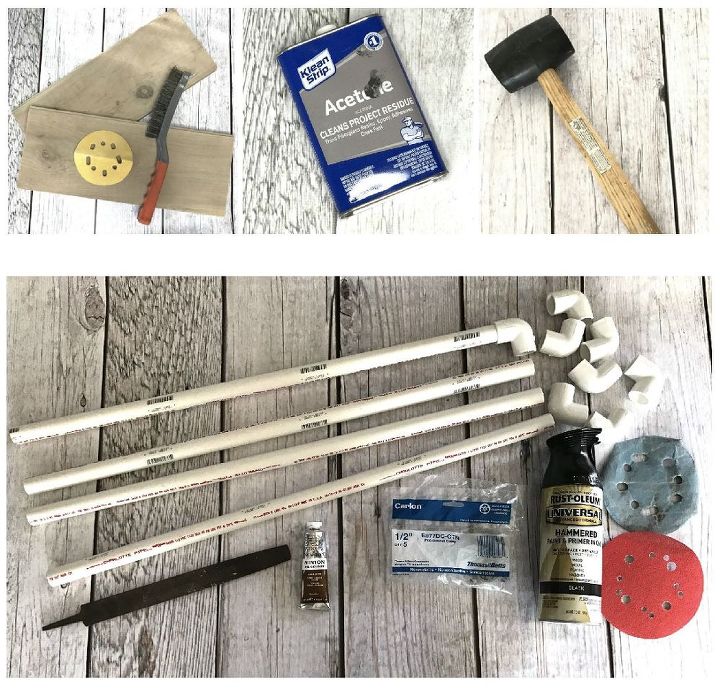
SUPPLIES:
-VPC 1/2 in. x 2 ft. PVC Sch. 40 Pipe (4)
-DURA 1/2 in. Schedule 40 PVC 90-Degree Elbow (8)
-Carlon 1/2 in. PVC Conduit Clamp (5-Pack...I only needed 2 though)
-Klean Strip Acetone
-file
-Winsor & Newton oil paint (color: Burnt Umber)
-Rustoleum hammered black spray paint
-220 grit sandpaper
-60 grit sandpaper
-rubber mallet
-1x6 board
-wire brush
Not pictured:
-Minwax Paste Finishing Wax
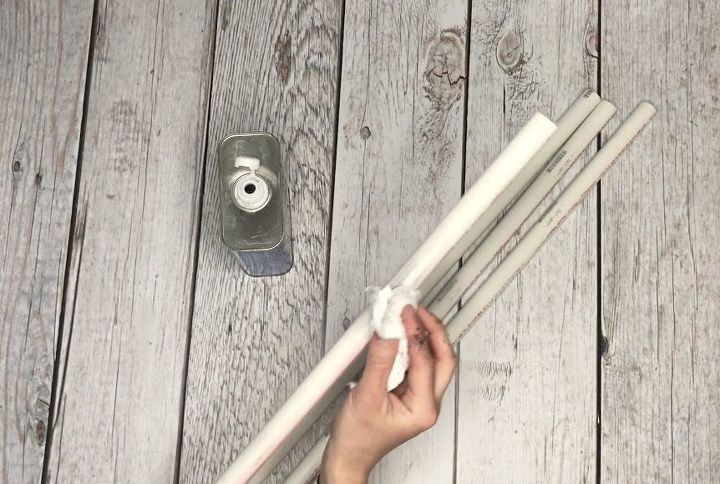
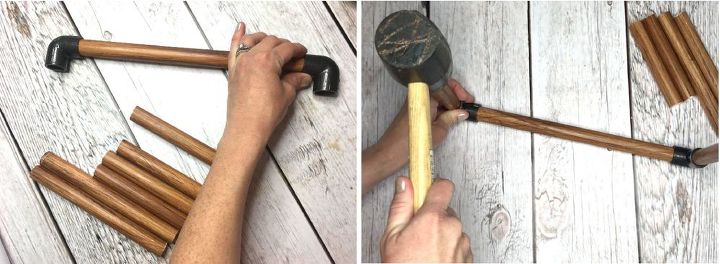
STEP 1: Remove ink labels
To start this project, I used acetone and a rag to remove the ink labels off of the PVC. You'll definitely want to do this step so the labels don't show through on your finished shelving unit.
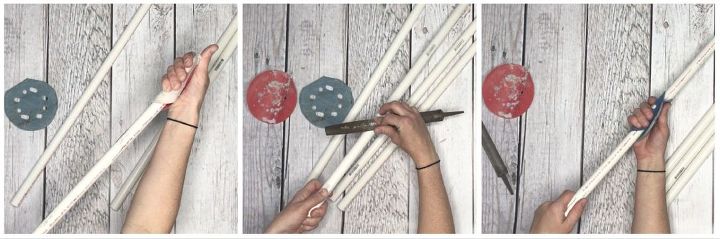
STEP 2: Rough up PVC
After I removed the labels, I roughed up the PVC; this will give the piping a wood grain look once you finish the next step. I first sanded the PVC with 60 grit sandpaper, then used a file to scrape and make deeper marks, and finally used 220 grit sandpaper to clean up the PVC of any spiderweb-like plastic debris left from the harder sanding and scraping.
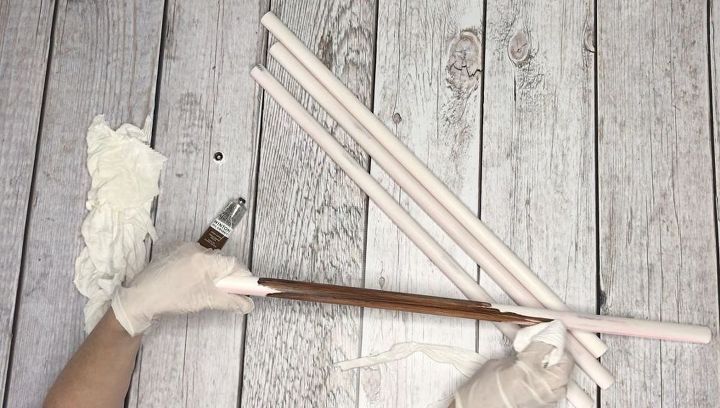
STEP 3: Apply oil paint
Next, I used gloves and a cloth rag to apply oil paint to the PVC. The oil paint is thick and a little bit goes a long way, so I recommend using a pea-size amount and spreading it out evenly in long sections of the PVC. I let my PVC sit overnight to ensure that it was completely dry.
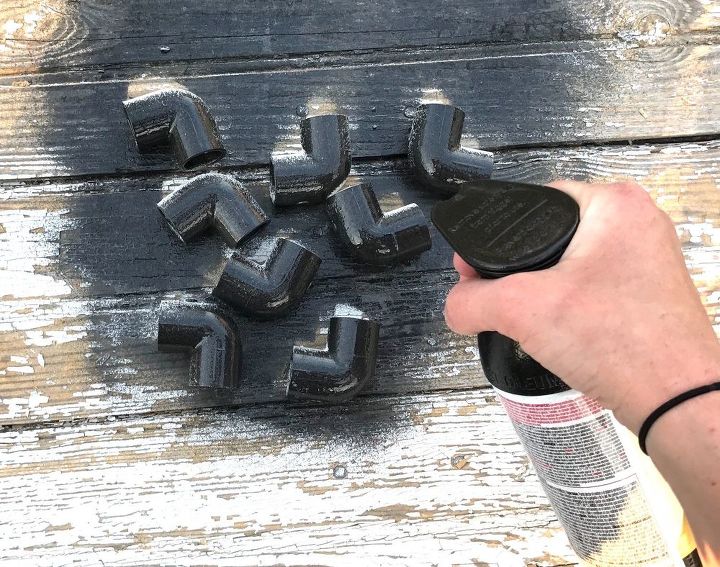
STEP 4: Spray elbows and clamps
While my PVC pipes were drying, I used hammered black spray to paint the elbows and clamps. I thought this would give somewhat of a metal/industrial look and break up the faux wood grain of the PVC.
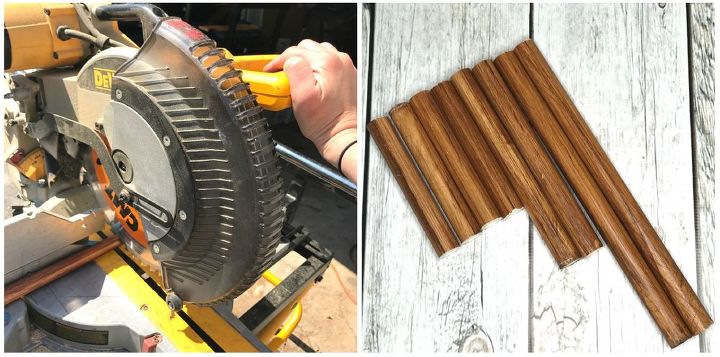
STEP 5: Cut PVC
The next day, I used a chop saw to cut my PVC into the dimensions I needed for my shelving unit. I had decided on 18" shelves so I went with the following dimensions for my PVC:
-12" (2)
-8" (2)
-5.5" (4)
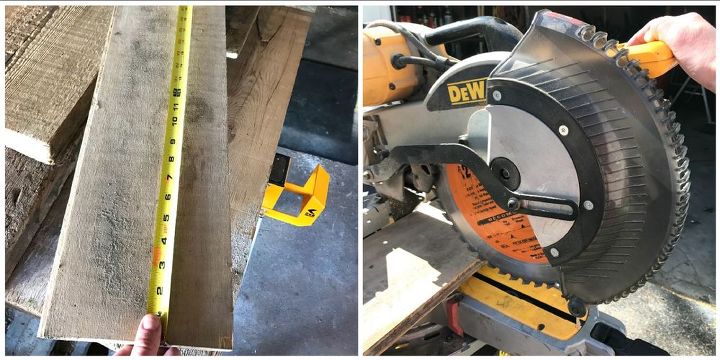
STEP 6: Cut 1x6 boards for shelves
After my PVC was cut, I measured out two 18" boards to create shelves from. Rob had some 1x6 tongue and groove boards laying around the garage so I used those. Feel free to purchase common board from Home Depot or your other local hardware store!
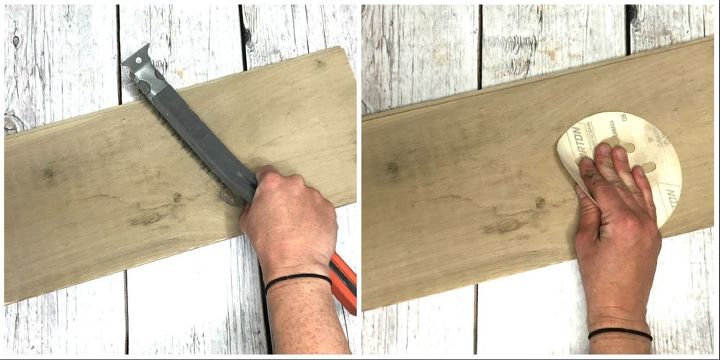
STEP 7: Clean up wood boards (optional)
Because the wood I was using for my shelves had been sitting around the garage and were a bit raw and dirty, I used a wire brush and sandpaper to knock off the dirt and smooth the boards out. I also tried to round out the edges a bit for a more finished look. In order to seal the wood and give it a complete look (while still having a natural finish), I used a rag to apply a small amount of Minwax Paste Finishing Wax, then let the shelves dry completely.
STEP 8: Assemble shelving unit
Finally, it was time to assemble my faux wood PVC shelving unit. I attached an elbow to each end of both of my 12" pieces, then used a rubber mallet to attach and firmly secure two of the 5.5" pieces to each of the other ends of the elbows.
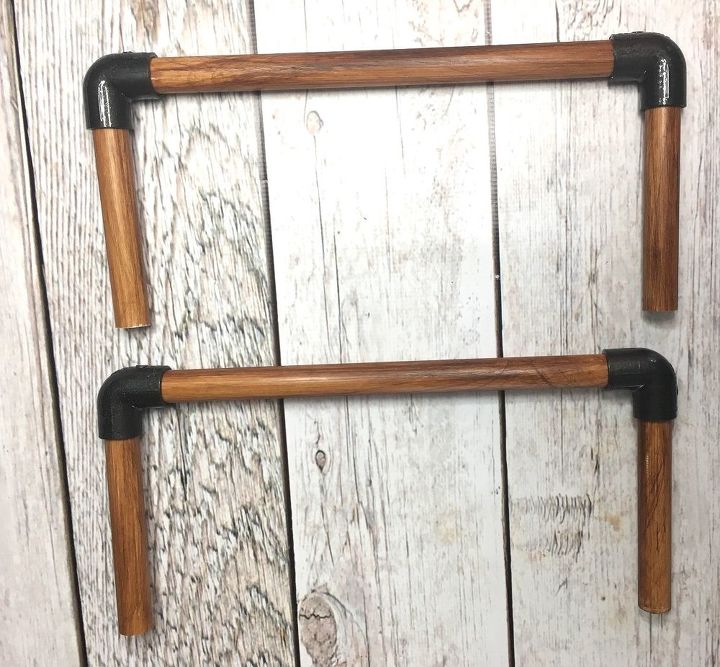
Here is what your first pieces should look like once assembled. The 12" pieces are across the top and the 5.5" pieces are on the left and right. I'm going to call these "fronts".
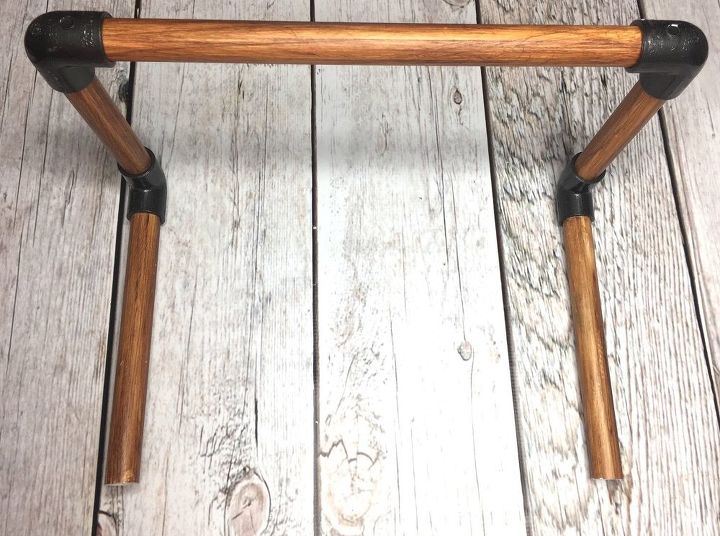
Next, I took two more elbows and attached them to the bottom of one of my fronts, then attached two 8" pieces of PVC and attached them to the empty ends of the elbows.

After that, I attached the remaining two elbows to the ends of the 8" PVC pieces...
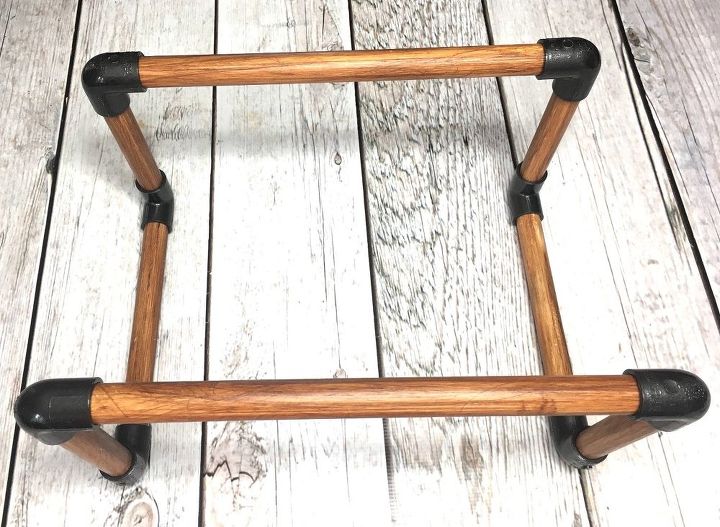
...and lastly, I attached my other front piece to the empty ends of the remaining elbows.
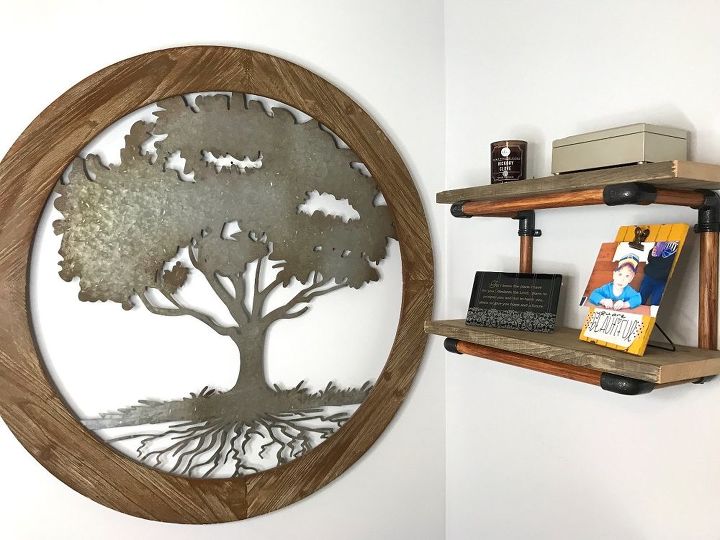
I'm really happy with how this little experiment came out. We don't have a whole lot of wall space because we have so many windows in our house (which is a good thing in a small house), so I don't want to clutter every furniture surface with photos and things. This little shelving unit is the perfect solution to being able to display table photos, candles and other keepsakes!
Comments
Join the conversation
-
That is so awesome and you made it look easy, will have to try this myself, thanks for sharing!
-
Cool idea. It really does look like wood. Thanks for sharing.
Thought about spraying copper as well. It would look like copper pipe without the expense.


Frequently asked questions
Have a question about this project?
What did you use to attach to your wall
How do you explain the number of pvc pipes? The picture shows 8 pipes yet the instructions say 4 pipes.
I really like your industrial-style shelves, but what I’m Really loving is the wall decor beside it. Did you make it or buy it? And if you bought it, could you tell me where, please? If you made it, well...no way could I ever replicate that metal tree silhouette. Or the circular frame. Btw...you guys post the most amazing how-to videos. You are so talented and creative!