


CounterTop Stacked Terra-Cotta Herb Planter
We have all seen those topsy-turvy planters in peoples yards, but what if you want one for your patio or even smaller for a countertop so you can have fresh herbs at your fingertips when you cook? Here's how to put a portable herb planter together in just a few short steps.
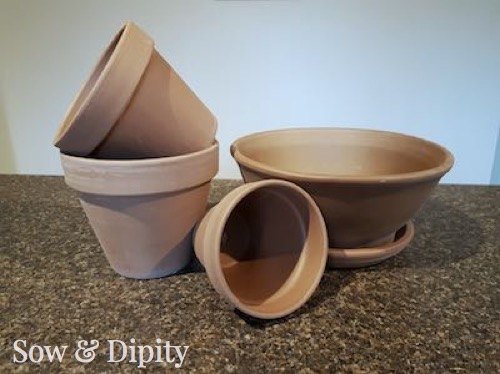
Select pots in at least 4 different sizes. You can use any type of pot and not just terra-cotta. I chose a mocha terra cotta pot to match my kitchen, but you could paint yours to match too.

You'll need a solid block that fits in the bottom pot and a thin scrap wood to go below to fasten together through the drain hole. I drilled channels to the center of the big block so water would weep through to the bottom. A sturdy bamboo stake will be your support.
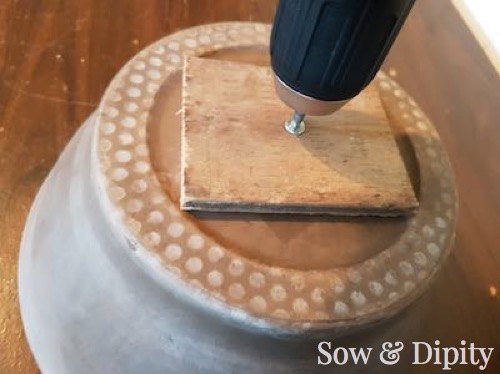
Sandwich the wood pieces together using a screw, then drill a hole big enough in the large block on the other side for your support stake to sit in.
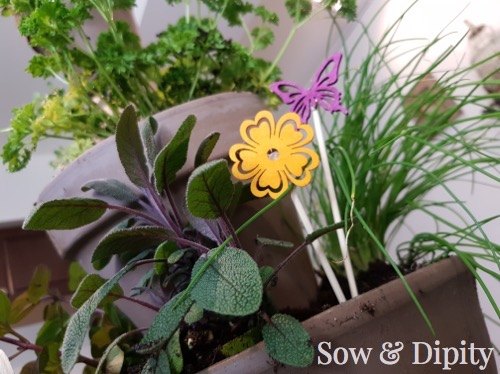
Stack your pots so they are sitting on the rim of the pot below it. Add your soil and plants, putting large upright plants in the bottom pot with trailing plants in the middle and top.
You can choose any plants for this project. Flowers, herbs, indoor house plants and even succulents. Light is an issue for flowering plants, so this is best used for a sunny patio. But most herbs will do well in a big window indoors.
Be sure to harvest often so they continue to flush with fresh growth!
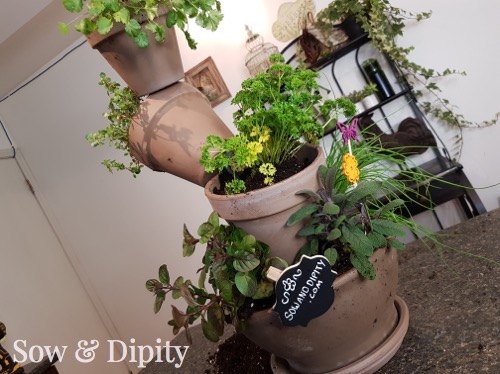
That's it! Now you can put a topsy-turvy planter anywhere without it being a permanent fixture. Just be sure to put your planter in an area with lot's of light and don't forget to water it! See full instructions in the link below...
{
"id": "3841113",
"alt": "",
"title": "",
"video_link": "https://www.youtube.com/embed/XVfL6XotUKw",
"youtube_video_id": "XVfL6XotUKw"
}
{
"width": 634,
"height": 357,
"showRelated": true
}

Want more details about this and other DIY projects? Check out my blog post!


Frequently asked questions
Have a question about this project?