


Nesting Tables Makeover + Tutorial
3 Materials
6 Hours
Easy
My furniture flips keep on coming. I have flipped & sold a coffee table, 2 sets of end tables within the past few weeks. Now I am working on a set of nesting tables. I also have a kitchen table makeover in the works as we speak.
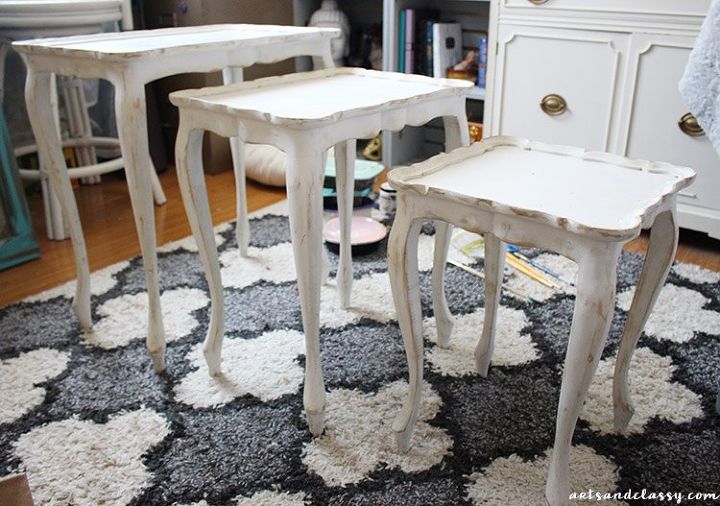
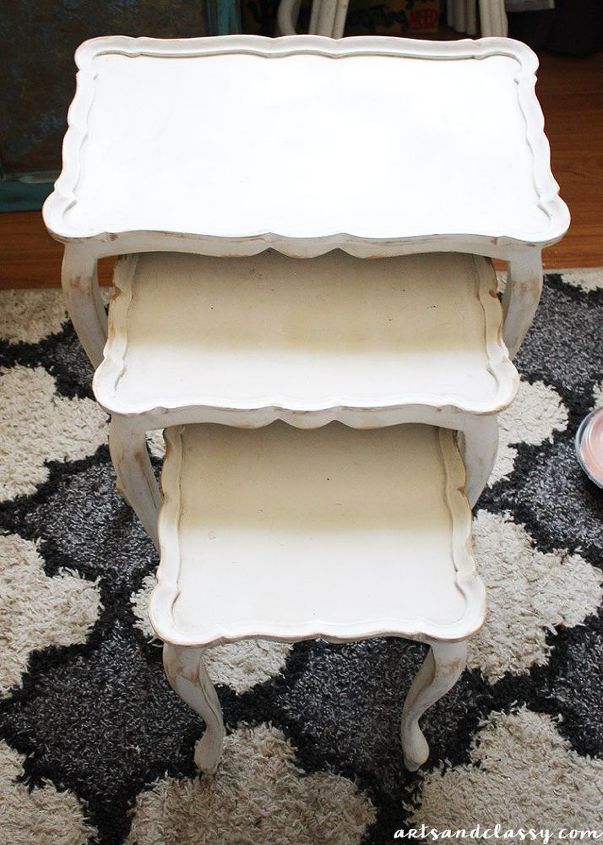
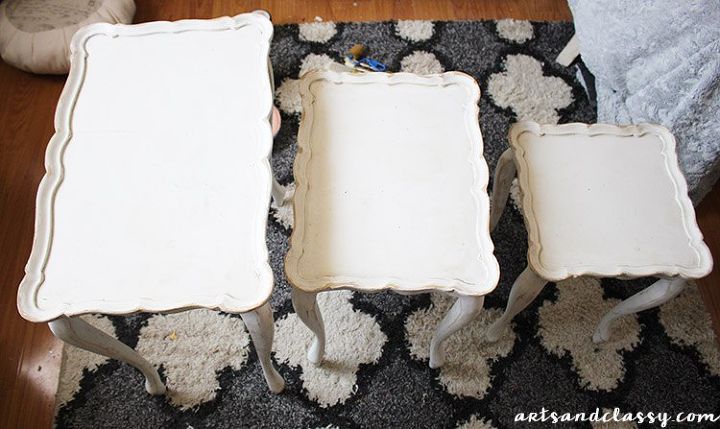
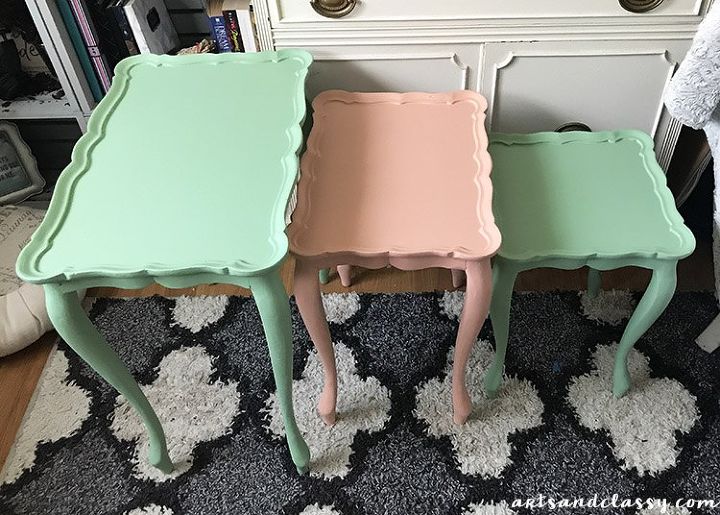
But First, Let’s Get To This Fun Nesting Table Makeover. Here Are The Before Photos Of This Piece.
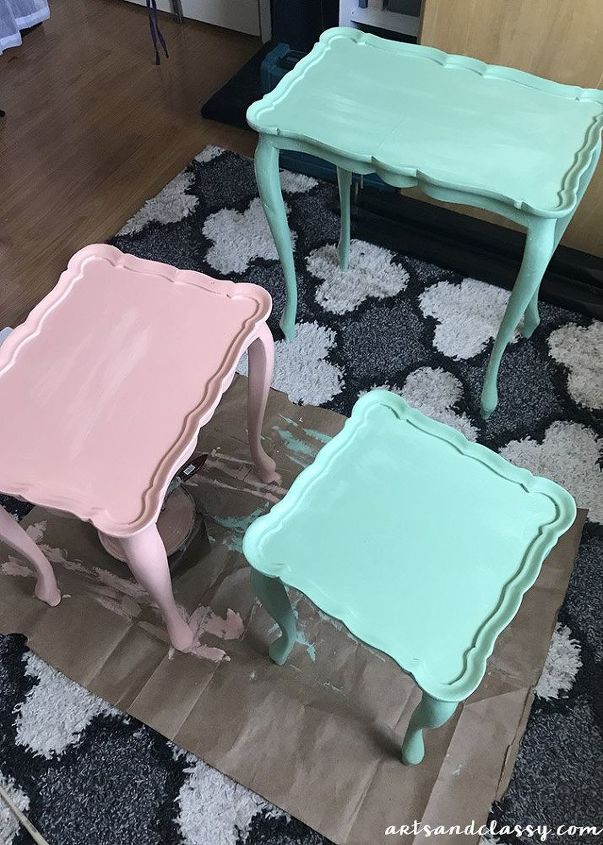
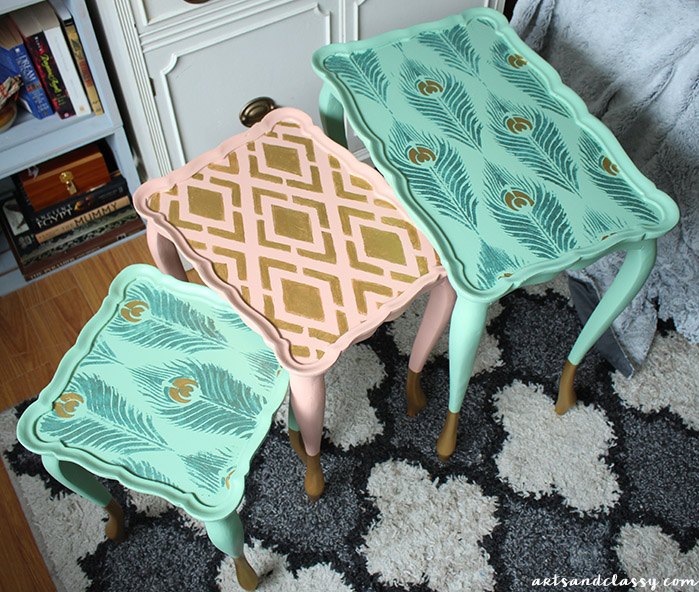
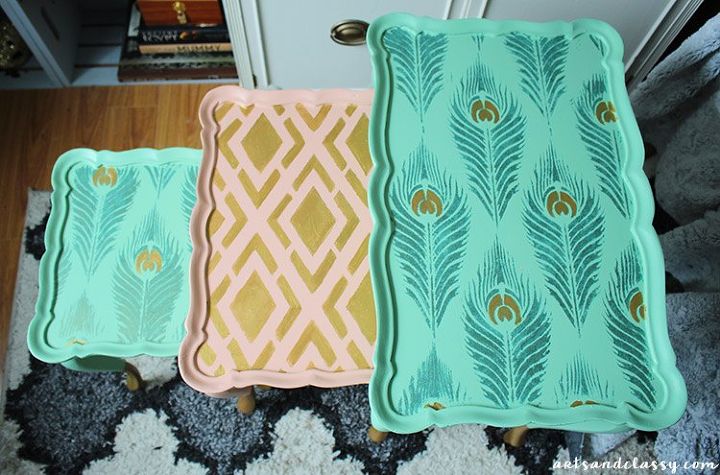
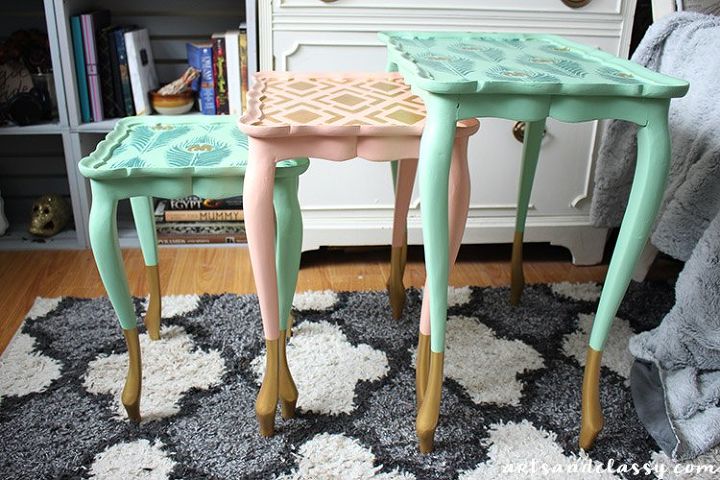
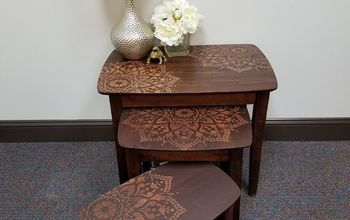
FIRST, I DECIDED ON THE COLOR OF ALL 3 TABLES.
I decided to make the largest and smallest table the same color my Behr paint in “Brookview.” The middle table would become the “California Coral” color that I used on my recent side table flip.
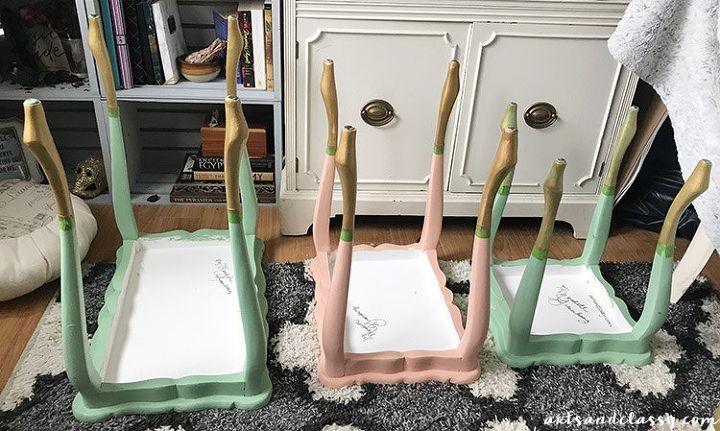
After painting couple of layers of on each nesting table, I moved on to taping off the bottom portion of the legs. I love that gold dipped effect on furniture legs.
I used my Modern Masters “Olympic Gold” paint to make these table legs pop!
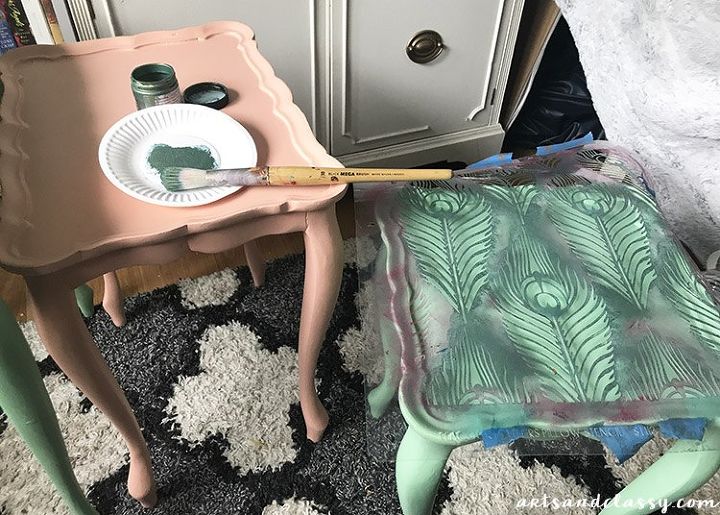
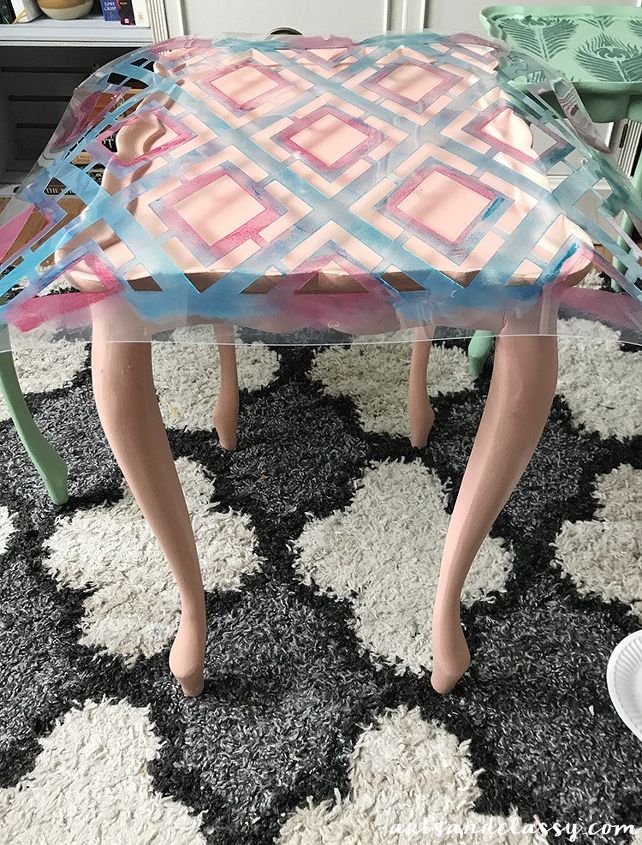
Last year, I was sent 2 stencils from Cutting Edge Stencils for their Paint-A-Pillow brand of stencils. I loved the stencils and kept them after the project in case I could make use of them again.
The day finally came to break them out. I thought they would make perfect additions to the tops of these nesting tables. I used a blunt stenciling brush to apply the Royal Stencil Creme I used in “Patina Green.”
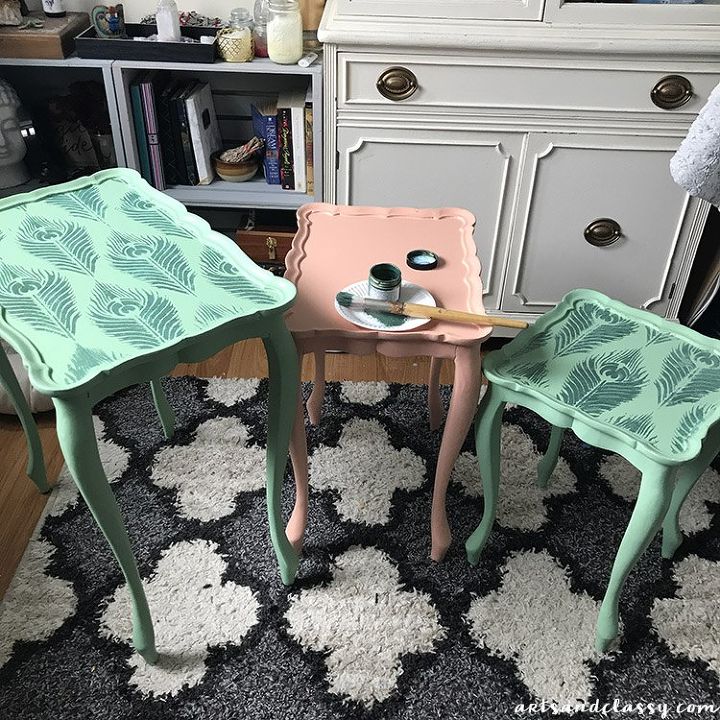
What do you think of these nesting tables? Where would you put them in your home? I would love to know! Let me know in the comments below.

Want more details about this and other DIY projects? Check out my blog post!
Comments
Join the conversation
2 of 54 comments
-
Good job
-
Absolutely GORGEOUS!!!


Frequently asked questions
Have a question about this project?
Beautiful!!
How did you get the stencil since it is larger than the top to lay flat? I have never used stencils so perhaps it's just my inexperience showing . Thanks! Joanne
Hello. No question, just to say I love these, I will check out second hand stores to do the same. Thank you.