


How To Make a Mosaic Glass Light!!

5 Materials
$75
3 Weeks
Medium
I love stained glass! This is how I made a large mosaic glass light for my ceiling using scrap glass.
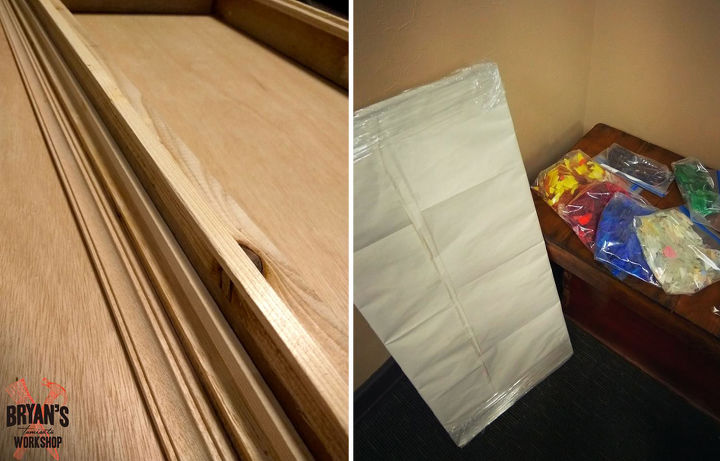
It all started with the glass. I found scrap glass for sale on Yahoo auction Japan. I bought 4 kg (8.8 pounds) for about $50...YES! The glass was a mix of stained glass, sea glass and bits of beach glass and broken decorative glass. It arrived all mixed in one bag, so I needed to separate it all (made my daughter do it) I ended up with mostly red, blue, pearl and yellow with some black, green and clear. I was so tired after separating all of this (100% my daughter)
I built a big chunky frame out of scrap wood and then had a piece of glass cut to fit in the frame perfectly. The frame has a lip that the glass sits on and wood is screwed in behind it to hold it securely in place, just like a picture or a mirror.
TIPS:
-Glass is sharp, so be careful
-This can be done on plastic, but in Japan sheet glass is cheaper.
-The bigger the glass/plastic the thicker it should be.
-Figure out where you want to hang/put this and then decide on the size.
-Be careful hanging heavy stuff from the ceiling! I needed to add joist bracing before hanging this bad boy.
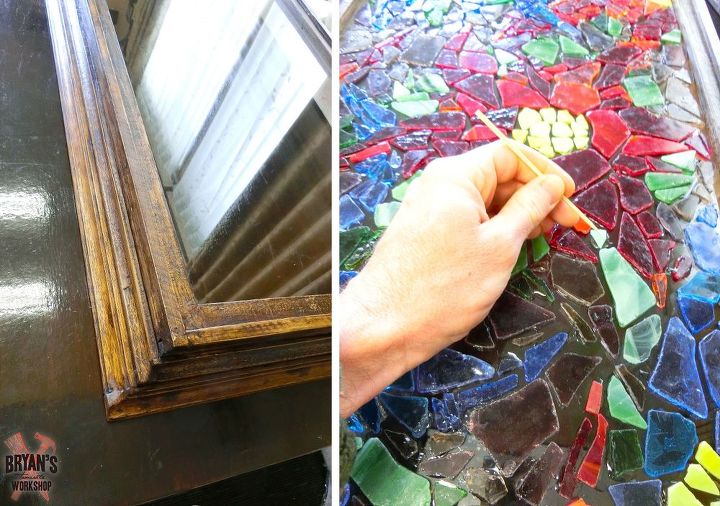
This is the finished frame after a couple coats of Jacobean Briwax. The glass is in and secure, so it is making the mosaic time!
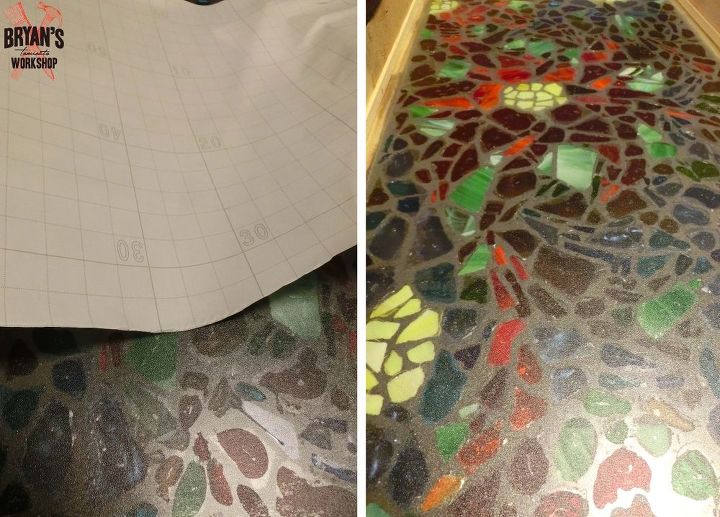
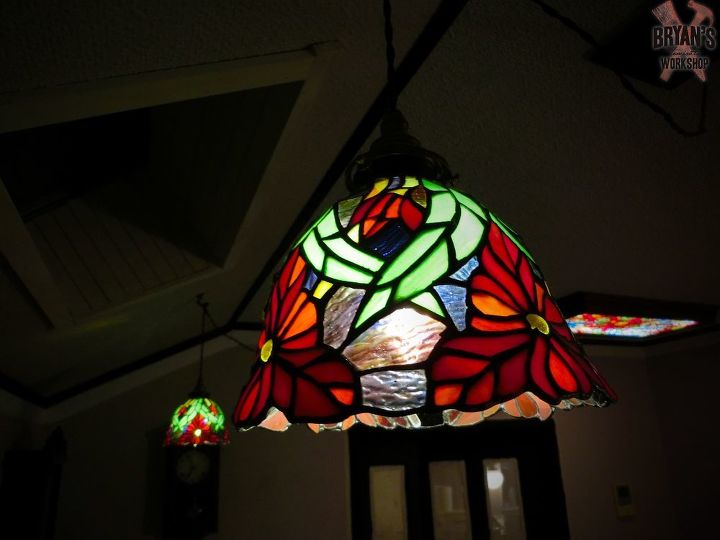
I did this all freehand. I intended on laying every piece of glass out first, but this way was easier for me. I got my design idea from two stained glass pendants already hanging up in my house. Those are pictured later on.
I used a local Japanese brand of "everything" super glue. It literally says on the bottle that it can glue anything to anything. I can't recommend a glue, but anything that glues glass to glass should work well.
TIPS:
-Make sure the glass is glued down in a way that grout won't get under it.
-Put glue on the window first and then put glass ontop of it. I applied glue to the glass pieces first and then put them down, but this made a mess for me later on. Glue strings got ontop of the colorful glass and needed to be scraped off.
-Wear gloves when working with super glue. *I'm not wearing gloves in this picture, because I've finished gluing everything down...or so I say..
-Work fast with super glue
-Get the glass pieces as close as you can, but leave room for grout.
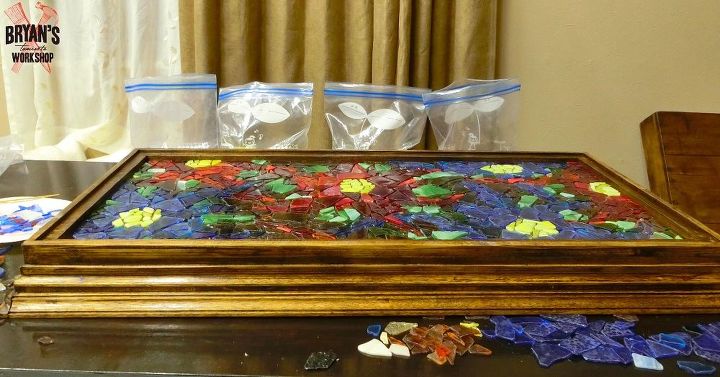
It's all glued down.
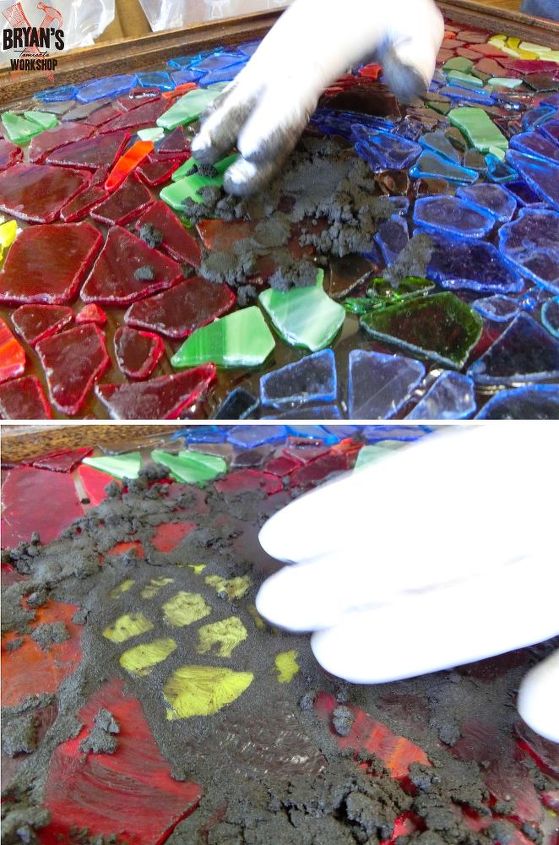
I used a local Japanese brand of black grout for this. I can't recommend a brand, but any black grout should work well. I put on gloves and pushed the grout into all of the cracks. It took FOREVER, so give yourself enough time.
TIPS:
-Keep clean up supplies nearby, like a bucket of water and sponges and towels.
-Grout dries quickly, so mix as you go.
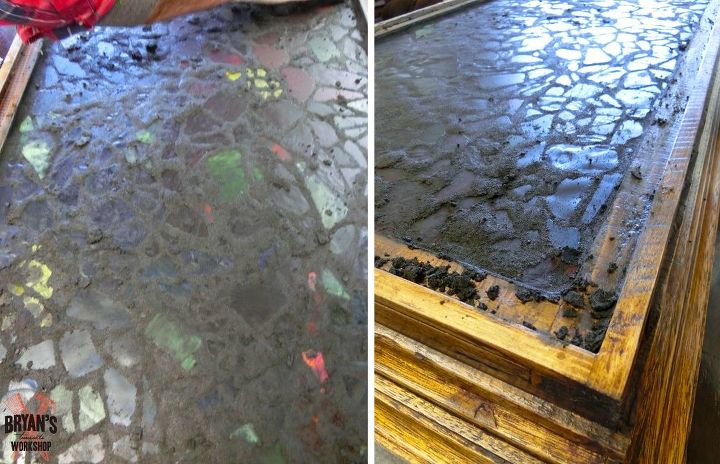
It's all covered! I am a wiz at grout, but found this challenging! It was the uneven surface that threw me off. You'll be able to begin sponging your grout after it begins to harden in 20-30 minutes. Check your grout for directions.
This was the most difficult part! The uneven surface made it challenging for me to sponge off the grout without taking too much grout off. This took a lot of time and I even thought at one point that i'd never see the glass again. Just give it time.
TIPS:
-Use a big bucket and a sponge made for sponging grout.
-Dispose of the clean up water in an outside drain if you can. There will be a ton of it!
-Take your time.
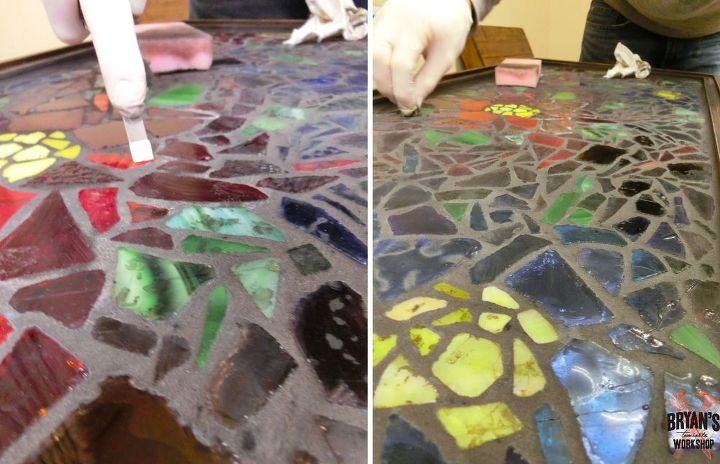
After sponging, I let the grout completely dry before cleaning up the glass. All of that residue you see on the glass is glue and grout dust. I scraped it off with elbow grease and polished it up nicely with a kitchen sponge and glass polish.

The grout wasn't looking dark enough, so I stained it with black tube water paint. You can totally do this! The grout will drink in the color and it will effortlessly wipe off the glass.
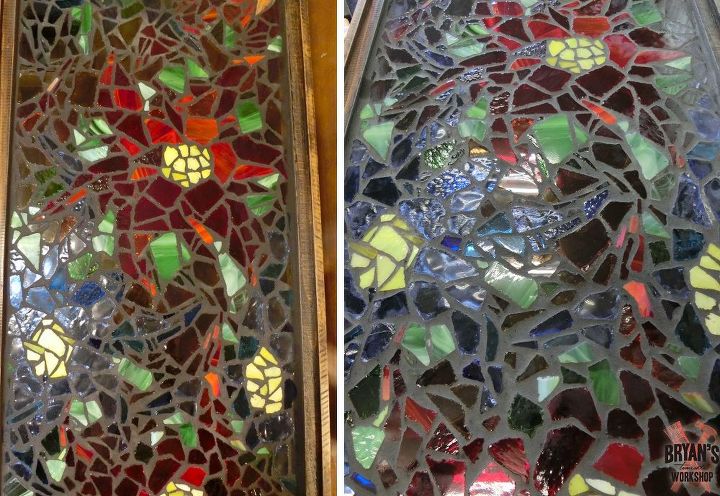
The grout is stained and the glass is polished!

Some of the sea glass was too transparent with light behind it, so I put down some leftover contact paper from my wife's privacy window project
I applied the contact paper to the back of the glass just like the privacy window.
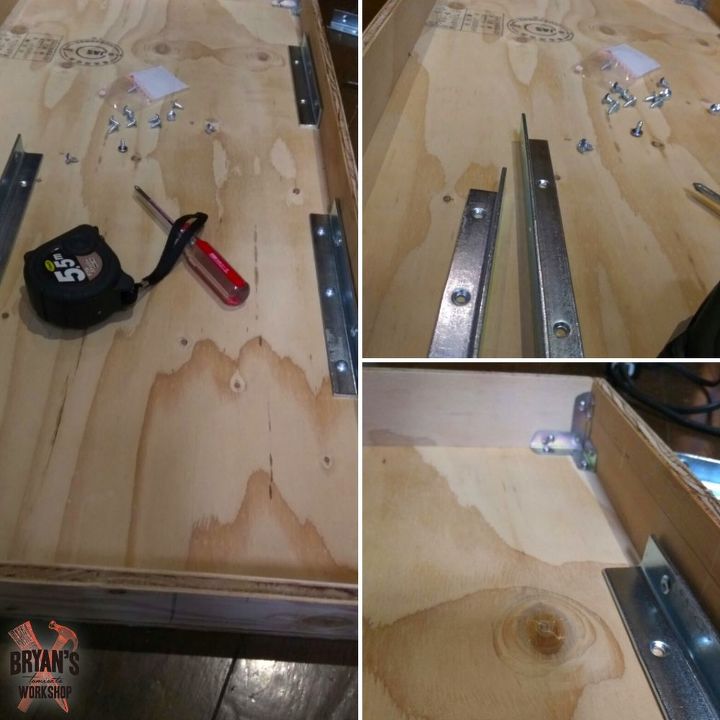
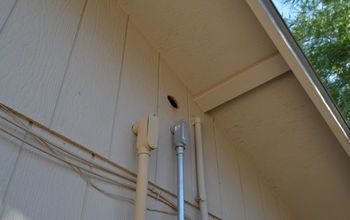
The is the light box that the mosaic glass light will slide on. This light box will anchor into the ceiling and the mosaic glass light will screw into this and also be anchored into the ceiling.
TIPS:
-Build this guy tough!
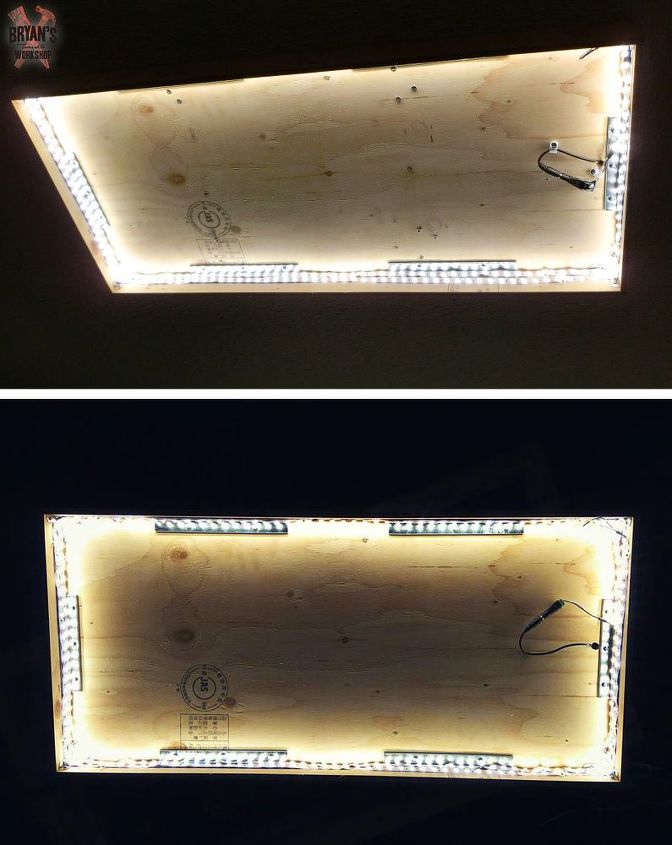
This is the light box on the ceiling. I used an LED strip to light this box. I won't get into any wiring details, but always use extreme caution around electricity.
TIPS:
-Be careful with electricity!!
-Be careful hanging anything from your ceiling!
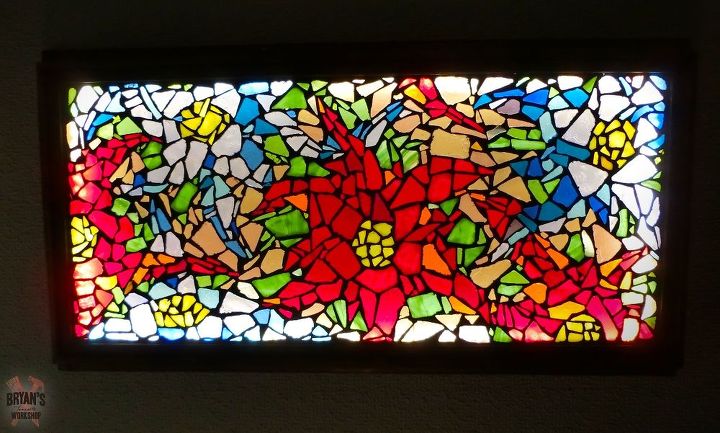
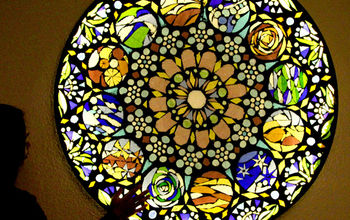
This is the finished light on the ceiling.
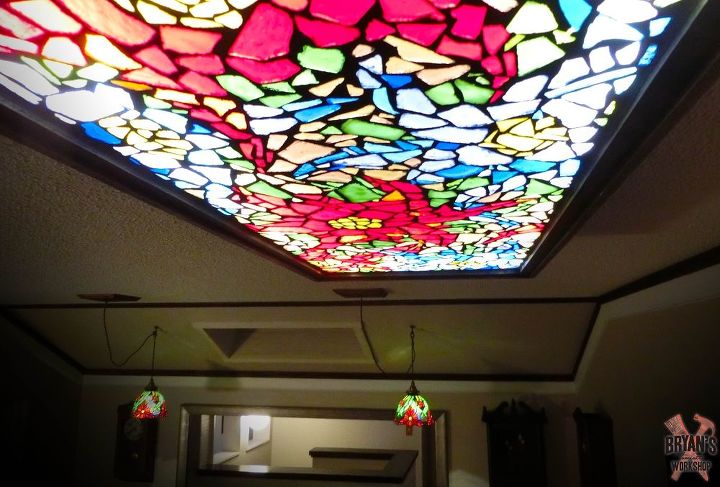
There are those two pendants I was writing about earlier!
Comments
Join the conversation
2 of 409 comments
-
Absolutely beautiful,I had always like this kind of glass, with your introductions I will definitely make one,now that I’m retired I think I have the time, thank you so much.👏🏼👏🏼👏🏼👏🏼👏🏼👏🏼👍🏼👍🏼👍🏼👍🏼👍🏼🌺🌹🌻
-
Absolutely beautiful 😍.


Frequently asked questions
Have a question about this project?
Wouldn't this make a pretty stained glass hanger.
How would you make the light cover (The cup looking one at the end of this article)? how do you mold it and keep it together?
No question, I just wanted to say it looks amazing! Wish i could pay you to come over and do a couple windows like this!!