


How to Create an Arrow Wallart From Wood
$10
Medium
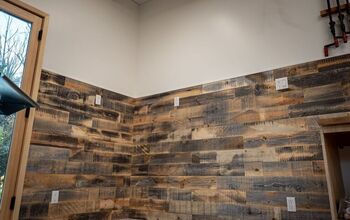
As I showed on my previous post, I received some free pallets from my husband, so here is another post using them. This time I decided to attempt a DIY wooden arrow for the gallery wall.
First job was to strip the pallets. I used a crow bar and a hammer to get the nails out. I did not use a template just measured the angles using my angle ruler (my favourite tool at the moment!!) I measured 10cm and drew a horizontal line across, then measured the next 10 cm and drew another line. I then drew a diagonal line from top left corner to bottom right corner to give me the angle.
I then cut along the lines using my jigsaw to get the diamond shapes. The pallet wood was a little rough so I sanded the shapes before assembling them
Once assembled I used wood glue to glue them together. You can use some clamps to secure them in place and let dry overnight. Any gaps can be filled with wood filler and sanded down.
I used some masking tape to get nice crisp lines and painted alternate diamond shapes in turquoise colour. As I wanted a little contrast and to show the wood grain, I simply put some clear varnish over the bare wood to bring the grain out.
Then added some tape at the back of the arrow and put it on my gallery wall!
To see how I created the gallery wall and my other projects, please visit the blog.

Want more details about this and other DIY projects? Check out my blog post!
Comments
Join the conversation
4 comments
-
I love your arrows so much
-
Love the arrow project. Can you tell me how you got your deer horns to stick to your plack? I have a pair but have not been able to make them stay on my board. Tks, Teresa
- See 1 previous


Frequently asked questions
Have a question about this project?