


How to Achieve an Affordable High-End Kitchen Look With Open Shelving

I know one of the latest crazes in kitchens these days is open shelving and I must admit, I've fallen in love with the concept especially since our small kitchen needed a facelift and we didn't want to break the bank.
Between creating a huge opening between our kitchen and living room, and now adding in open shelving, our kitchen is starting to look bigger and more inviting.
Surprisingly, implementing the open shelving wasn't as crazy as I thought it'd be and it really only took two steps once I prepped the bare walls and Rob prepped the shelves themselves.
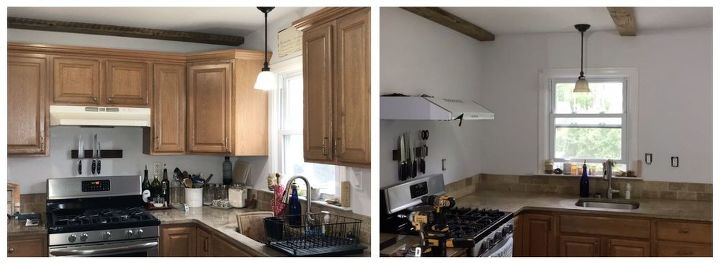
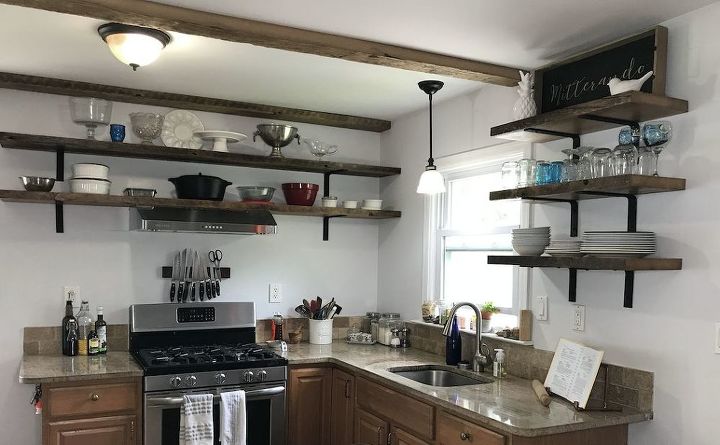
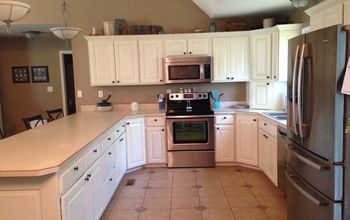
BEFORE:
Our kitchen was very typical before with light wood cabinets and granite counter tops. We wanted to update our kitchen by opening up the space and having a more updated, airy feel without breaking the bank.
This overall venture to change up the look of our kitchen was a two-fold project where we took down our top cabinets and repurposed them for basement storage (here's the link: http://www.hometalk.com/diy/outdoor/furniture/repurposed-kitchen-cabinets-28453883), and now putting up open shelving.
*Note: obviously there's going to be some leg work for this project. After we took down our top cabinets, we had to fill in holes, sand, primer and paint the walls. We also purchased a new oven hood to go with our new gas range. We recommend that you hire a professional to install your oven hood if you get a new one as it can be a hazardous task.
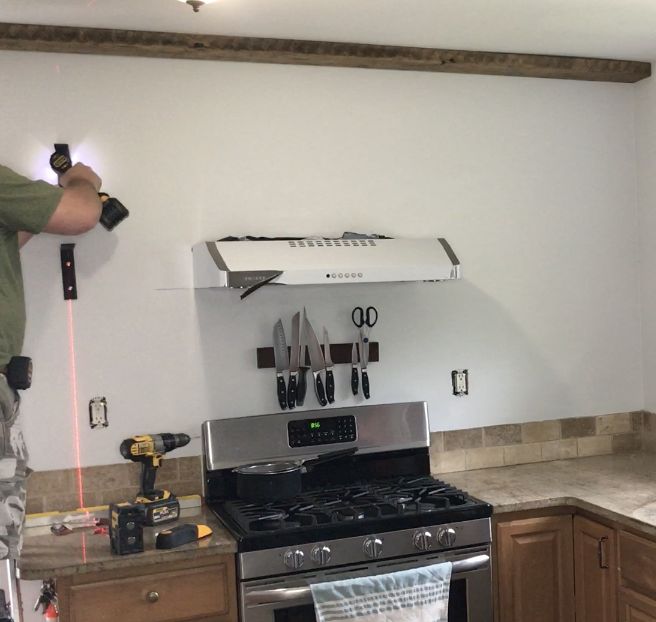
1. Install brackets
First, we used a stud finder (or you can do the 'ole knock-on-the-wall method) to locate the studs in our walls where we could securely install our brackets.
Then, we used 2" pan head screws to install the brackets to the walls. We started with driving in one screw in the top hole of our brackets and a level to ensure that it was straight before driving in the second screw and securing the brackets to the wall. [We used a laser level to make sure that the brackets were vertically level but a bubble level will work just as well.]
*Note: We had a friend create these custom-made metal brackets for us. Then, Rob used a paint sprayer and 2-3 coats of Rustoleum satin black paint for a finished look. Brackets similar to ours can be purchased online (i.e.: Etsy) or you can ask your local metal shop if they can create them for you.
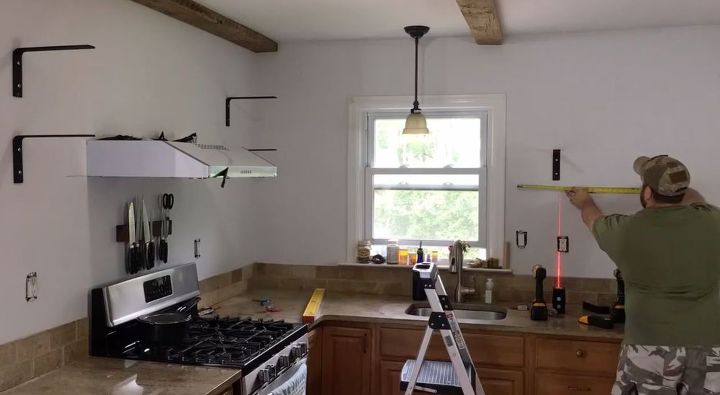
In order to ensure that our shelves would hold weight evenly, we measured the shelves and based our bracket distance on those measurements; however, we also had to consider the distance between the studs in the wall.
*Note: there's really no formula for this part of the step as it's going to be based on how big your shelves are and where your studs are located.
We also used a bubble level to ensure that the brackets (for each shelf) were level with each other. You don't want to have uneven brackets because your shelves will, in turn, be crooked and your dishes will be compromised.

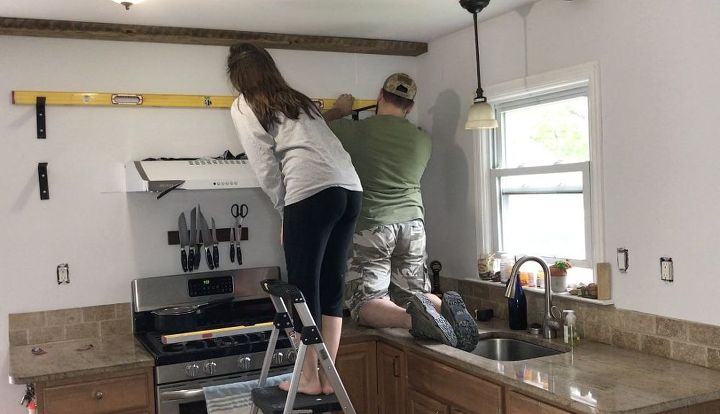
2. Attach Shelves
Next, we used 1-1/2" pan head screws to attach the shelves to the brackets. Again, this step will vary because it will be dependent on what type of brackets you have.
As you can tell from the photos, the screws we used were silver. I went back once all the brackets and shelves were installed and painted the screws black using the same paint that the brackets were painted with and a small paintbrush.
*Note: Rob purchased 2"x12' reclaimed hemlock boards from a local barn salvage supplier. He cut them down to the sizes we needed and refinished them himself. A lot of times you can score small pieces like these because the supplier will have them leftover from large jobs; this makes things a little more economical for the purchaser. We spent about $75-80 on the boards.
Even though our kitchen isn't quite finished yet, I'm in love with the open shelving! I know a lot of people are thinking, "why would you do this?! You'll always have to keep your dishes nice and neat!"
I'm totally cool with it to be honest! Going this route forced us to get rid of dishes we never used and reorganize other kitchen items (for example: I didn't want our tumblers or Bo's cutesy plastic dishes displayed so I had to re-organize my lazy Susan cabinet in order to make room for not-so-coordinated dishes) while also giving us a cleaner, more open look.
More Wallet-Friendly Room Makeovers
As you can see from this photo, there's a lot of blank wall space to the left and right of the stove; we are going to install hooks under the bottom shelf (left side of the stove) so we can hang our collection of cast-iron skillets and on the right side, Rob is going to make a few smaller shelves to hold our spices, oils and vinegars.
The very last part of this kitchen reno is going to be painting our bottom cabinets a dark grey color and changing up the hardware which I'm super excited about! I'll post an updated photo once these last few elements are complete. In the meantime, I'm going to look googly-eyed at these custom made open shelves! 
Resources for this project:
See all materials


Comments
Join the conversation
-
Nice look if you never use your kitchen. Yes, you would have to clean all the grease and dust off the shelves weekly. One nice shelf would be good to display the "fancy' dishes.
-
It is a nice idea for some people - just not short ones.


Frequently asked questions
Have a question about this project?
Looks great I lov e the color of woods and counter top where did u get the backsplash tiles exact color i’m Looking for thanks you beautiful
Hi there, we are looking to do the same thing in our kitchen. For our project we would be installing a range hood similar to yours. We are wondering what kind of hood range you have in your kitchen and how you braced it against your wall. Did you use an under-cabinet hood and add extra bracing? Would you mind sharing the model you used and what kind of wall mounting you used?
Now that everything on the shelving is open to dust & dirt - don’t you have to wash each piece now before using them?