


Reclaimed Wine Nook
$800.00
3 Weeks
Medium
Reclaimed Wine Nook
Hello everyone – tonight’s blog – the reclaimed wine nook, the perfect spot for wine storage. We had a large wine room in our other home, so I did not want hubby to go without the room he enjoys the most in the house - so we came up with a small yet cozy wine nook. We carved out a 9×4 room, yep it’s that cozy :-) While visiting the villa one day, one of the contractors asked what the space was going to be since they were adding no finishes to the space. We explained our vision for a reclaimed wine nook , and once closed, got to work on a place for the wine to live.
This is what we did to make the space our own.
1. We ordered flooring first since it would take 3 weeks to get (that’s even being family) – Our wood floors are from our good friends at Fontenay Hardwood Flooring in Costa Mesa, CA. They are Vintage Barrel Collection Cooperage, handcrafted from reclaimed barrels, and beautifully displays authentic stamps and markings from the barrel head. They were a splurge, but they made the space start to come to life and start to look like a reclaimed wine nook! If you love them, give them a call – you will find no better service, and they are all made to order.
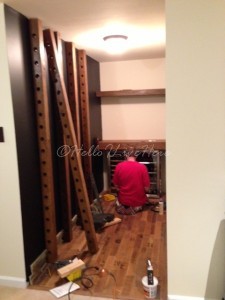
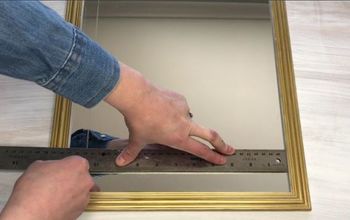
2. Next, we found reclaimed 4 x 4 left over from our house build, we just could not toss them away since we paid for the wood already. We bored holes through one side of the posts, with a drill and 1 1/4″ Irwin Speedbor purchased from Lowe’s to fit the wine bottle necks, stained with an aged oak stain and then attached the posts with very long lag bolts from the back of the wall.
3. Once attached, we purchased Vissani 17 in. 28-Bottle Wine Cooler in Stainless Steel and matching Vissani 17 in. Wide 90 cans Beverage Cooler in Stainless Steel from Home Depot. Once we got them home, we cut out the back wall opening and framed to allow more room for storage, and for proper cooling of the units.
4. Moving forward, we built a custom bar top to go over the units with our left over Cooperage flooring from Fontenay Hardwood Flooring. we had just enough to complete a 4 ft x 18″ wide, and installed the counter above the wine and beverage coolers. We then set the custom shelf into place and installed the wine stem holders.
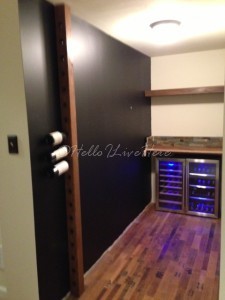
5. We painted the reclaimed wine nook wall with black chalkboard paint so we can write the wine types above the columns, then used a corresponding sage grey green color to bring out the flooring and tile, and added art work.
6. Last, we installed the slate tile board around the bar top and wood flooring. This truly brought the wood and colors to life.
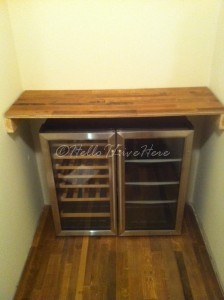
The result, unexpected storage for a cozy space! We love our new reclaimed wine nook, and could not be happier with the finished room. Here’s to you finding a cozy space to store your wine!
-Linda
Hello everyone – tonight’s blog – the reclaimed wine nook, the perfect spot for wine storage. We had a large wine room in our other home, so I did not want hubby to go without the room he enjoys the most in the house - so we came up with a small yet cozy wine nook. We carved out a 9×4 room, yep it’s that cozy :-) While visiting the villa one day, one of the contractors asked what the space was going to be since they were adding no finishes to the space. We explained our vision for a reclaimed wine nook , and once closed, got to work on a place for the wine to live.
This is what we did to make the space our own.
1. We ordered flooring first since it would take 3 weeks to get (that’s even being family) – Our wood floors are from our good friends at Fontenay Hardwood Flooring in Costa Mesa, CA. They are Vintage Barrel Collection Cooperage, handcrafted from reclaimed barrels, and beautifully displays authentic stamps and markings from the barrel head. They were a splurge, but they made the space start to come to life and start to look like a reclaimed wine nook! If you love them, give them a call – you will find no better service, and they are all made to order.
2. Next, we found reclaimed 4 x 4 left over from our house build, we just could not toss them away since we paid for the wood already. We bored holes through one side of the posts, with a drill and 1 1/4″ Irwin Speedbor purchased from Lowe’s to fit the wine bottle necks, stained with an aged oak stain and then attached the posts with very long lag bolts from the back of the wall.
3. Once attached, we purchased Vissani 17 in. 28-Bottle Wine Cooler in Stainless Steel and matching Vissani 17 in. Wide 90 cans Beverage Cooler in Stainless Steel from Home Depot. Once we got them home, we cut out the back wall opening and framed to allow more room for storage, and for proper cooling of the units.
4. Moving forward, we built a custom bar top to go over the units with our left over Cooperage flooring from Fontenay Hardwood Flooring. we had just enough to complete a 4 ft x 18″ wide, and installed the counter above the wine and beverage coolers. We then set the custom shelf into place and installed the wine stem holders.
5. We painted the reclaimed wine nook wall with black chalkboard paint so we can write the wine types above the columns, then used a corresponding sage grey green color to bring out the flooring and tile, and added art work.
6. Last, we installed the slate tile board around the bar top and wood flooring. This truly brought the wood and colors to life.
The result, unexpected storage for a cozy space! We love our new reclaimed wine nook, and could not be happier with the finished room. Here’s to you finding a cozy space to store your wine!
-Linda

Finished Wine Nook completed by Hello I Live Here.
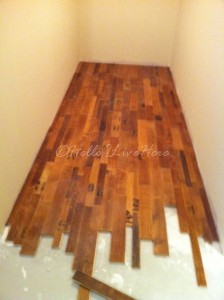
Installing wood floors made from reclaimed wine barrels.
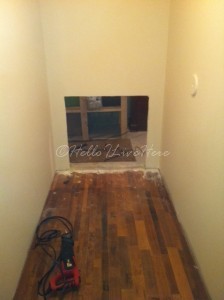
Cutting hole for wine fridge units.
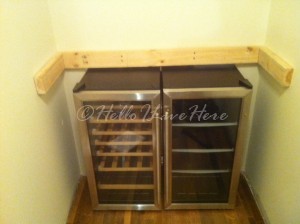
Wine unites installed.

Backs of wine units (able to breath just like the wine).
Building shelf out of remaining wine barrel wood flooring.
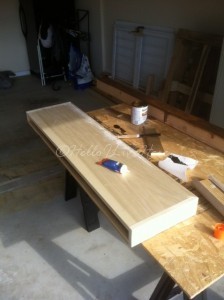
Building floating box shelf for over top of counter for stem ware.
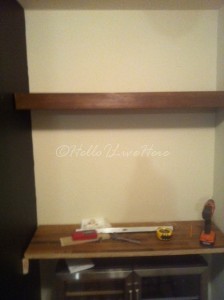
Shelf installed.
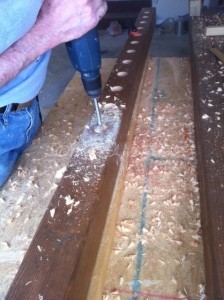
Boring holes in 4 x 4's to complete wall wine rack units.
Attaching and testing out the holders.
Completing the wine bottle holders.
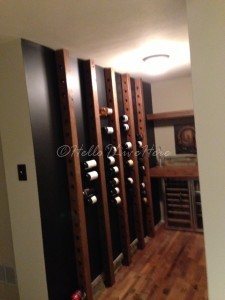
Wine going in.
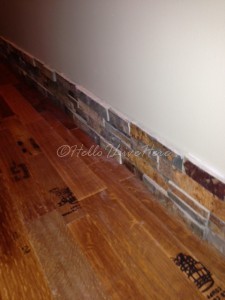
Installing Italian stone to trim out wood flooring pieces.
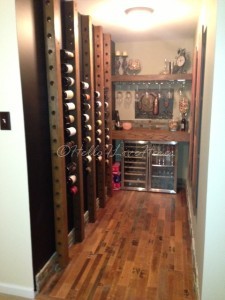
Finished room.

Want more details about this and other DIY projects? Check out my blog post!
Comments
Join the conversation
3 of 28 comments
-
this is absolutely awesome!!
-
Great job!


Frequently asked questions
Have a question about this project?