Move the table to a well-ventilated area. This work can be done in a workshop, garage or outside if weather and conditions permit. If the table is too big to move, open all the windows around the table and make the area as ventilated as possible.
Protect the area. Lay plastic sheeting and newspapers on the floor around your work area to protect it from any stains or damage.
Apply the stripper. Apply a coat as evenly as possible to the surface with a paint brush. Give it 15 to 20 minutes to do its job -- loosening the finish, that is. Don't set it and forget it, though; if it gets too dry, it will be difficult to remove.
Strippers come as liquids, or in thicker formulations referred to as gels, semi-pastes or pastes. Liquid strippers are only good for horizontal surfaces. For vertical surfaces, the thicker strippers are able to hang on better.
As useful as they are, chemical strippers can be bad news if used improperly. Treat them with care -- use adequate ventilation, rubber gloves and eye protection when using these substances. After all, they are designed to soften, peel and blister paint and varnish -- you do not want them to do the same to your skin, lungs or eyes. Always follow the safety recommendations on the container.
If your interest is in restoring antique or valuable old furniture, look first at products designed to clean and restore antique furniture without refinishing, and always test such products in an inconspicuous area before use. It may be that the old finish itself contributes to the value of the furniture.
Remove the finish. With a plastic scraper, start removing the finish (when it's ready, obviously). "Plastic" here is key -- a metal scraper could scratch your table. Do as much as you can, but if not all of it will come off, use a bit more of the stripper instead of breaking a sweat and breaking the table in frustration. Repeat the process multiple times if need be.
Remove as much paint or varnish as you can with a scraper or putty knife. Round the edges of your scraping tool to prevent it from gouging the wood. Follow-up with medium grade steel wool. Soaking the steel wool in the stripper may help remove stubborn spots. Some finishes, particularly enamels, will require multiple applications of stripper to get the job done.
Despite what you may read on the back of a can, if you want to do a really good job, some sanding will still be required after the old finish is removed by the stripper.
Sand the grain. With a fine-grade sandpaper (#000 is good), sand the surface lightly in the direction of the grain. If there were any discolorations or irregularities, they'll be gone in no time.
If you did a great job with the stripper, your sanding woes may be lessened. Use your 120 grit sandpaper to clean off any remaining finish and smooth out any not so pretty places. Then, with 220 paper, go over the whole piece. And as always, make sure you go with the grain. The better job you do now, the happier you'll be in the end.
Clean the surface. Wipe the entire table with a cloth to remove any remaining dust and residue.
Fill the grain. That is, if your wood has an open grain -- like oak or mahogany. If you want a smooth even finish for an open grained wood, it has to be filled. But if your wood has a tight grain, you can skip this part.
You can buy grain filler in a whole bunch of different colors. If you'd like the grain to stand out, purchase a color that will contrast with the final color of your table (post-staining). If grain isn't your thing, fill it with a color that will match the finished color of your piece.
To apply the paste, use a rag or stiff paint brush. For this step, it's best to follow the directions on the packaging. Work it into the grain well and let it dry. If there's excess in certain places, remove it with your scraper or putty knife. Make sure to hold the device at angle to avoid damaging the wood.
Apply sand sealer. This is much like priming the wood. Some woods have a tendency to absorb stains unevenly, and this prevents that from happening. They can be applied after staining, too, in place of a finishing coat or two.
Apply a coat liberally over the entirety of your piece. Let it get a good soak in for a few minutes. Then, with a clean rag, wipe off the excess. Make sure it's completely dry before you go over it light with sandpaper. 220 grit is good here.
Take the stain off your table. If the finish is stain, you will want to use sandpaper and sand with the grain of the wood until all the stain is gone. Use a hand power sander if you want to, but be careful not to gouge the wood. Begin with 100 grit sandpaper and move to a finer paper to finish for a smoother surface.
Apply your stain. To get the look you're going for, it's important to apply it evenly and to get the excess off promptly (depending on the shade you desire, of course). Since you've put in the dirty work of stripping and sanding, it'll be thirsty for the stain, so time is of the essence. Once you have your stain on, grab a piece of cheesecloth to remove the excess. If it's still too light, just repeat the process once more, still maintaining an eye for evenness.
Apply at least 2 coats of stain, using a light grade sandpaper in between coats to smooth the surface of any fibers sticking up.
If you're looking to go green, liquid water-based stains should be your pick; they're better for the environment. They work much the same as oil-based stains, as more applications equals a deeper color. They're also very convenient in that they clean up well with only soap and water. The only downside is that they can raise the grain of the wood. To minimize this effect, dampen the wood with a moist, clean rag.
Add the final finish. The work's not quite done yet. You want to protect all your efforts with a coating of polyurethane, wax or tung oil. Polyurethane is the most popular option, but paste wax does a great job, too. The latter adds a warmth and protects from water damage, too.
The type of finish you choose is just a matter of your personal preferences. Penetrating oil finishes are soft, natural, and easy to apply, but offer less protection than varnish or lacquer. Polyurethane, on the other hand, is hard, durable, and comes in a variety of sheens (and Estevezes). Unfortunately, good as lacquers look, they take a bit of skill to apply on well. What's your confidence level like with this particular piece?
Stain your table. Apply the stain liberally with a paintbrush. When brushing it on, go with the grain of the wood. Allow the stain to soak in for a few minutes and then wipe off the excess with a cloth. The longer a stain sits on the surface, the darker the hue will be.
You can strip it down and re-stain it or paint it. You can put tiles on it or if its damaged, I have purchased old tables at thrift shops and rummage sales and used the table top to replace the old table top. You can also use reclaimed wood and make a new top..
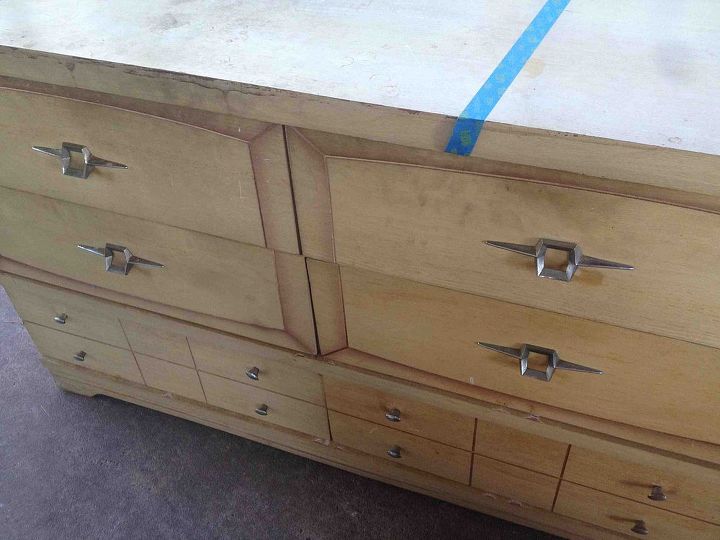
I found this in the curb this morning on my way to work. Needless to say I'm late :) does anyone know anything about this piece? What would you do with it? Paint? Res...
See more


Move the table to a well-ventilated area. This work can be done in a workshop, garage or outside if weather and conditions permit. If the table is too big to move, open all the windows around the table and make the area as ventilated as possible.
Protect the area. Lay plastic sheeting and newspapers on the floor around your work area to protect it from any stains or damage.
Apply the stripper. Apply a coat as evenly as possible to the surface with a paint brush. Give it 15 to 20 minutes to do its job -- loosening the finish, that is. Don't set it and forget it, though; if it gets too dry, it will be difficult to remove.
Strippers come as liquids, or in thicker formulations referred to as gels, semi-pastes or pastes. Liquid strippers are only good for horizontal surfaces. For vertical surfaces, the thicker strippers are able to hang on better.
As useful as they are, chemical strippers can be bad news if used improperly. Treat them with care -- use adequate ventilation, rubber gloves and eye protection when using these substances. After all, they are designed to soften, peel and blister paint and varnish -- you do not want them to do the same to your skin, lungs or eyes. Always follow the safety recommendations on the container.
If your interest is in restoring antique or valuable old furniture, look first at products designed to clean and restore antique furniture without refinishing, and always test such products in an inconspicuous area before use. It may be that the old finish itself contributes to the value of the furniture.
Remove the finish. With a plastic scraper, start removing the finish (when it's ready, obviously). "Plastic" here is key -- a metal scraper could scratch your table. Do as much as you can, but if not all of it will come off, use a bit more of the stripper instead of breaking a sweat and breaking the table in frustration. Repeat the process multiple times if need be.
Remove as much paint or varnish as you can with a scraper or putty knife. Round the edges of your scraping tool to prevent it from gouging the wood. Follow-up with medium grade steel wool. Soaking the steel wool in the stripper may help remove stubborn spots. Some finishes, particularly enamels, will require multiple applications of stripper to get the job done.
Despite what you may read on the back of a can, if you want to do a really good job, some sanding will still be required after the old finish is removed by the stripper.
Sand the grain. With a fine-grade sandpaper (#000 is good), sand the surface lightly in the direction of the grain. If there were any discolorations or irregularities, they'll be gone in no time.
If you did a great job with the stripper, your sanding woes may be lessened. Use your 120 grit sandpaper to clean off any remaining finish and smooth out any not so pretty places. Then, with 220 paper, go over the whole piece. And as always, make sure you go with the grain. The better job you do now, the happier you'll be in the end.
Clean the surface. Wipe the entire table with a cloth to remove any remaining dust and residue.
Fill the grain. That is, if your wood has an open grain -- like oak or mahogany. If you want a smooth even finish for an open grained wood, it has to be filled. But if your wood has a tight grain, you can skip this part.
You can buy grain filler in a whole bunch of different colors. If you'd like the grain to stand out, purchase a color that will contrast with the final color of your table (post-staining). If grain isn't your thing, fill it with a color that will match the finished color of your piece.
To apply the paste, use a rag or stiff paint brush. For this step, it's best to follow the directions on the packaging. Work it into the grain well and let it dry. If there's excess in certain places, remove it with your scraper or putty knife. Make sure to hold the device at angle to avoid damaging the wood.
Apply sand sealer. This is much like priming the wood. Some woods have a tendency to absorb stains unevenly, and this prevents that from happening. They can be applied after staining, too, in place of a finishing coat or two.
Apply a coat liberally over the entirety of your piece. Let it get a good soak in for a few minutes. Then, with a clean rag, wipe off the excess. Make sure it's completely dry before you go over it light with sandpaper. 220 grit is good here.
Take the stain off your table. If the finish is stain, you will want to use sandpaper and sand with the grain of the wood until all the stain is gone. Use a hand power sander if you want to, but be careful not to gouge the wood. Begin with 100 grit sandpaper and move to a finer paper to finish for a smoother surface.
Apply your stain. To get the look you're going for, it's important to apply it evenly and to get the excess off promptly (depending on the shade you desire, of course). Since you've put in the dirty work of stripping and sanding, it'll be thirsty for the stain, so time is of the essence. Once you have your stain on, grab a piece of cheesecloth to remove the excess. If it's still too light, just repeat the process once more, still maintaining an eye for evenness.
Apply at least 2 coats of stain, using a light grade sandpaper in between coats to smooth the surface of any fibers sticking up.
If you're looking to go green, liquid water-based stains should be your pick; they're better for the environment. They work much the same as oil-based stains, as more applications equals a deeper color. They're also very convenient in that they clean up well with only soap and water. The only downside is that they can raise the grain of the wood. To minimize this effect, dampen the wood with a moist, clean rag.
Add the final finish. The work's not quite done yet. You want to protect all your efforts with a coating of polyurethane, wax or tung oil. Polyurethane is the most popular option, but paste wax does a great job, too. The latter adds a warmth and protects from water damage, too.
The type of finish you choose is just a matter of your personal preferences. Penetrating oil finishes are soft, natural, and easy to apply, but offer less protection than varnish or lacquer. Polyurethane, on the other hand, is hard, durable, and comes in a variety of sheens (and Estevezes). Unfortunately, good as lacquers look, they take a bit of skill to apply on well. What's your confidence level like with this particular piece?
Stain your table. Apply the stain liberally with a paintbrush. When brushing it on, go with the grain of the wood. Allow the stain to soak in for a few minutes and then wipe off the excess with a cloth. The longer a stain sits on the surface, the darker the hue will be.
Finished.
You can strip it down and re-stain it or paint it. You can put tiles on it or if its damaged, I have purchased old tables at thrift shops and rummage sales and used the table top to replace the old table top. You can also use reclaimed wood and make a new top..
depends on how much work you want to put into it. You can buy something that strips the top off or you can sand it and then put the new stain on it.
I would sand and stain for the easiest and best finish!
After sanding and staining, what can I put on top so it won't chip or scratch easy??
what cori said