


Install DIY Shiplap Walls -- Learn From My Mistakes!!

by
Amy
7 Materials
$300
1 Week
Advanced
How to get those “easy” DIY faux shiplap walls installed without getting divorced or ending up in a puddle of your own tears when it goes terribly wrong. Get Prep Tips, Installation Tips, and Trim/Molding Tips I wish I knew when I started.
I’m not going to write a huge how-to tutorial on DIY faux shiplap walls. Why you ask? Well, you can google it and find like a million other posts. I didn’t invent this. Nor do I feel like writing something other people have already written. So, I’m going to direct you to my favorite tutorial instead over at Sawdust 2 Stitches. Read what Corey has to say. She has good step-by-step instructions that are easy to follow.
But wait… don’t go yet. Make sure you read my post too. Why? Because after following this tutorial, I have some more recommendations. Some things that, man, if I had to rip the whole thing down and start over I would TOTALLY do it this way.
DETAILED INSTRUCTIONS & MORE PHOTOS AVAILABLE ON MY BLOG: http://www.prettypurpledoor.com/not-install-diy-faux-shiplap-walls/
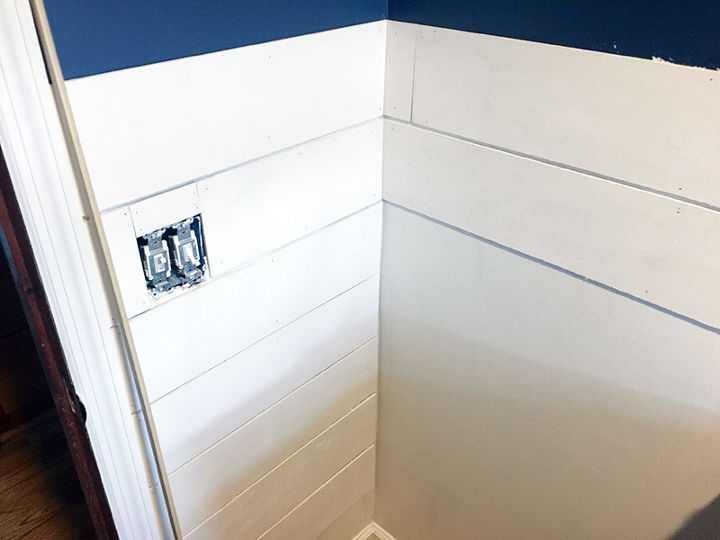
The faux shiplap is getting installed. This is the wall closest to my door. You can see near the center the shiplap is pieced together. After adding the paintable caulk this seam disappears.
Shiplap Wall Prep Tips
Ok, so you have your power tools, and you’re ready to give this a go! Great! Here are some tips to get you started. After doing this project myself, I realized that I was so excited to actually see the shiplap on the walls, that I kind of skimped on the prep work. I think that you shouldn’t.
- Get the plywood cut at the hardware store. I got the 24x48” pieces of 1/8” ply cut at the big box store. They sometimes aren’t happy about doing it, but they will if you ask nicely and slip them a five dollar bill (shhhh). Just be aware that if you are getting the wood cut into 6” strips that you will get seven 6” strips and one strip that’s between five and size inches. Make sure you put that one off to the side and use it for the bottom where your walls are [probably] crooked. Don’t use it in the middle by accident.
- Plan your shiplap around outlets and light switches. Ok, so you’re adding anywhere from 1/8-1/2” to the thickness of your walls. Which means, your outlets and light switches will have to be pulled out of the wall a bit so that the little metal lip rests on top of the wood and you’ll still be able to access them. Well, that won’t work if the lip of your outlet lands in between the shiplap boards in one of those recessed/groove areas. Make sure that the top and bottom of your outlets have plywood to rest on. And, while you are at it, measure how close you need to get the plywood to the outlet in order for the lip to catch on your wood. Going too far away from the opening could land you in a groove and you will be so sad.
- Paint the wall first. Yeah… this is probably a no-brainer. But, unless you have a paint gun and can spray both the wall and the shiplap once it’s installed, you’ll need to paint the wall behind where you are installing this. Or, put up some pieces and see what your existing wall color looks like behind it. You may like the contrast and save yourself some time!
- Sand the plywood before installing. This is probably the #1 tip I have for you. Usually when getting the wood cut at the big box store, they are using a crappy, worn-out blade. It left a lot of my pieces with a tattered edge. I thought I wouldn’t mind this so much, but once I started putting it up I hated it. I wish, wish, wish that I had sanded the edges first. This would have saved me so much time, because after it was installed I was trying to get in between my little 1/8” gap with a sander to smooth out those edges. It took forever… and I got tired and cried. Don’t be like me.
- Paint the front AND EDGES of the plywood before installing. So… I read this somewhere and I was so proud of myself for taking the time to paint the edges before installing. Once the shiplap is installed it’s a huge pain in the rear to get a brush into those gaps in order to paint them. Unfortunately, I did not sand, so after everything was installed I had to go in there with a sander, thus sanding off the pre-painted edges of my wood. So, after sanding I had to go back in with a tiny brush and touch up all those little edges. It sucked. This is the second time I cried during the installation.
- Figure out your corners. Ok… so how are you going to meet the corners of the plywood together? Are you going to run it all the way to the edge of the wall, then butt the next wall up against that? Or are you going to leave a little gap there and cover it with some molding? That’s really up to you, just make sure you know what you’re doing first, because it’s going to change the measurements you’re going to use. You don’t want to end up cutting all your wood long, then having to recut it. That sucks.
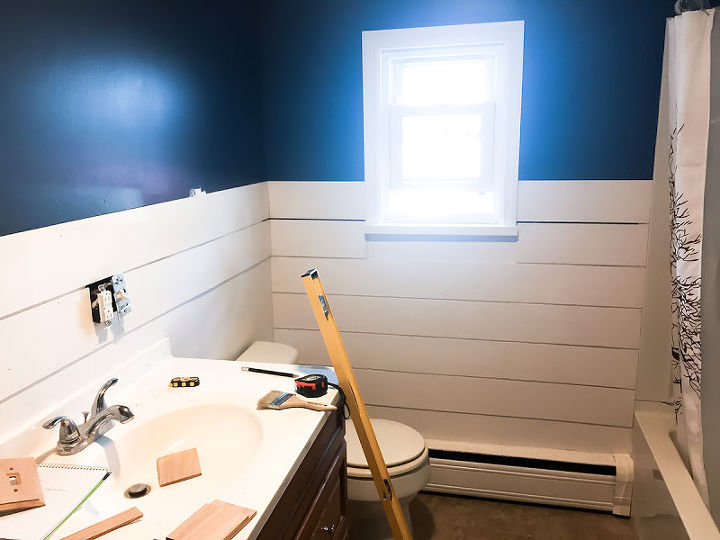
During the process of installing the plywood/faux shiplap. We started at the top and worked down so that we could tweak the bottom piece where the baseboard heater is.
Installation Tips
Ok great. We are all prepped and ready to go! And you are way ahead of the ball game here because you now haven’t made many of the mistakes I already made. You should be ready to install your “faux” shiplap now. So… here are a few more tips to get you through the installation process.
- Use a big level. Make sure that you are going in a straight line. It’s deceiving using a level sometimes. And it’s really easy to just kind of eyeball it and not realize that the bubble is a tiny bit off. If you have a long stretch of wall to cover, the tiniest slant up or down is going to rear its ugly head. The worst part? When you get to the next wall, your playwood wont line up with the other wall and it will look mismatched. The second worst part? When you get to the bottom of the wall you’ll have to make a slanted cut in order to accommodate for your installation not being level. Making a slanted cut down the length of a board sucks… even if you have a table saw. So… take some extra time to do this properly. Repeat after me, “avoid slanted cuts at all costs.”
- Start at the top and work down. I debated on this for awhile but finally decided to start at the top. I think it was the way to go, although it’s not a deal breaker. I just know that my walls are not perfectly level and I had some baseboard heating to deal with. It just made more sense to have those quirky pieces at the bottom rather than in the center of the wall. My outlets and switches are also higher on the wall, so it made sense to start closer to these areas to make sure I had the spacing right. I should note that I only put the faux shiplap on the bottom half of the wall.
- Glue the backs of the boards. I didn’t want to do this… for obvious reasons, like, “what if I want to take it down? It’s going to be a nightmare to rip adhesive off the wall.” Well… when I installed the shiplap and used the nail gun to secure it, I got some gaps. Perhaps if you use thicker plywood than I did this wouldn’t be as big of an issue. I ended up nailing the sh!t out of some of the pieces to try to close the gaps. It kind of worked… but not 100%. If I had to go back I probably would have used adhesive to glue the wood to the wall… at least in the places that looked like they were bowing outward.
- Know that you’ll have to repaint the wall. Even if you are like me, and painted the front and sides of the plywood before installing, just know that you’ll have to give it another coat of paint afterwards. Buy enough paint to do this. Then, while you’re installing it you won’t have to worry so much about the imperfections because you’ll know you’re going to paint another coat at the end. It will make your day brighter and you’ll be less stressed about it being perfect.
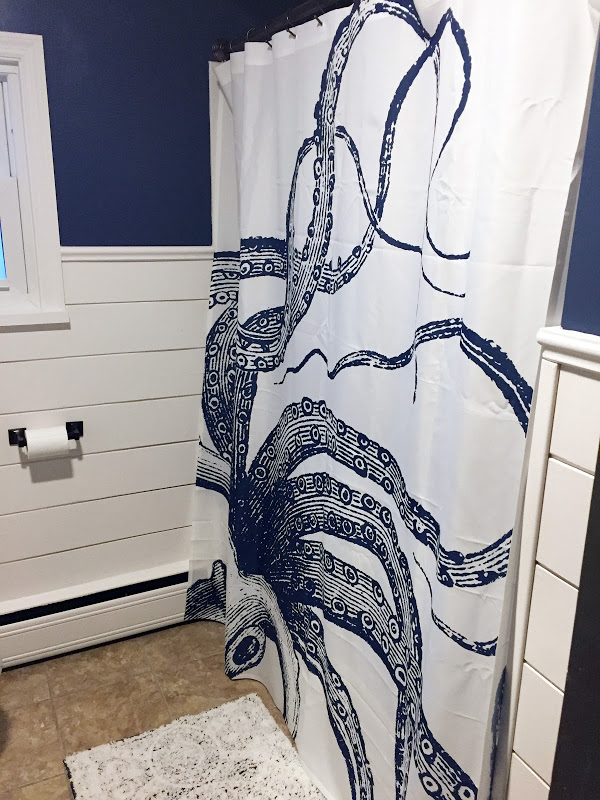
How cool is this squid shower curtain from Etsy??
Trim/Molding Tips
We are almost there. The shiplap is up and looking awesome! Now it’s time for some molding. This will really finish things off, right? You’ve got your chop saw and your expensive pieces of molding and you’re ready to go (my molding pieces cost more than the whole wall… yikes). Read these trim & molding installation tips before you get started.
- Buy a little extra molding. Yeah, I know it’s expensive. But you’ll probably screw up or need a piece or two to practice with. So don’t be a cheapo like me and make sure that you have enough to cover yourself. Making trips to the hardware store this late in the game will suck the life out of you.
- Paintable caulk is not the be-all-end-all. I can’t tell you how many posts I’ve read that said… oh yeah don’t worry about the corners and stuff because paintable caulk will cover all the mistakes. This is true, to an extent. But… don’t think that you don’t have to know how to cut corner molding. That 1/4” gap that you left will not just magically disappear with this paintable caulk stuff. It will look like crap and will drive you insane. So… spend the time making practice cuts until you have your corners as close as you can get them. Don’t heavily rely on the “magic caulk” to fix everything. It won’t. Oh, and keeping a little bowl of water with a balled up paper towel in it to wet your fingers as you caulk is KING. Seriously try this when you are caulking.
- Fill in the nail holes. Well, unless you love the unfinished look that the nails give, I’d recommend filling in most to all of the nail holes. Use that fancy caulk to cover them. It will look more finished.
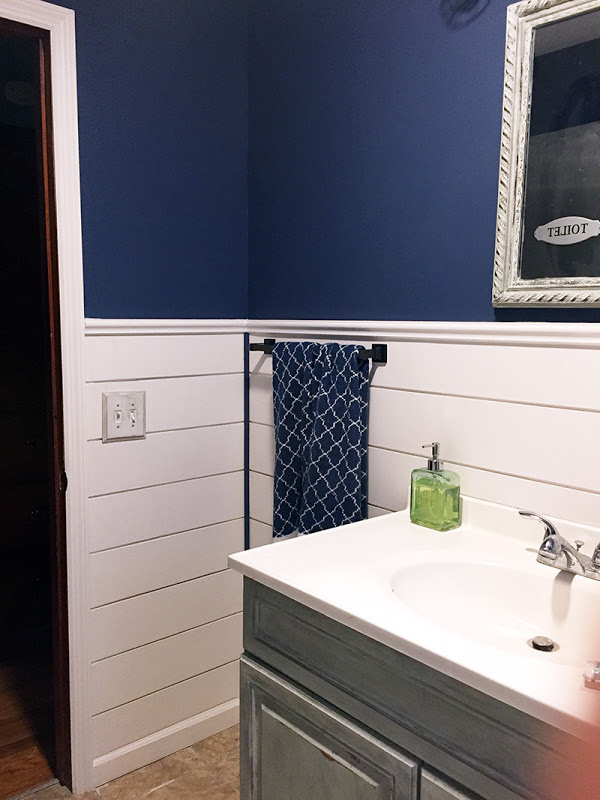
The Finished Product!
Wrapping Up
So, today we’ve learned that blog posts reading “Easy DIY Faux Shiplap Walls” are misleading. They should be titled “Easier than Real Shiplap DIY Faux Shiplap Walls.” This is a really fun project, and I don’t want to discourage ANYONE from attempting it. Not my intention at all. I think we are all capable. But, if you asked my honest opinion I would say that this is an intermediate project, and not one you shouldn’t take on without a chop saw, pneumatic nail gun, and an orbital sander. Just follow all of my helpful tips for prepping, installing, and trimming out your shiplap and you’ll have a beautiful DIY faux shiplap wall in no time.
Just kidding… this took us 8 weeks because Clyde and I both work full time and have lives. And… I thought it was going to be done in a weekend like those “easy” blog posts said it would. Newsflash: it’s going to take longer than you think. But it’s going to be great. And the next time you watch Fixer Upper you can yell at the TV when they make all of this crap look so easy. Good luck, and let me know if you have any questions or more tips to add! I’d love to see your projects!
Don't forget that detailed instructions and more photos are available on my blog if you click the link below :)
Want more details about this and other DIY projects? Check out my blog post!


Frequently asked questions
Have a question about this project?