


7 Amazing Wood Crosses

2 Materials
$15
4 Hours
Medium
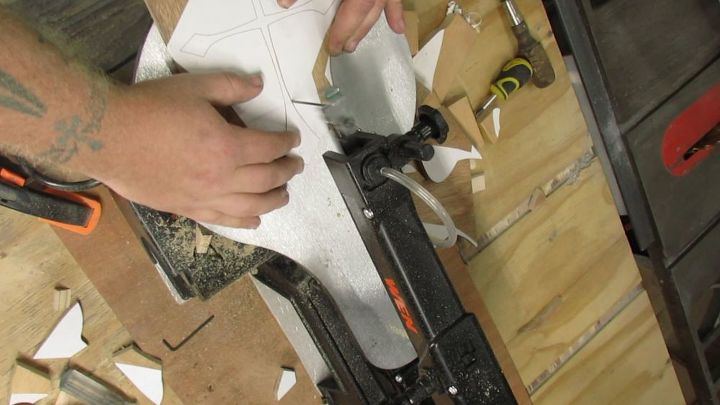
The scroll saw is probably one of our favorite tools in the shop. It's simple to use, not very loud and using it is almost therapeutic at times. One of our other favorite things to do is design. Designing patterns is something we've been doing for some time now and it proves to be a great creative outlet.
We designed these 7 cross patterns to be simple and fun to make at the same time. They can be used for both stencil work and scroll projects - and most likely anything else you can think of.
You can find out how to get the eBook that contains all of these patterns on our website - 7 Amazing Cross Patterns.
{
"id": "3909563",
"alt": "",
"title": "",
"video_link": "https://www.youtube.com/embed/h-k0pjz_EN0",
"youtube_video_id": "h-k0pjz_EN0"
}
{
"width": 634,
"height": 357,
"showRelated": true
}
Often times a step is more easily understood when you can see the whole process. Take a couple of minutes and check out the short build video that we have included. It shows a lot more of the entire build.

CROSS 1
Along with the generic title, this cross is incredibly easy to make. With only 9 inner cuts it is one of the quickest of the 7 to make. We chose to make this one out of the 3/4" pine board.
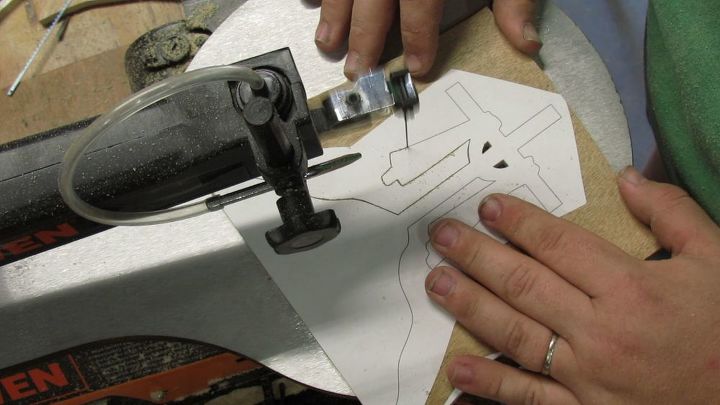
Simply drill out the holes in all of the negative spaces (highlighted in grey) and insert the blade through those holes. Make your inner cuts before making the outside perimeter cut.
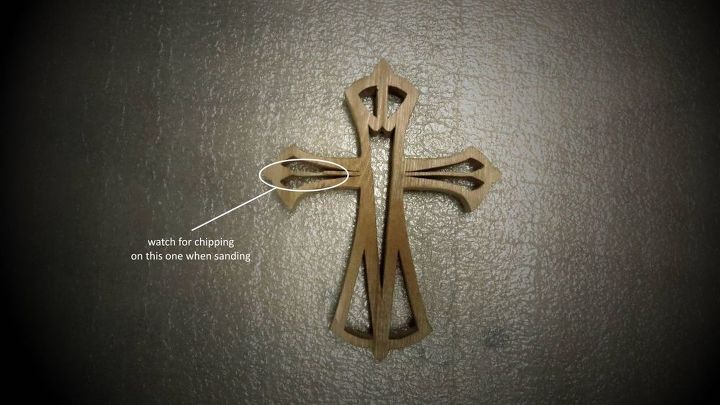
NOTE: If sanding afterward, be careful of chipping on some of the thinner parts of the cross. We learned that the hard way.
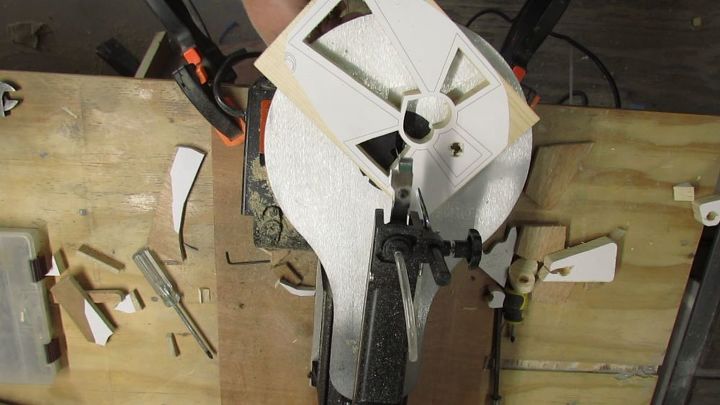
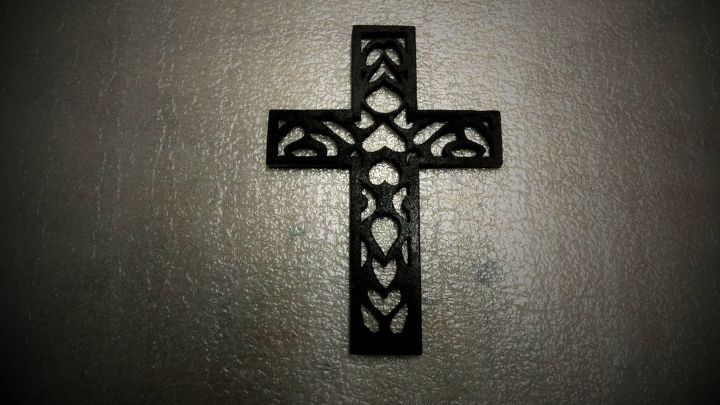
3 LAYER CROSS
The three layer cross is a stacked design. The cuts are incredibly easy since they are all outside cuts. The patterns are labeled in the eBook to designate the order of stacking.

Each layer is attached with wood glue and clamps. You may need to fine tune the edges when the glue-up is complete, by sanding them flush with each other. We used 1/4" plywood for this cross.

FLOWER CROSS
Another super simple design, this cross features a separate flower that can be glued to the front of the cross. The hole in the center of the flower was created with a forstner bit, but could be cut on the scroll saw as well.
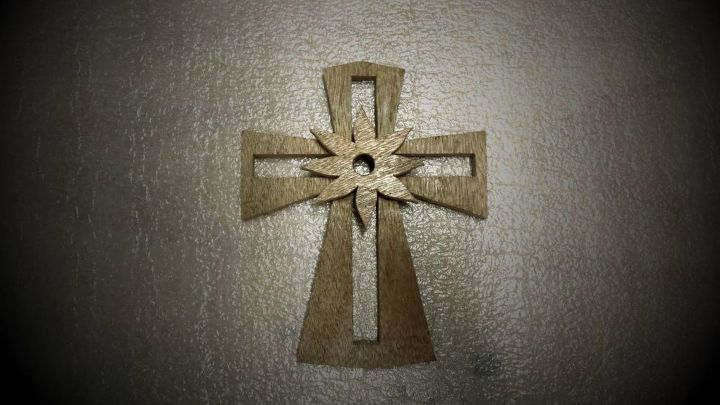
The cross itself only has one inside cut. The flower can be attached with wood glue and clamping. We made this cross out of 1/4" plywood as well.
HEART CROSS
The intention with this design is to eventually fill the cavities with resin, which we will do eventually. This cross only consists of 5 inner cuts and they are pretty simple.
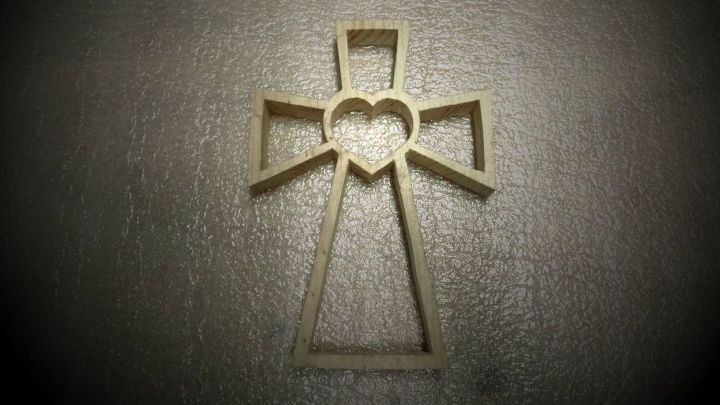
We used 3/4" pine board for this one so we would have high cavity walls for the resin, but it may look better with a thinner material.
CROSS & ROBE / TEALIGHT HOLDER
This pattern serves two purposes. The main cross pattern can be used as it is and hung on the wall or displayed otherwise. You can also trace the rock-like base of the pattern once it is cut out to make a stand for the back that can be used to help the cross sit upright and also serve as tealight candle holder.
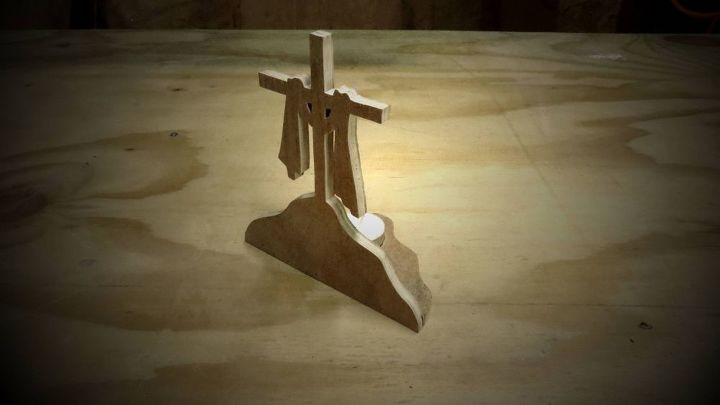
To make the candle holder, you simply make the base from the existing pattern and drill a 1 1/4" hole (we used a forstner bit) about half way into the material. This will hold a standard tealight candle. The candle being lit from behind the cross creates a silhouette of sorts. The base can simply be glued to the back of the cross.
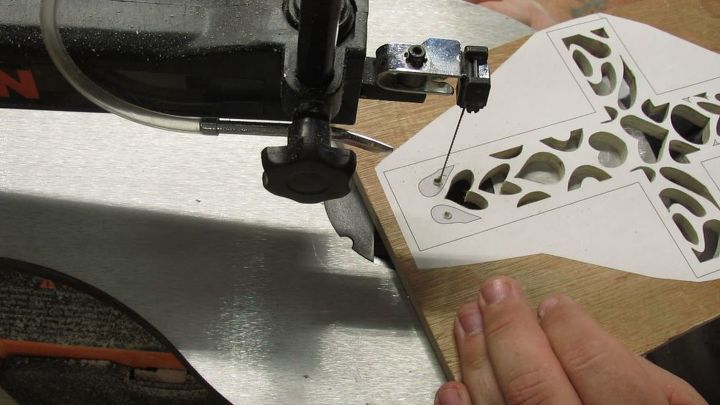
LACE CROSS
This is probably the most time-consuming pattern that is included in the eBook. There are a lot of intricate cuts, though they aren't incredibly difficult. We just drilled the holes through all the negative spaces, inserted the blade and got to work.
We used 1/4" material and we suggest the same. Using a thicker material may be difficult with all of the tiny areas. We think this would also look good with a backing board. A thinner fine-tooth blade was used for this as well.
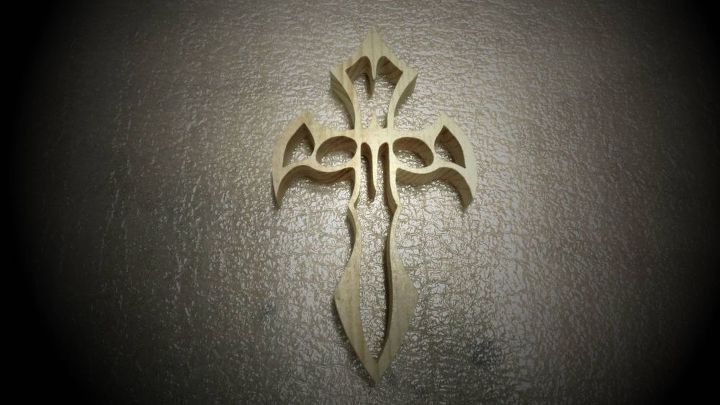
TRIBAL CROSS
We call this the tribal cross, though it looks a little more like a sword or dagger. It's in the shape of a cross though, so that counts for something. We envision this as a window hanger or some other hanging display. It would also be neat to carve down some of the edges and thin them out with a rotary tool, which we may do some day.
This cross was made with the 3/4" pine board as well and is still pretty simple with only 6 inner cuts.
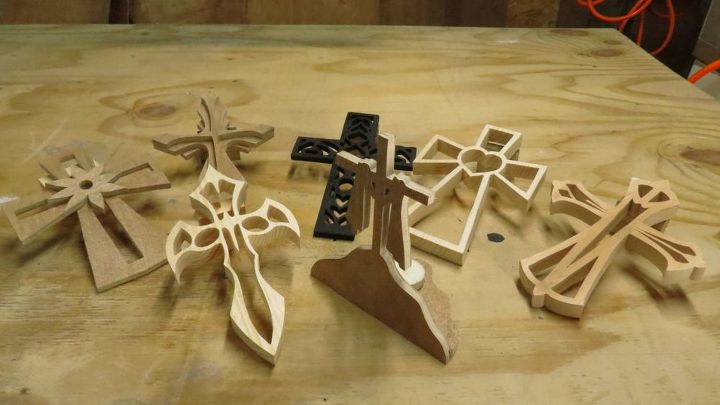
That's it. All 7 crosses in all their glory. The patterns, material and method can all be tweaked to make different things. We hope you might be able to get some use out of this set of steps and hopefully you'll check out the eBook and perhaps get some use out of the patterns as well. Thanks for checking this one out.
Comments
Join the conversation
4 of 23 comments
-
Beautiful crosses! We rarely see crosses as a DIY project. What a pleasant surprise. May God bless you and your company!
-
Beautiful work! I love them all!


Frequently asked questions
Have a question about this project?
hi. Love your cross designs. What kinda nd of machine are you using and what kind of blades. Im In Australia. If I can get the machine & blades I'd like to get your book too. My son has Asperges and wood work is his hobby. Thanks
judi.walker@biond.com.
I love them but find if very time consuming getting the blade in and out for the inside cuts, is there an easy way?