


Surf Woodie Inspired Dresser Makeover!

$75
2 Days
Medium
A couple of days ago, an incredible idea popped into my head. I had this old dresser sitting in my "waiting room" waiting to be made over, and out of nowhere... BOOM! ... I knew exactly how I was going to do it.
Summer had officially hit, and what says summer more than... the beach? I love old cars and furniture, and somehow, I got the idea to blend the two with a little hint of summer tossed into the mix.
And that's where the idea to turn this dresser into a woodie surf wagon inspired piece was born! Take just a few minutes of your time to watch this video, and I'll show you exactly how I did it!
{
"id": "3919608",
"alt": "",
"title": "",
"video_link": "https://www.youtube.com/embed/kZgrzpqVj0k",
"youtube_video_id": "kZgrzpqVj0k"
}
{
"width": 634,
"height": 357,
"showRelated": true
}
Pretty sweet, huh?
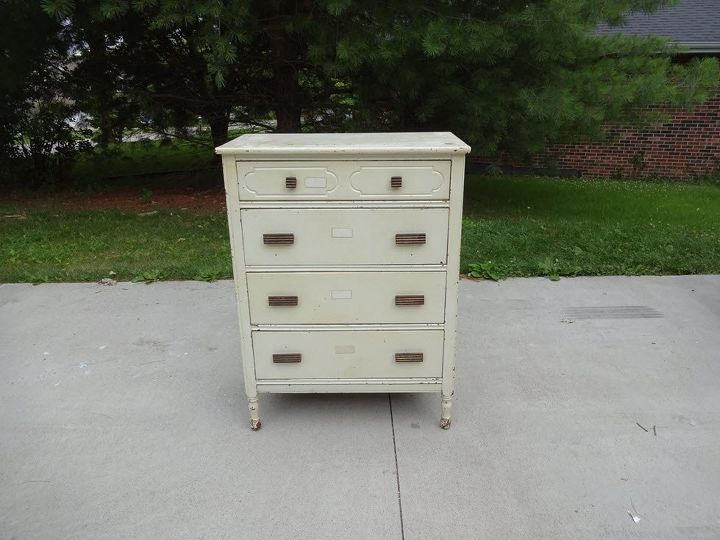
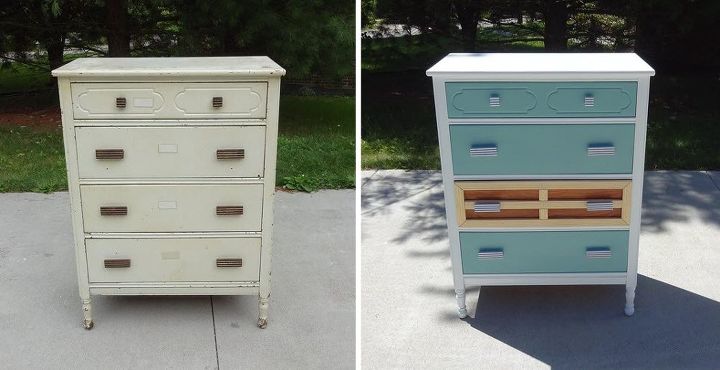
It all started with this dirty, old, beat up dresser. I picked up an identical pair of them from my local Salvation Army for $80 a couple of months ago. I usually swing by once or twice a week to see if they have any new furniture for sale, and I tend to find pretty good deals. The dressers were in pretty nice shape for the price, so I snagged them up.
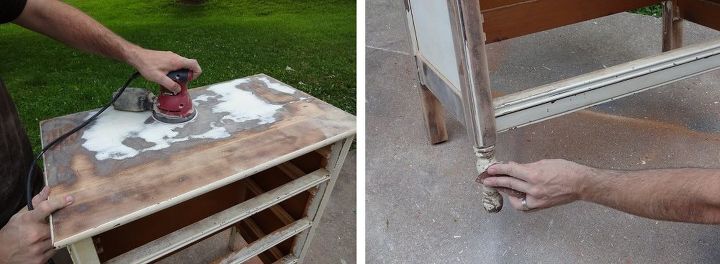
The paint was shot on this one and needed help. It looked like it was nicotine stained, and it was chipped and scratched all over. Sometimes, I'll use paint stripper to get rid of the paint, but on this dresser, it flaked off fairly easily, so I just ran my orbital palm sander with an 80 grit disc on it to quickly tear through the paint on the body and drawer faces. For the tight nooks and crannies, I just hand sanded them to knock back the flaky paint. Once I had gone over the dresser body, drawer faces, and handles with 80 grit, I then smoothed them out with a 120 grit disc to prep them for primer and paint.
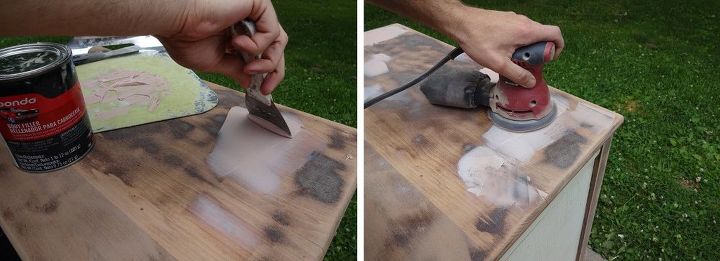
I had to take care of a little body work before priming it though. The top had some deep scratches and dings on it, so I smoothed them out with Bondo. Yep, the same filler you'd use to fix a car fender. I learned about using it on wood from a cabinet maker's website a few years ago. I found it to be a little easier to spread and sand than some of the wood fillers I've tried in the past. Once it dried, I smoothed it out with a 120 grit disc, and it was ready to move on to primer.
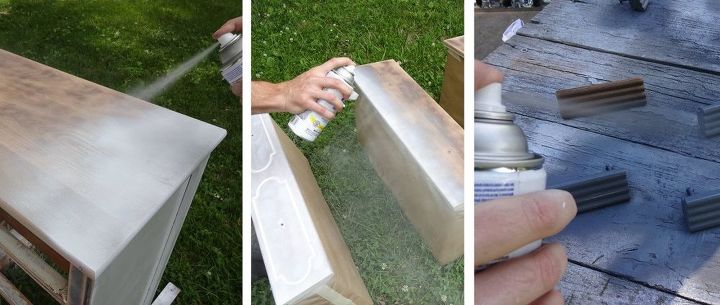
I've learned the hard way, that if you paint right over raw sanded wood (or even stain), many times, the tannins in the wood will bleed right through the paint. It'll make weird, little, oily brown spots and turn white paint beige. I also found that even regular water based "color blocking" primer won't block it out, so I usually use either oil based primer (smelly, messy, gotta wait for it to dry) or.... white spray paint primer! The spray paint primer is quick & easy (sure, it's a bit messy), but it works great. I sprayed the dresser body & drawer faces with the white primer, and I sprayed the drawer handles with gray primer.
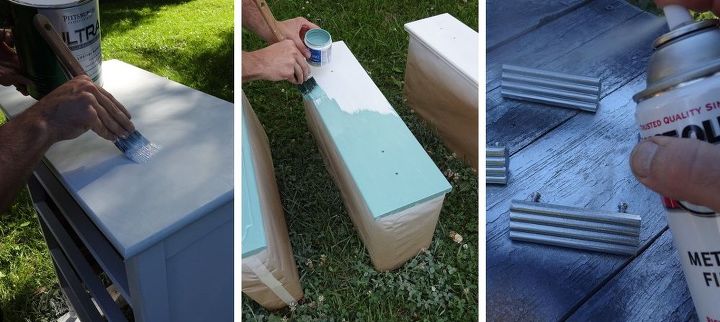
Once the primer had dried, it was time to paint! The dresser body was painted with some bright white in a semi-gloss, and the drawer faces were painted "Hipster Green" in a satin finish. I like using satin and semi-gloss finishes on my furniture pieces, since they hold up so well and are easy to clean. The drawer handles were painted with a "chrome" spray paint to get that nice, metallic look like an old, chrome door handle.
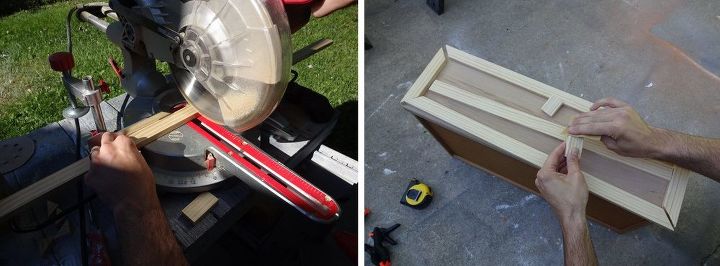
Now that the paint was finished, it was time to work on the "woodie panel" drawer face. When I sanded everything earlier, I made sure to sand this drawer face all the way down to the raw wood. The other three drawers were sanded smooth with a 120 grit disc, which is good enough for paint, but on this drawer face, I sanded it further with some 320 grit sandpaper for a super smooth finish that would look great stained.
Once it was sanded smooth, I measured and cut the woodie style trim pieces out of an 8ft long piece of 1/2" x 1-1/4" pine stock that I picked up at the hardware store. I chose pine because it had a nice, light color that would look great stacked on top of the darker stained drawer face. Once all the trim pieces were cut to length, I cut 45* miter angles at the corners and then slightly rounded over the edges with a piece of 320 grit sandpaper for a smooth look.
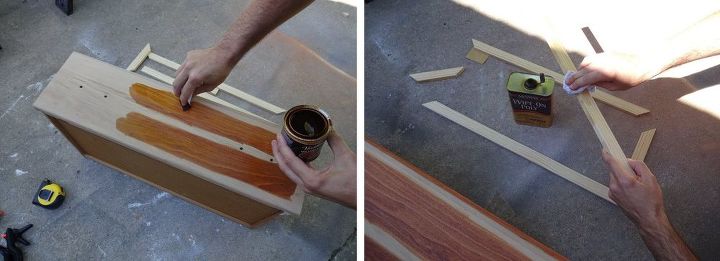
After I test fitted all the trim pieces and was happy with them, I stained the drawer face with some red oak colored stain. You can see that I left some raw spots where the trim pieces were going to be mounted. I did that, so that the wood glue would have a strong bond. That may not be totally necessary, but better safe than sorry, right? The pine trim pieces were left as is and were finished with some wipe on polyurethane. Once the stain dried on the drawer face, I finished the stained areas with some wipe on poly as well.
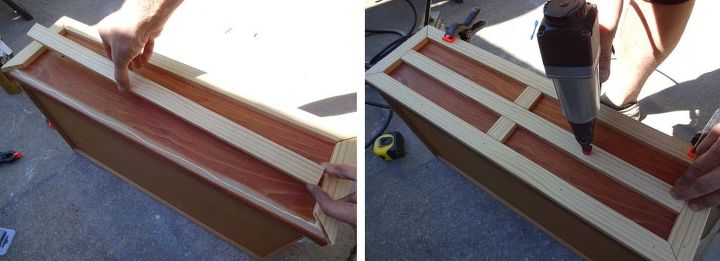
Once the poly was dry, I ran a line of wood glue on the raw areas and carefully placed my trim starting with the outer pieces. I found that they wanted to slide around on me, so I used some spring clamps to hold them in place as I popped in some nails. I tried to make sure to keep my nail spacing even around all the trim for a neat, tidy look.
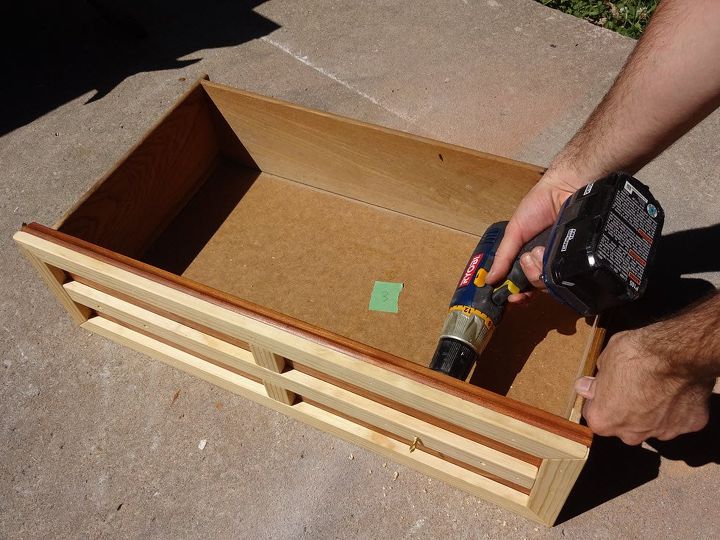
I was excited to put the whole thing together, but I had one last thing to do. I had to drill some holes through the middle trim piece to mount the handles. I used a drill bit the same size as the original holes in the drawer face, and carefully drilled them from the backside. I also had to use some longer screws to hold the handles in place, and then it was good to go!
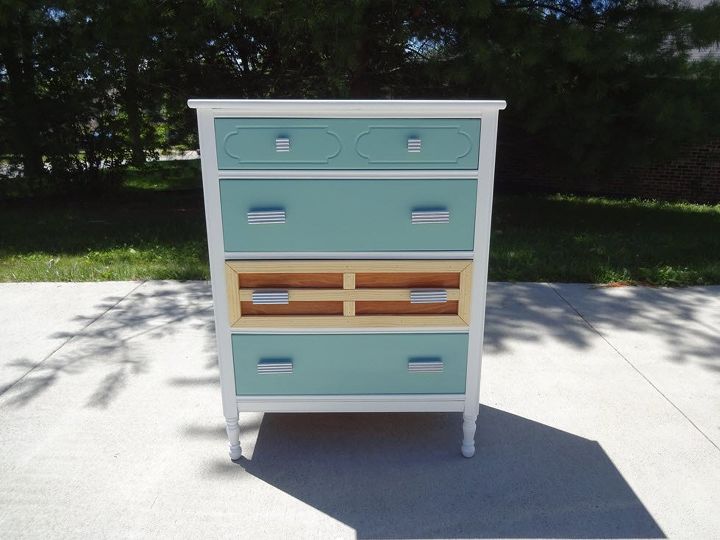
And here it is all finished... I really love how this one turned out! Once the surf woodie idea popped into my head, I just knew it was the perfect makeover for this piece. Seeing it all come together in real life was the cherry on top!
The fresh, bright white paint brought new life to the dresser body. The "Hipster Green" paint on the drawers was inspired by the color of an old, glass Coke bottle... you know, that sort of green / blue / gray color? And, of course, the woodie panel drawer really sealed the deal. The contrast of the dark/light wood looks so cool!
Well, I hope you liked this makeover.
If you did, let me know what you think, and I'd love to invite you to check out all the other furniture makeovers, custom builds, and house renovations I do on my MrDiyDork YouTube channel: www.youtube.com/user/MrDiyDork/videos and on my website: www.diydork.com!
Thanks for checking out this project!
Later!
Kevin - DIY Dork
Comments
Join the conversation
2 of 46 comments
-
You did a great tutorial!
-
I like it ! Thank you for showing us how it do this!


Frequently asked questions
Have a question about this project?
Scharlet, what would you have done with this piece??? as you know there are many ideas for an old dresser such as this one.... my comments are only my thoughts of what i see and perhaps what i would have carried on to make this piece my art... but certainly not my art,, someone elses art... to each their own... pls respond as i truly would be interested in what you would have done... thanks and will wait to hear your answer... Donna